Notification Plugins
Configure notification channels to receive alerts from your clusters.
Notification channels live under Monitoring > Alerting, on the Notification Channels tab. The tab shows summary counters (Total Channels, Active, Inactive, Healthy) and an Add Channel button (or Create First Channel when no channels exist yet).
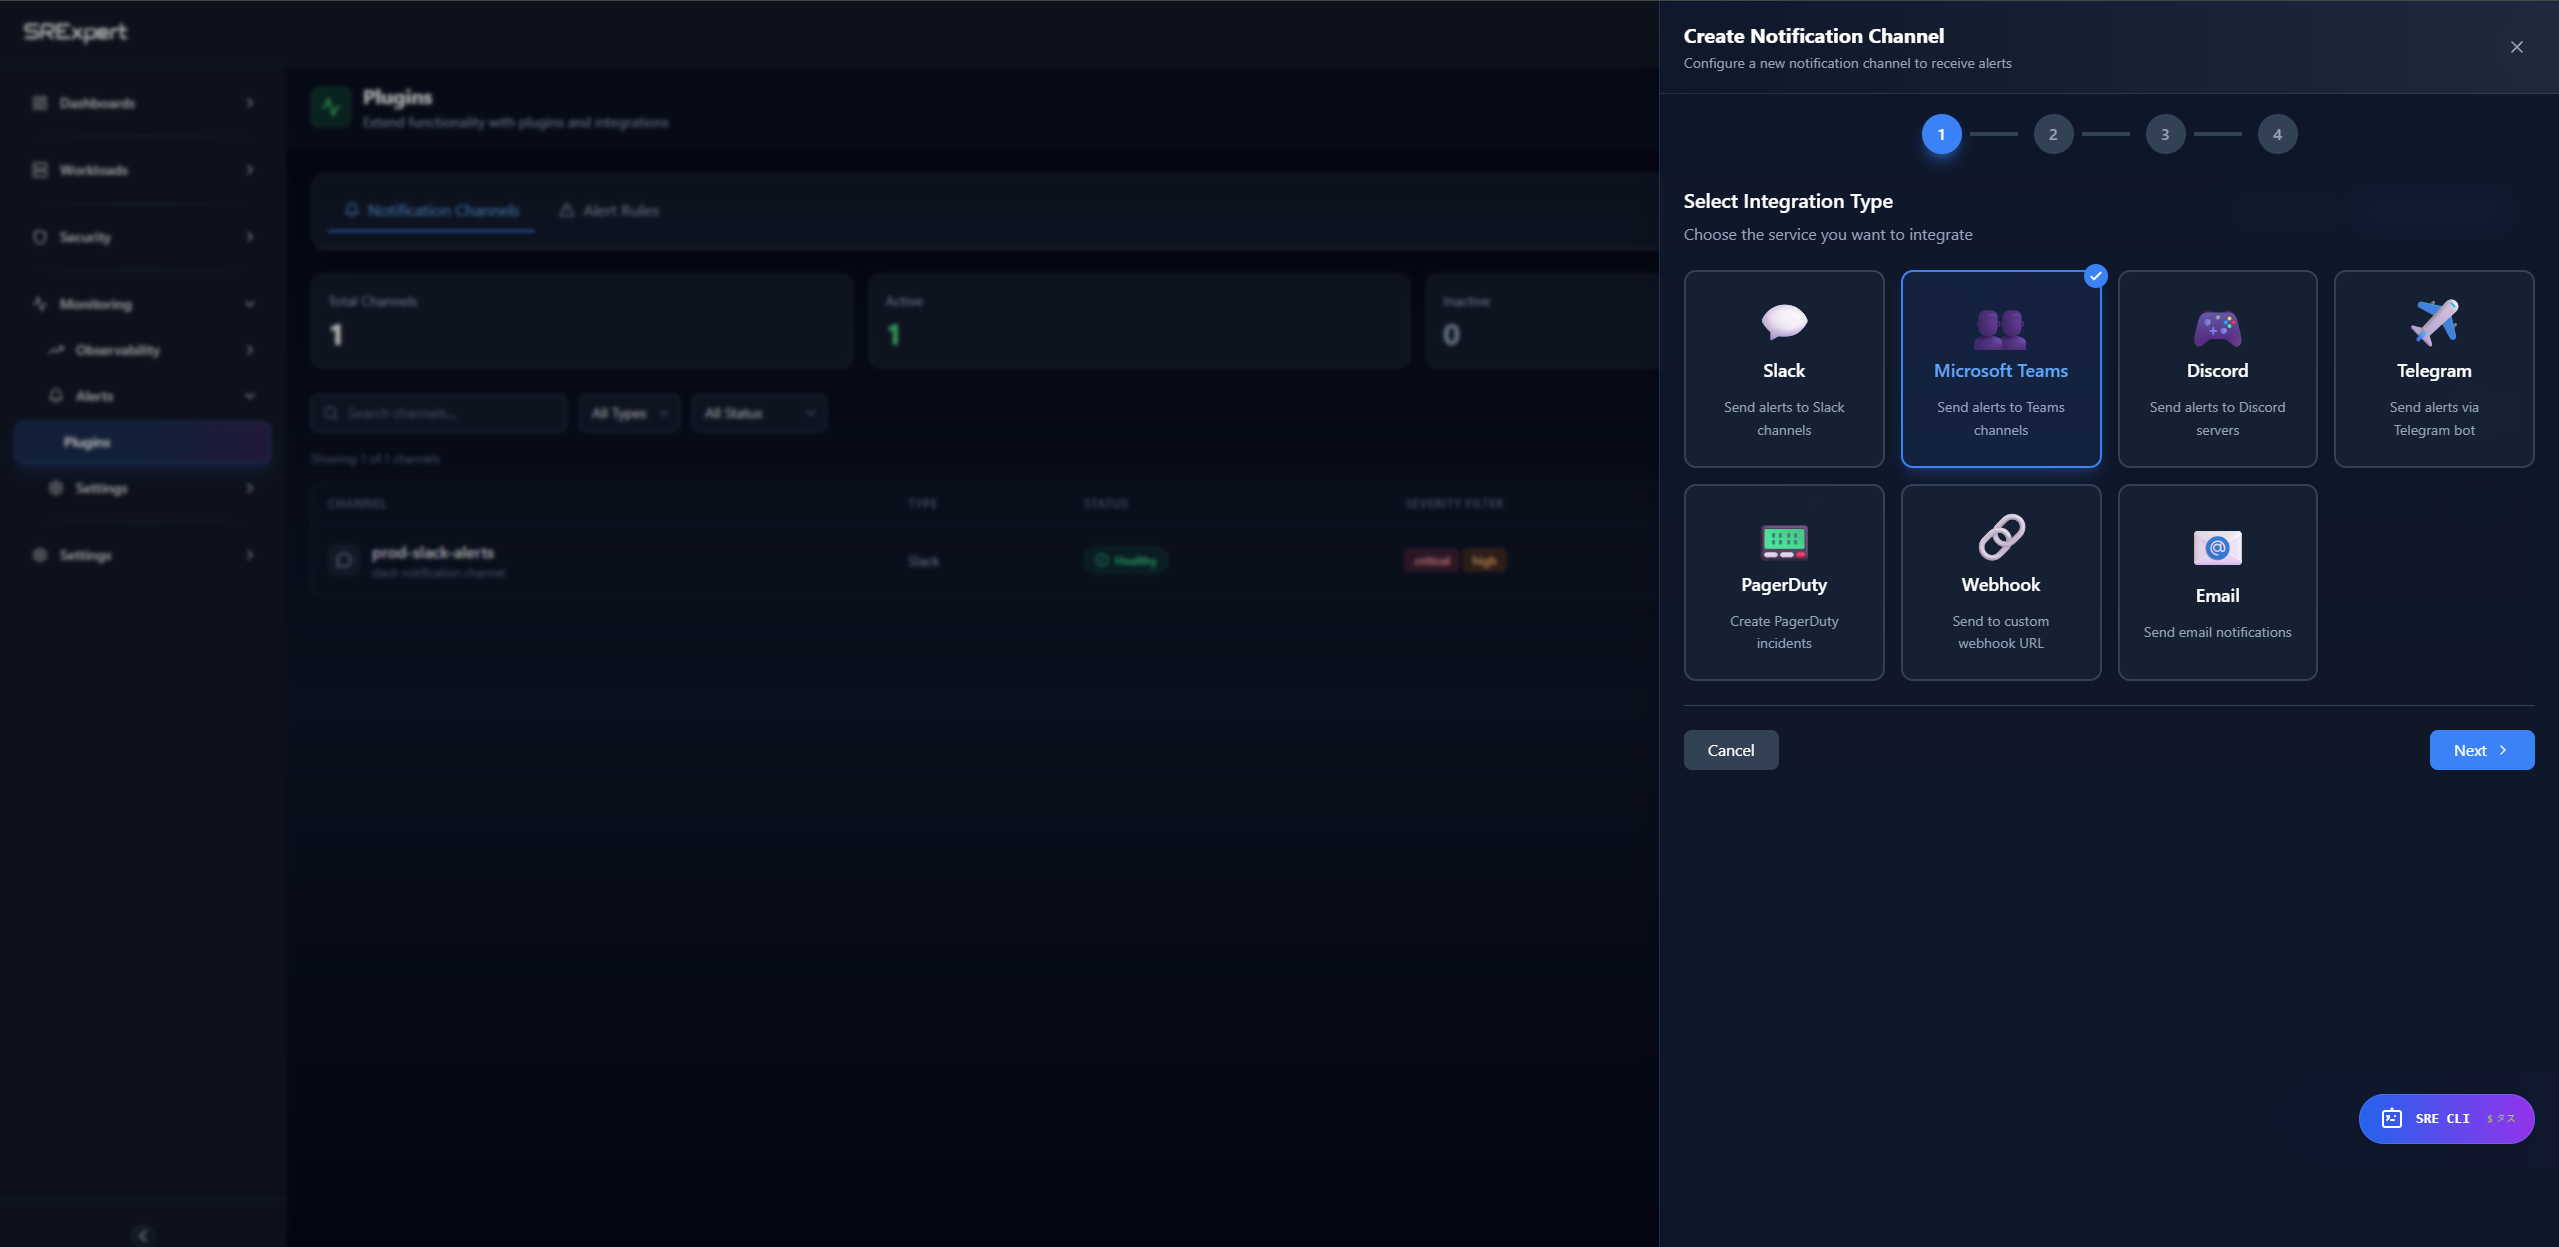
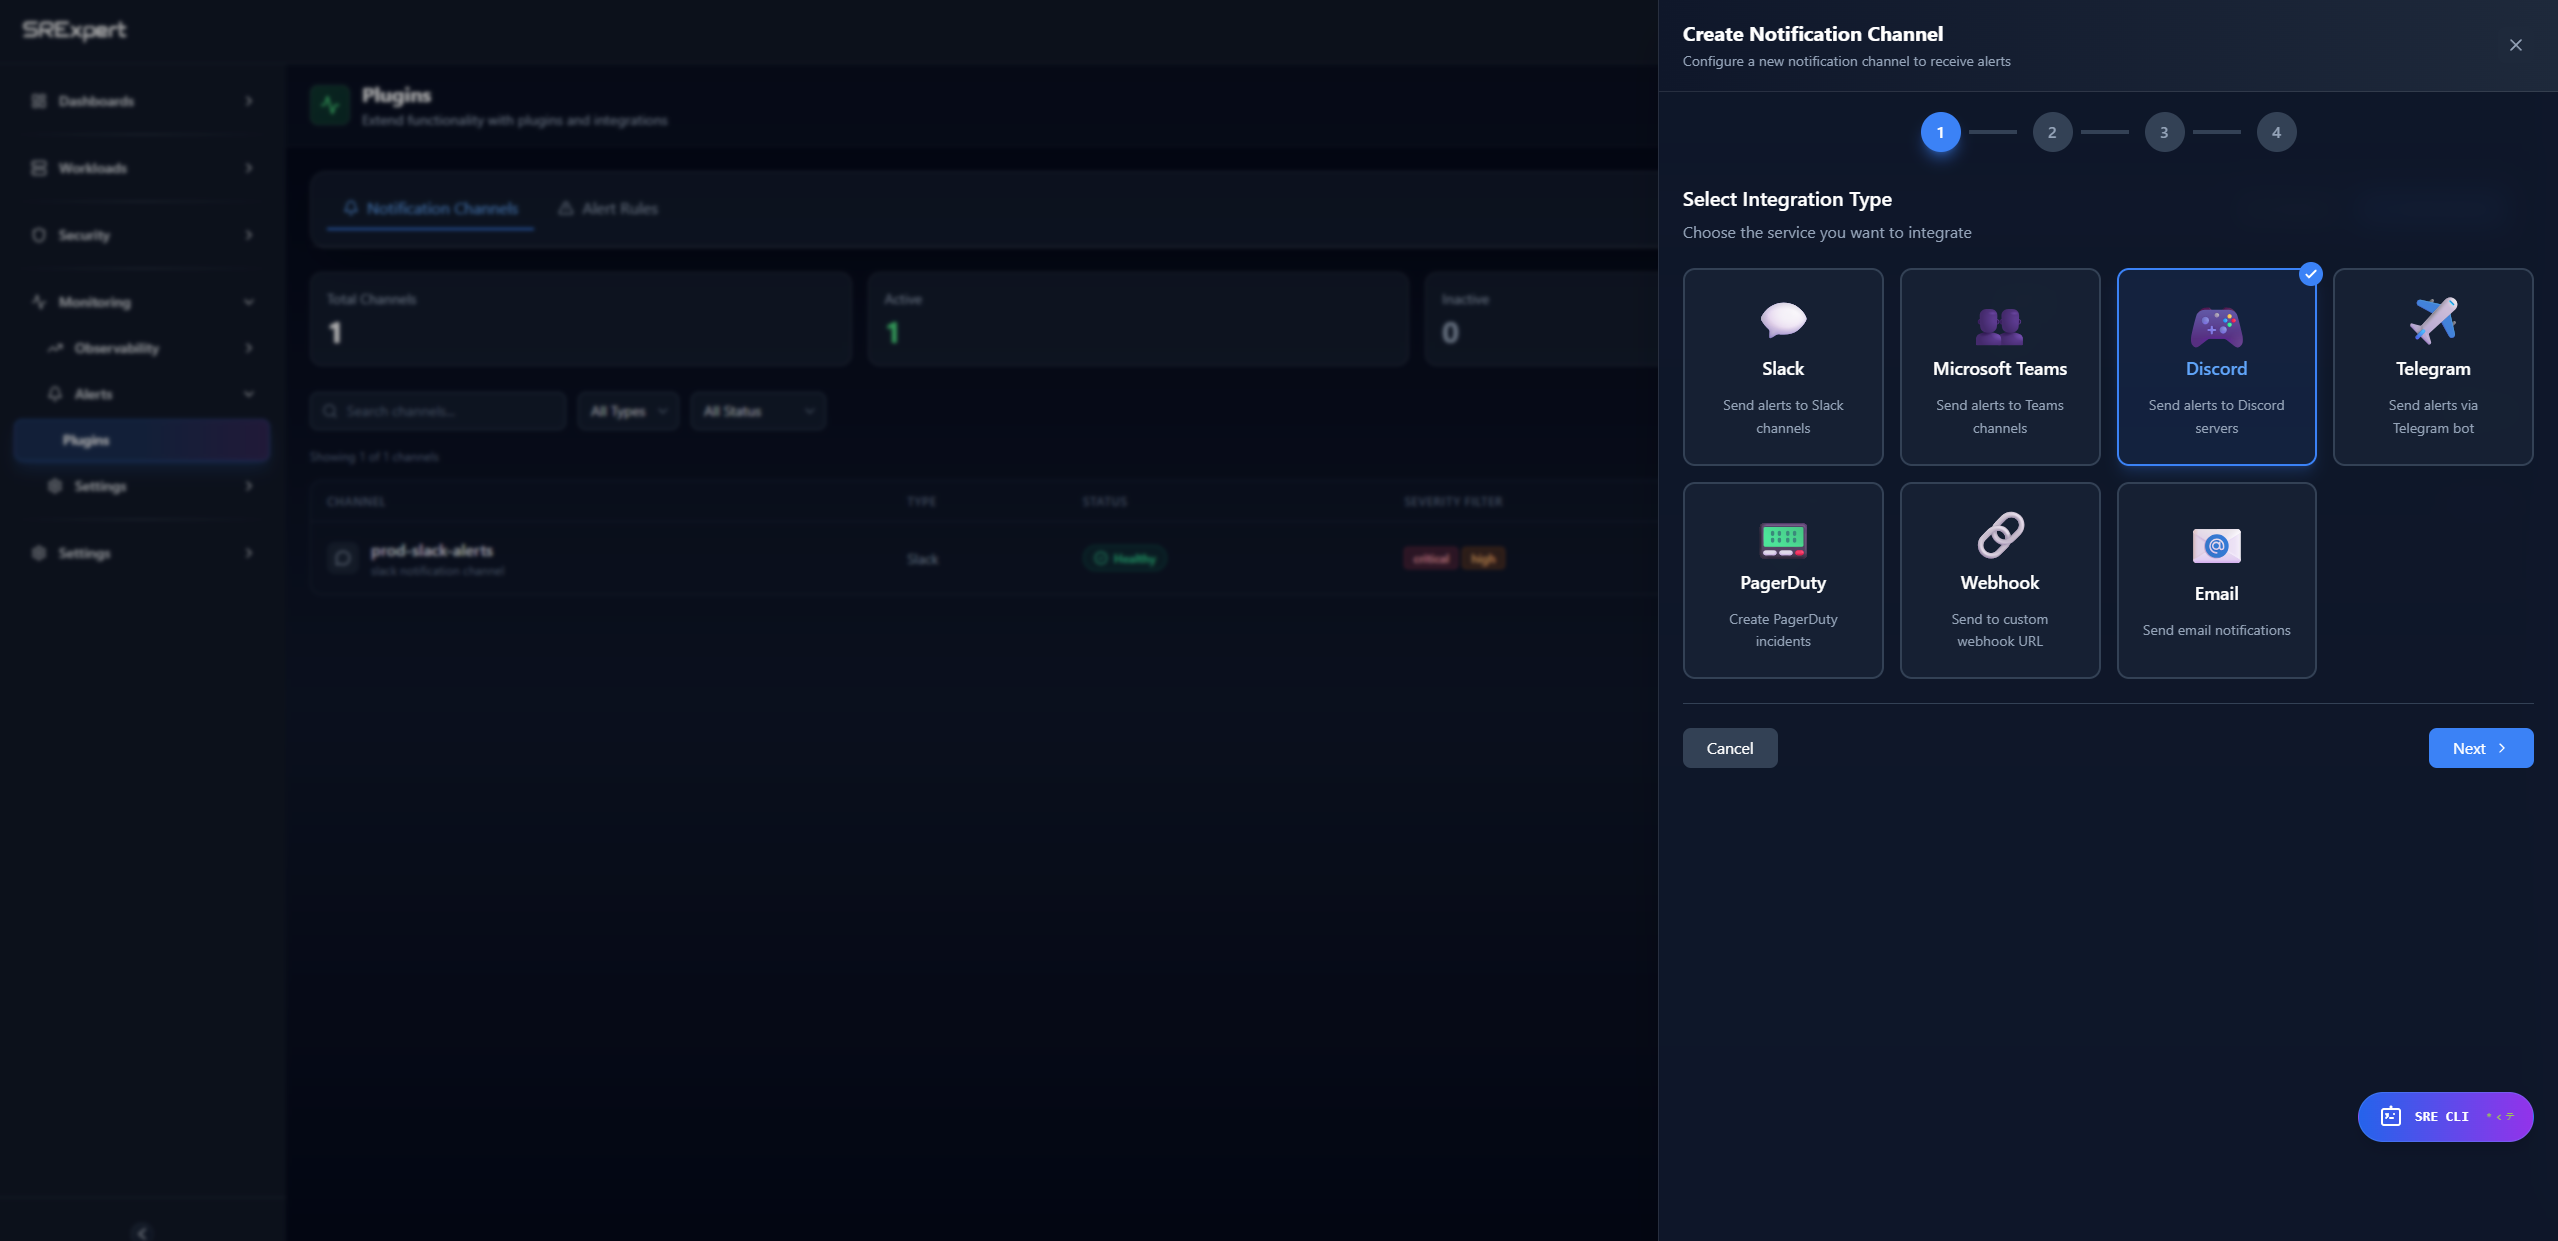
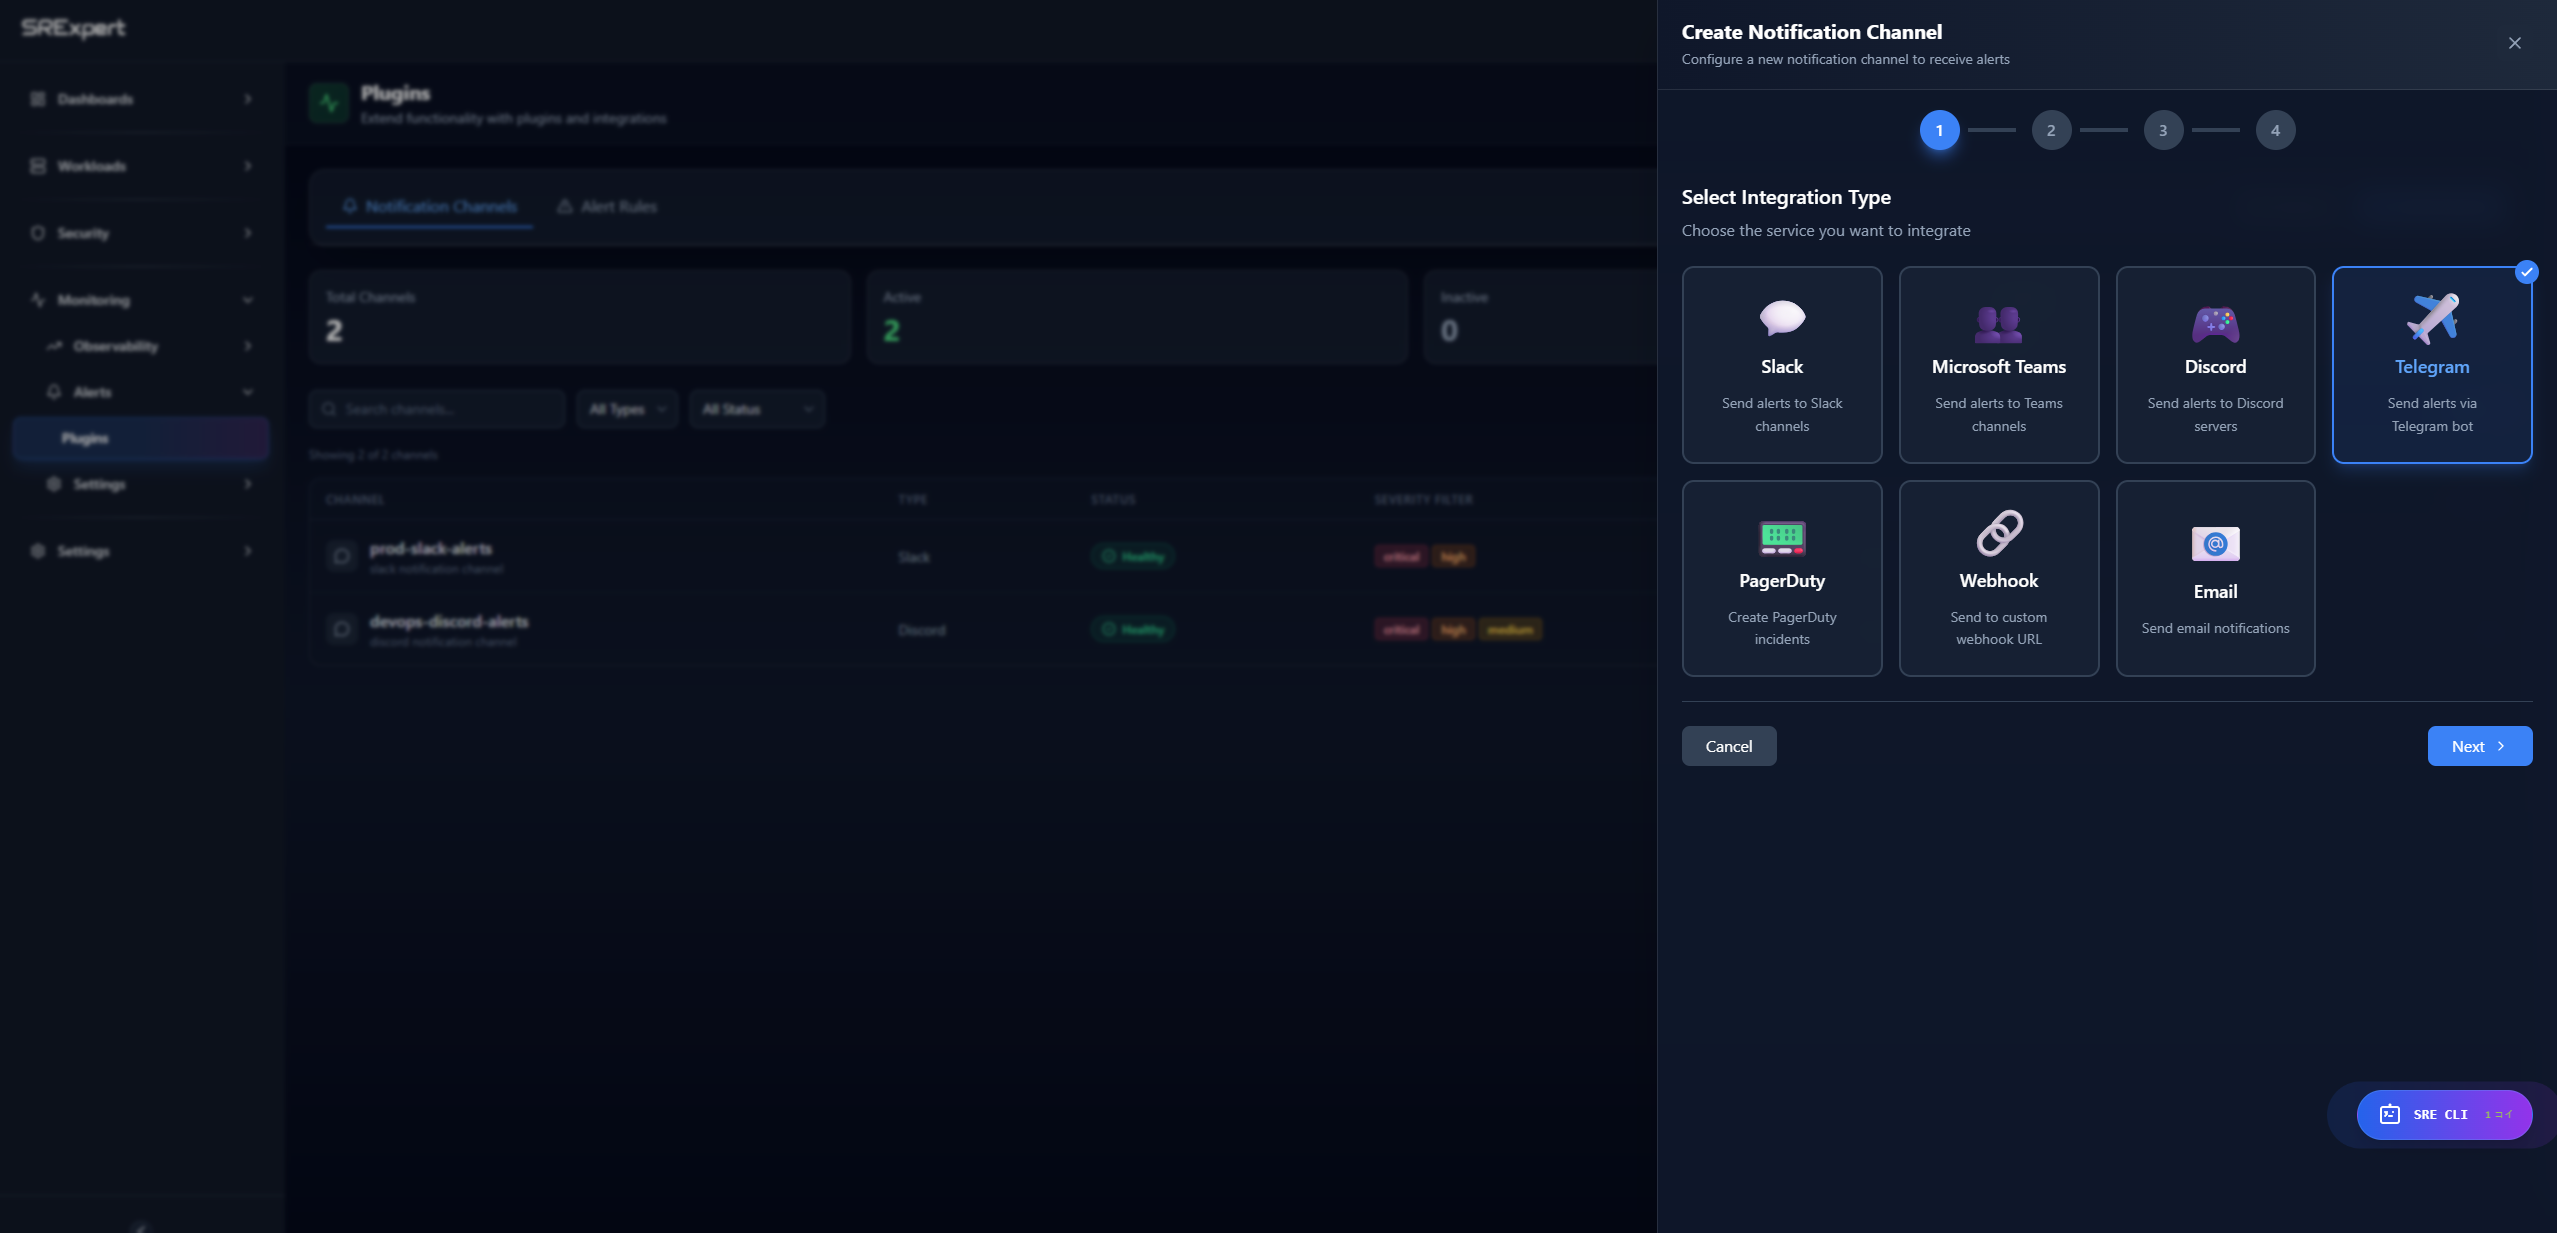
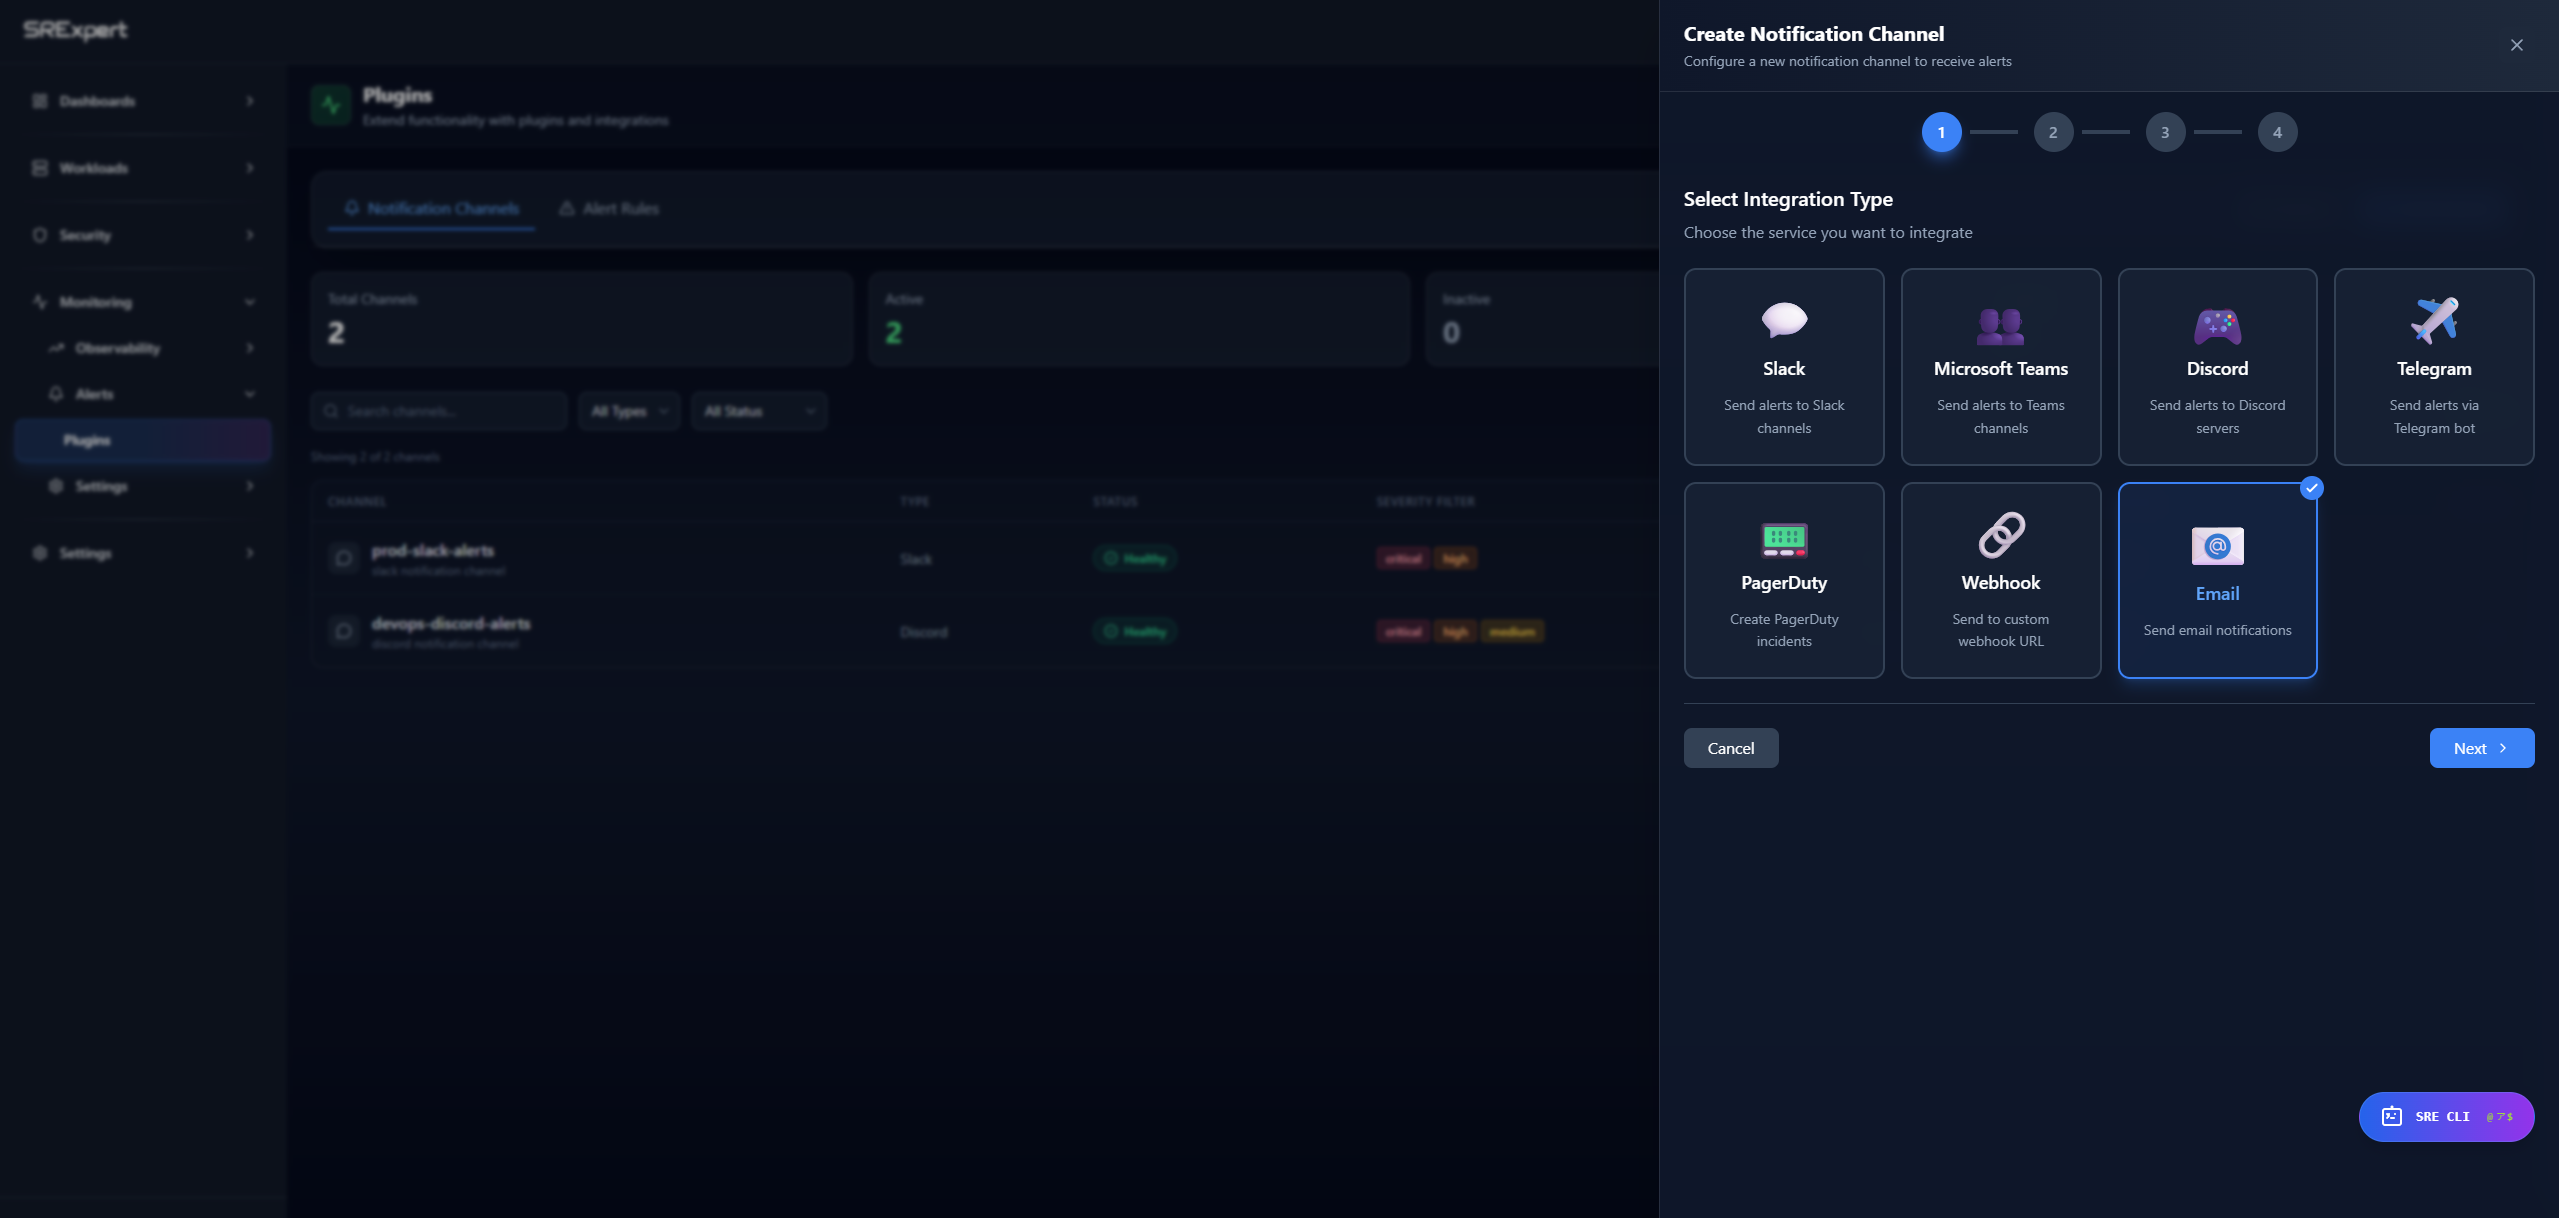
Creating a channel is a 4-step wizard:
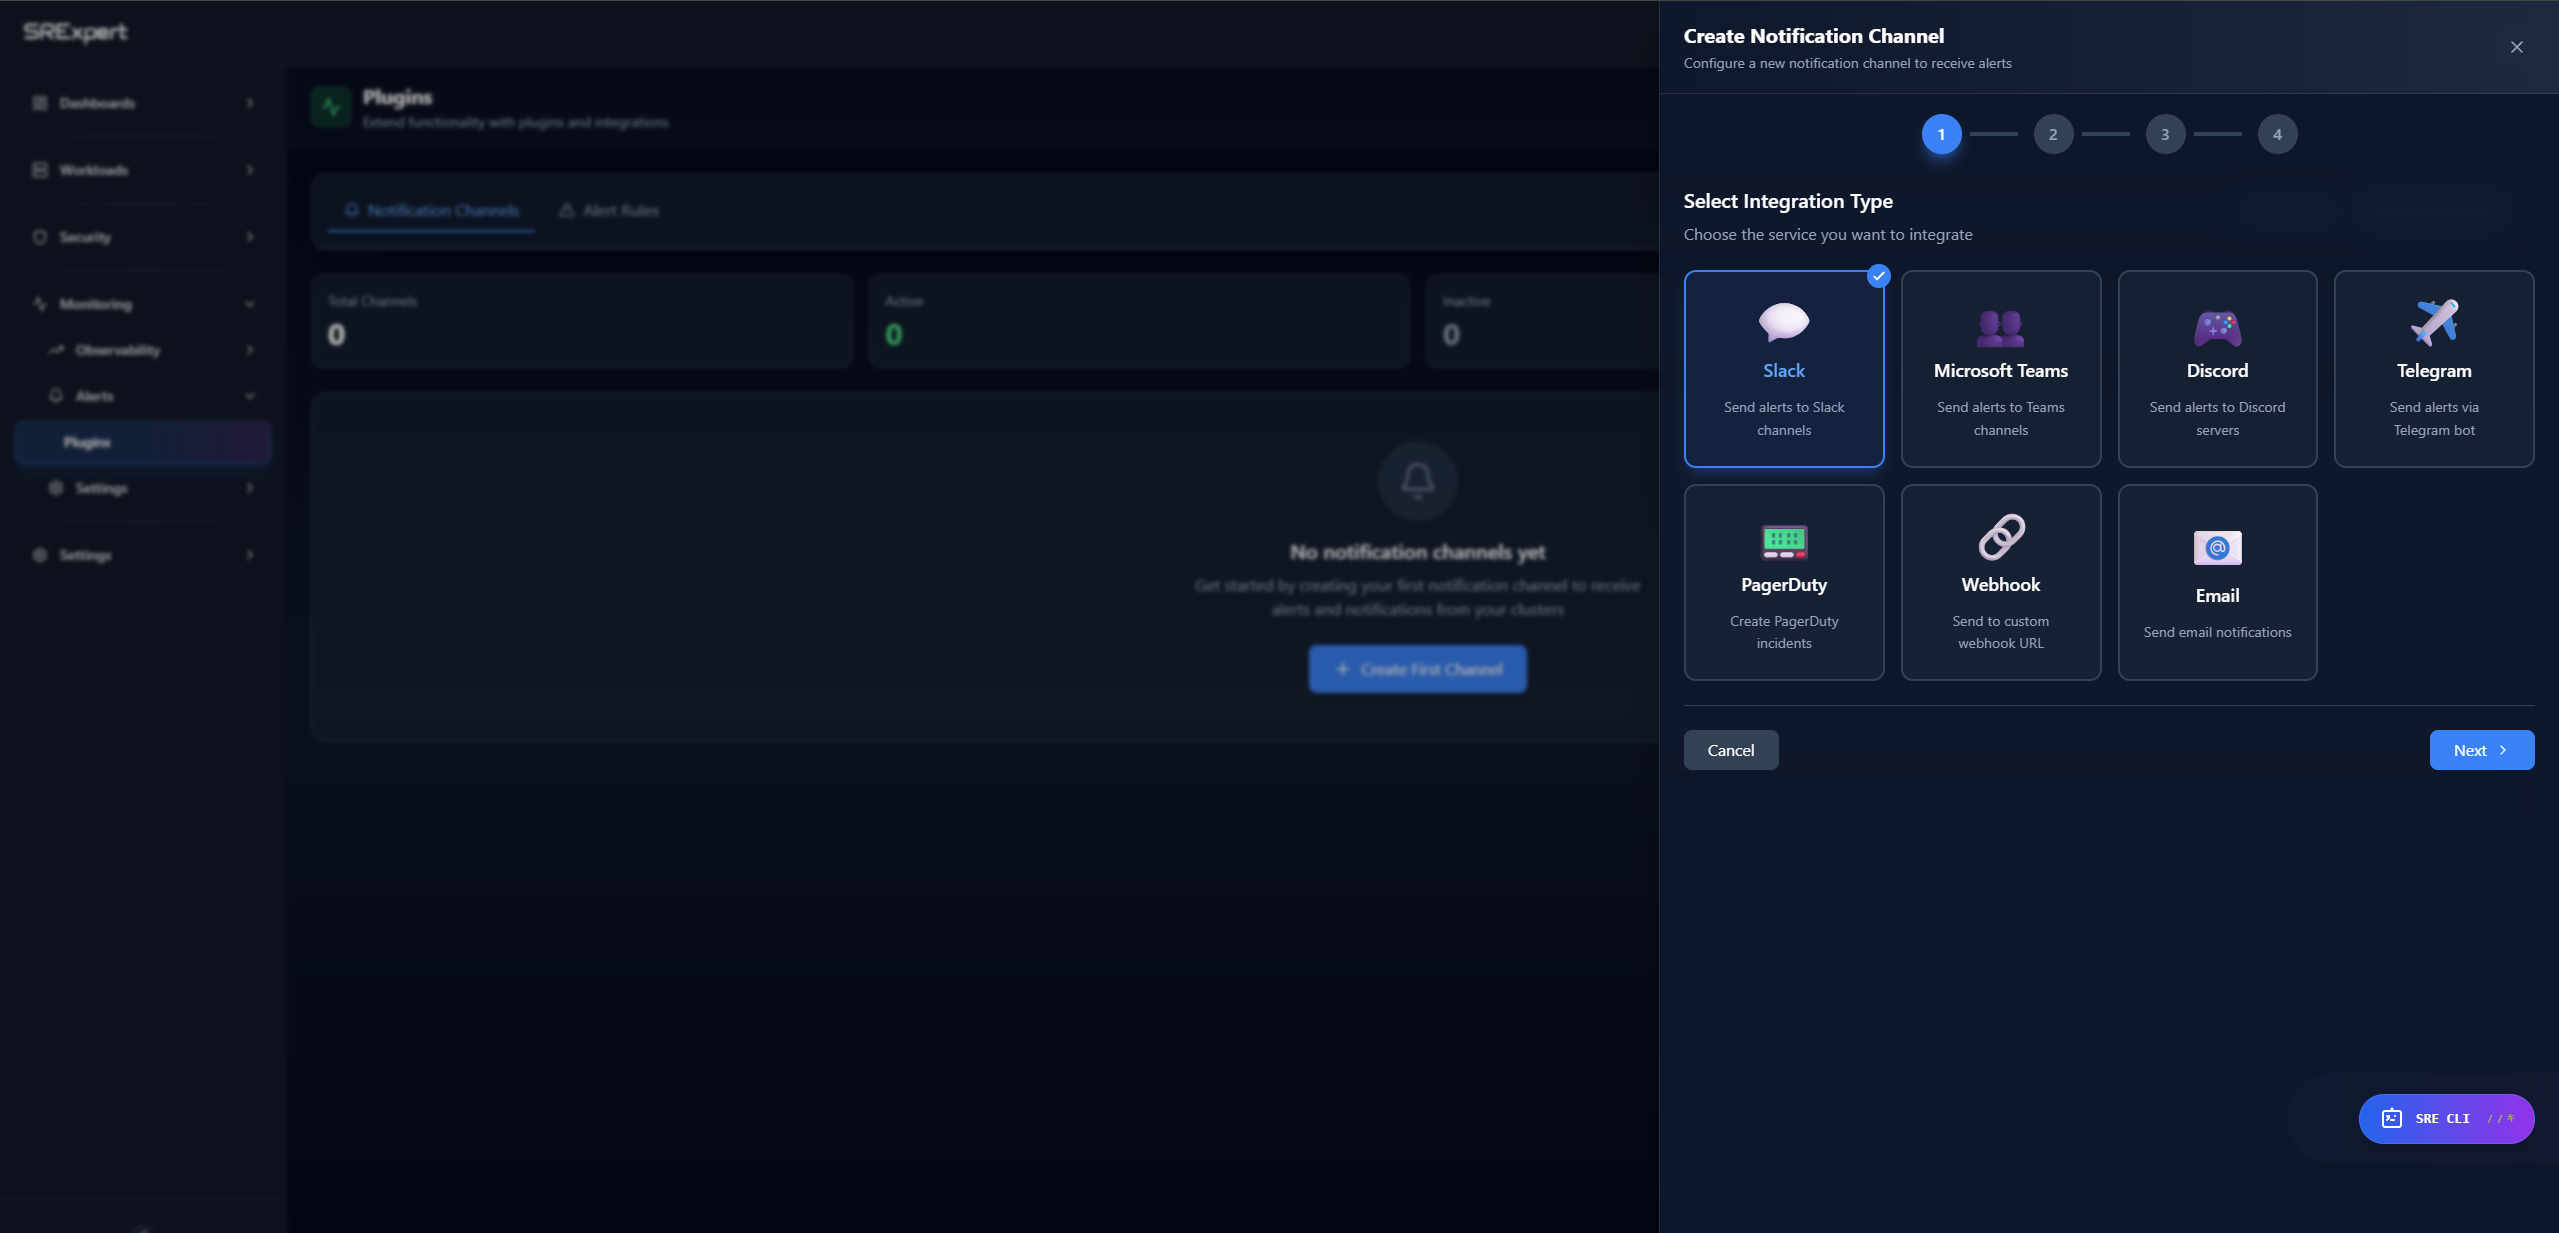
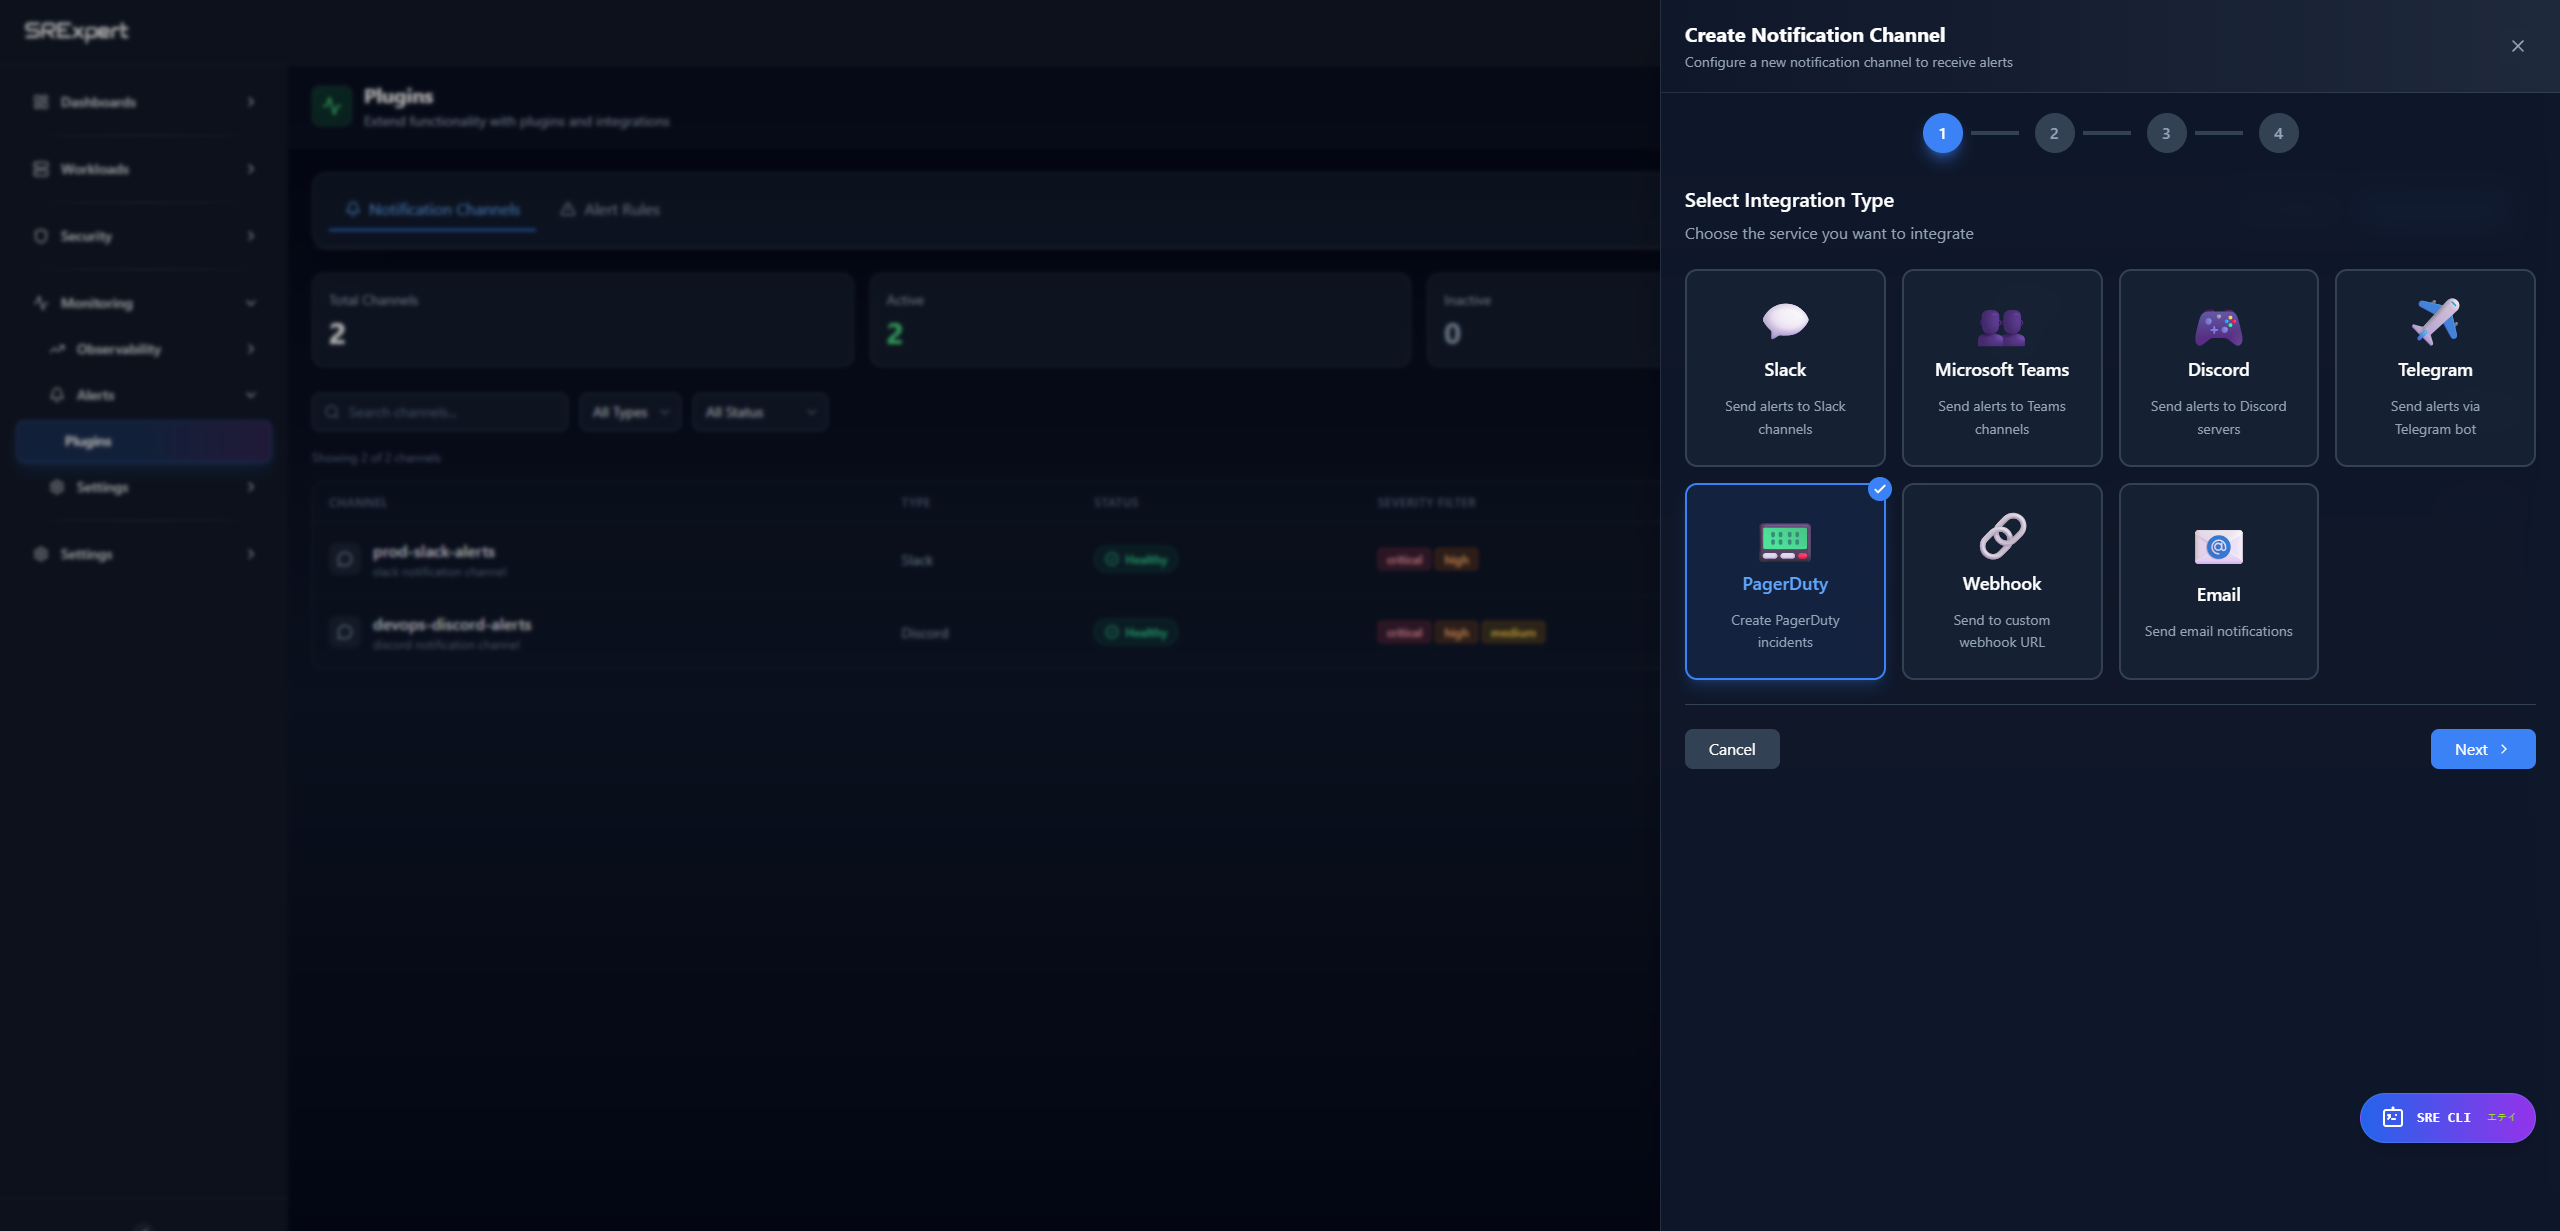
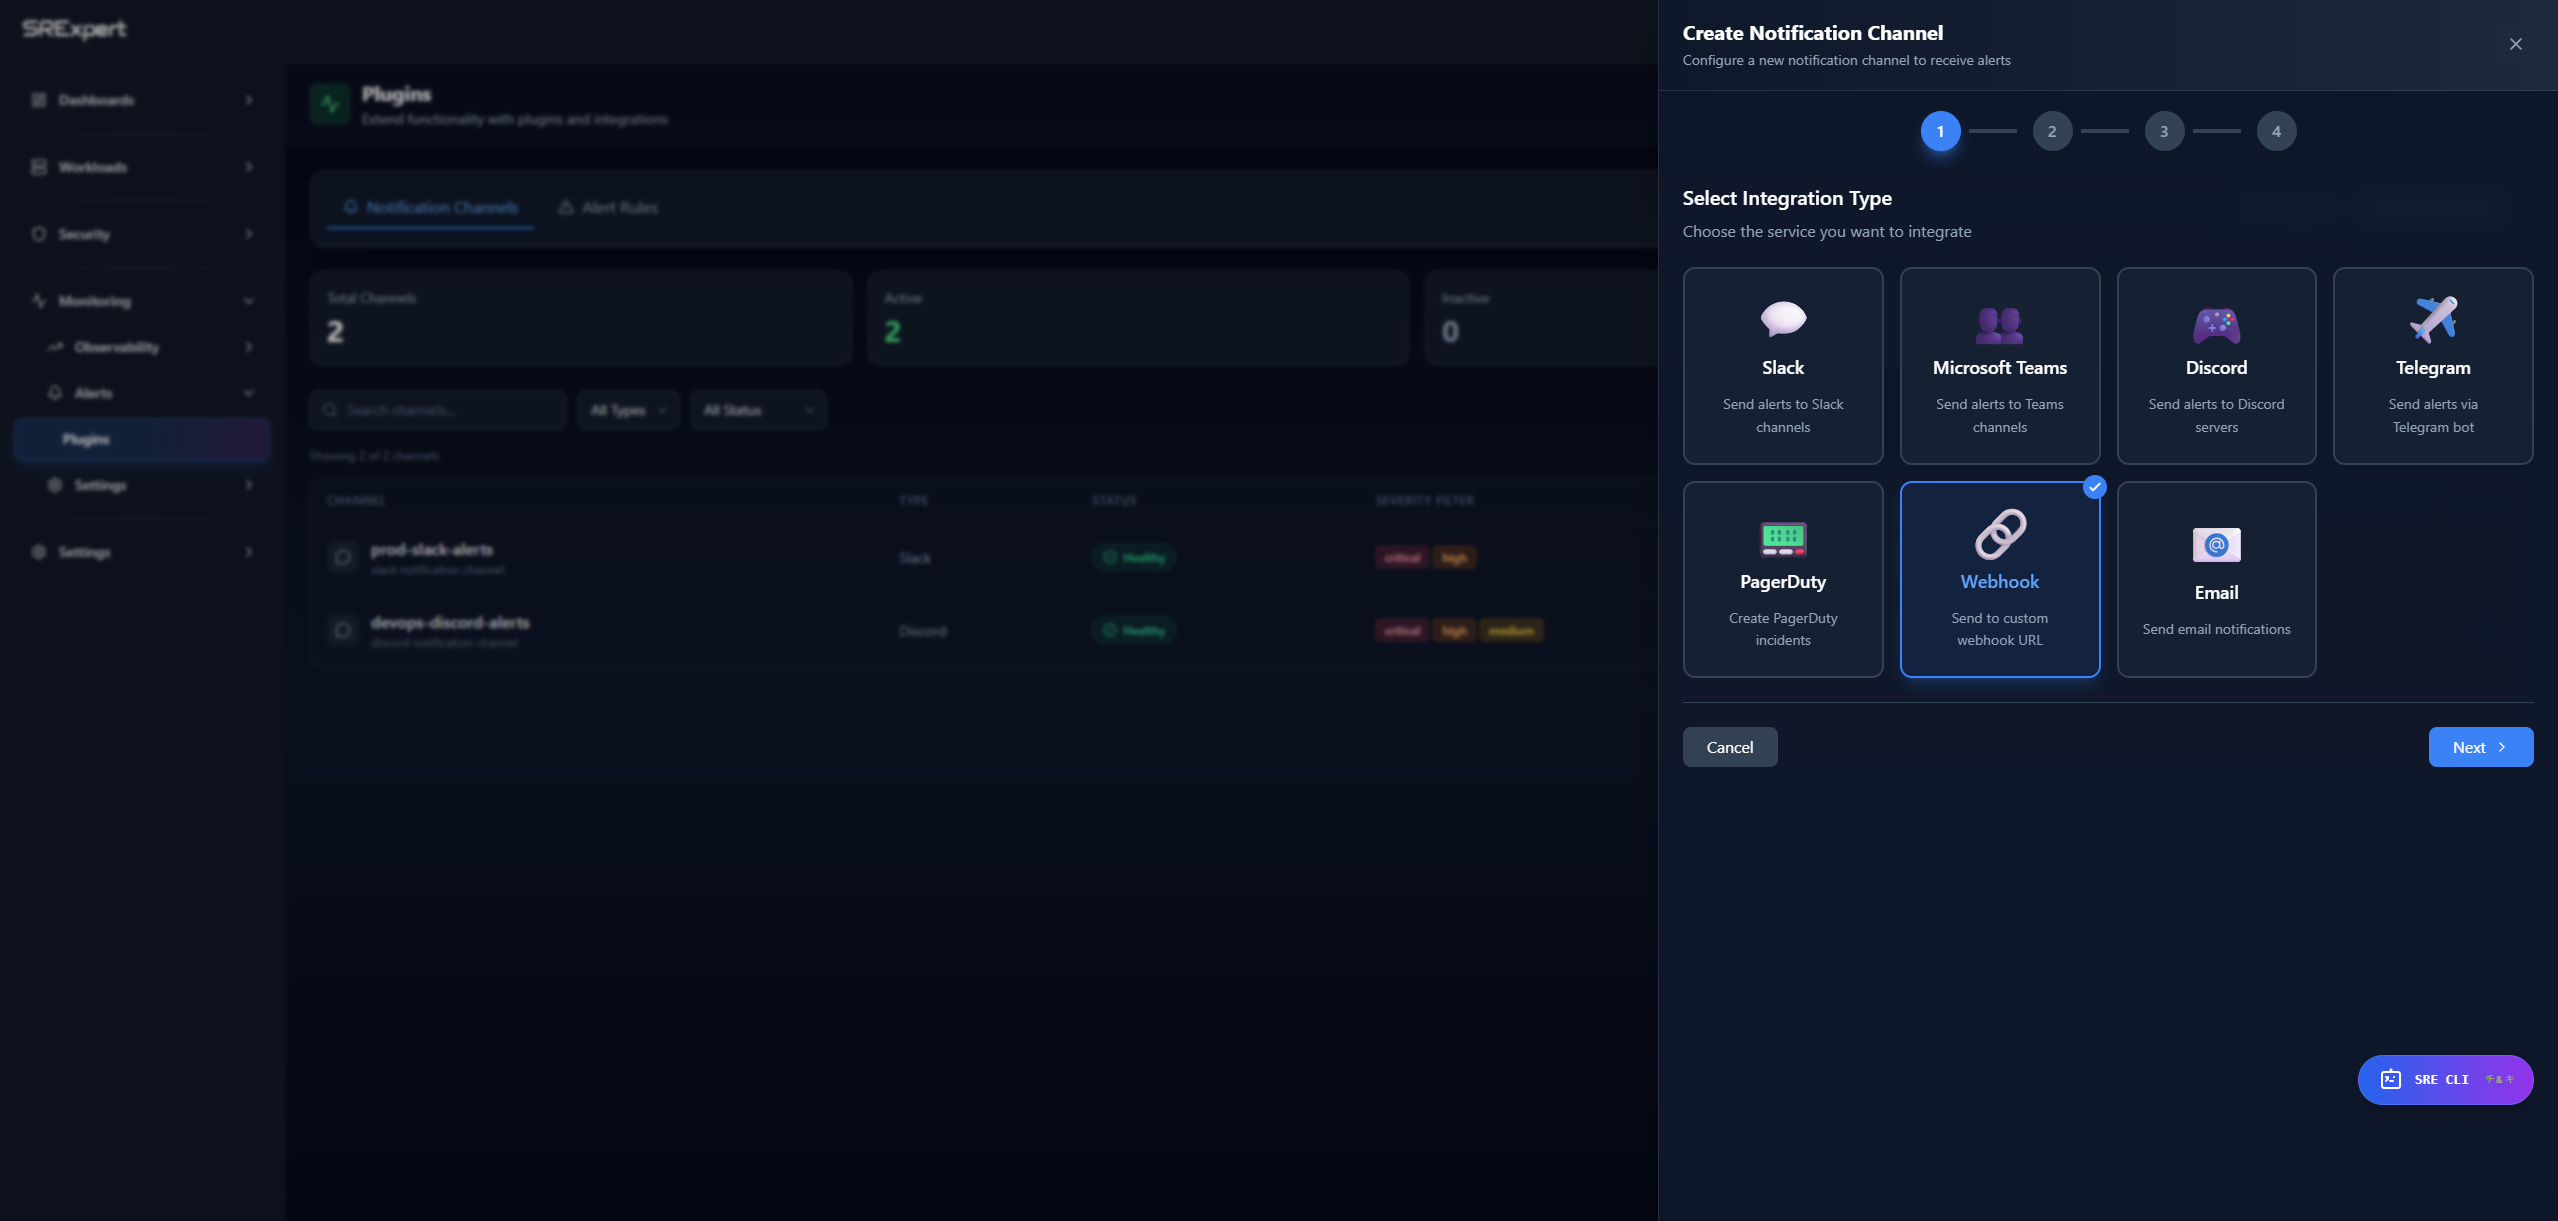
- Select Integration Type - choose one of the 7 integration types below
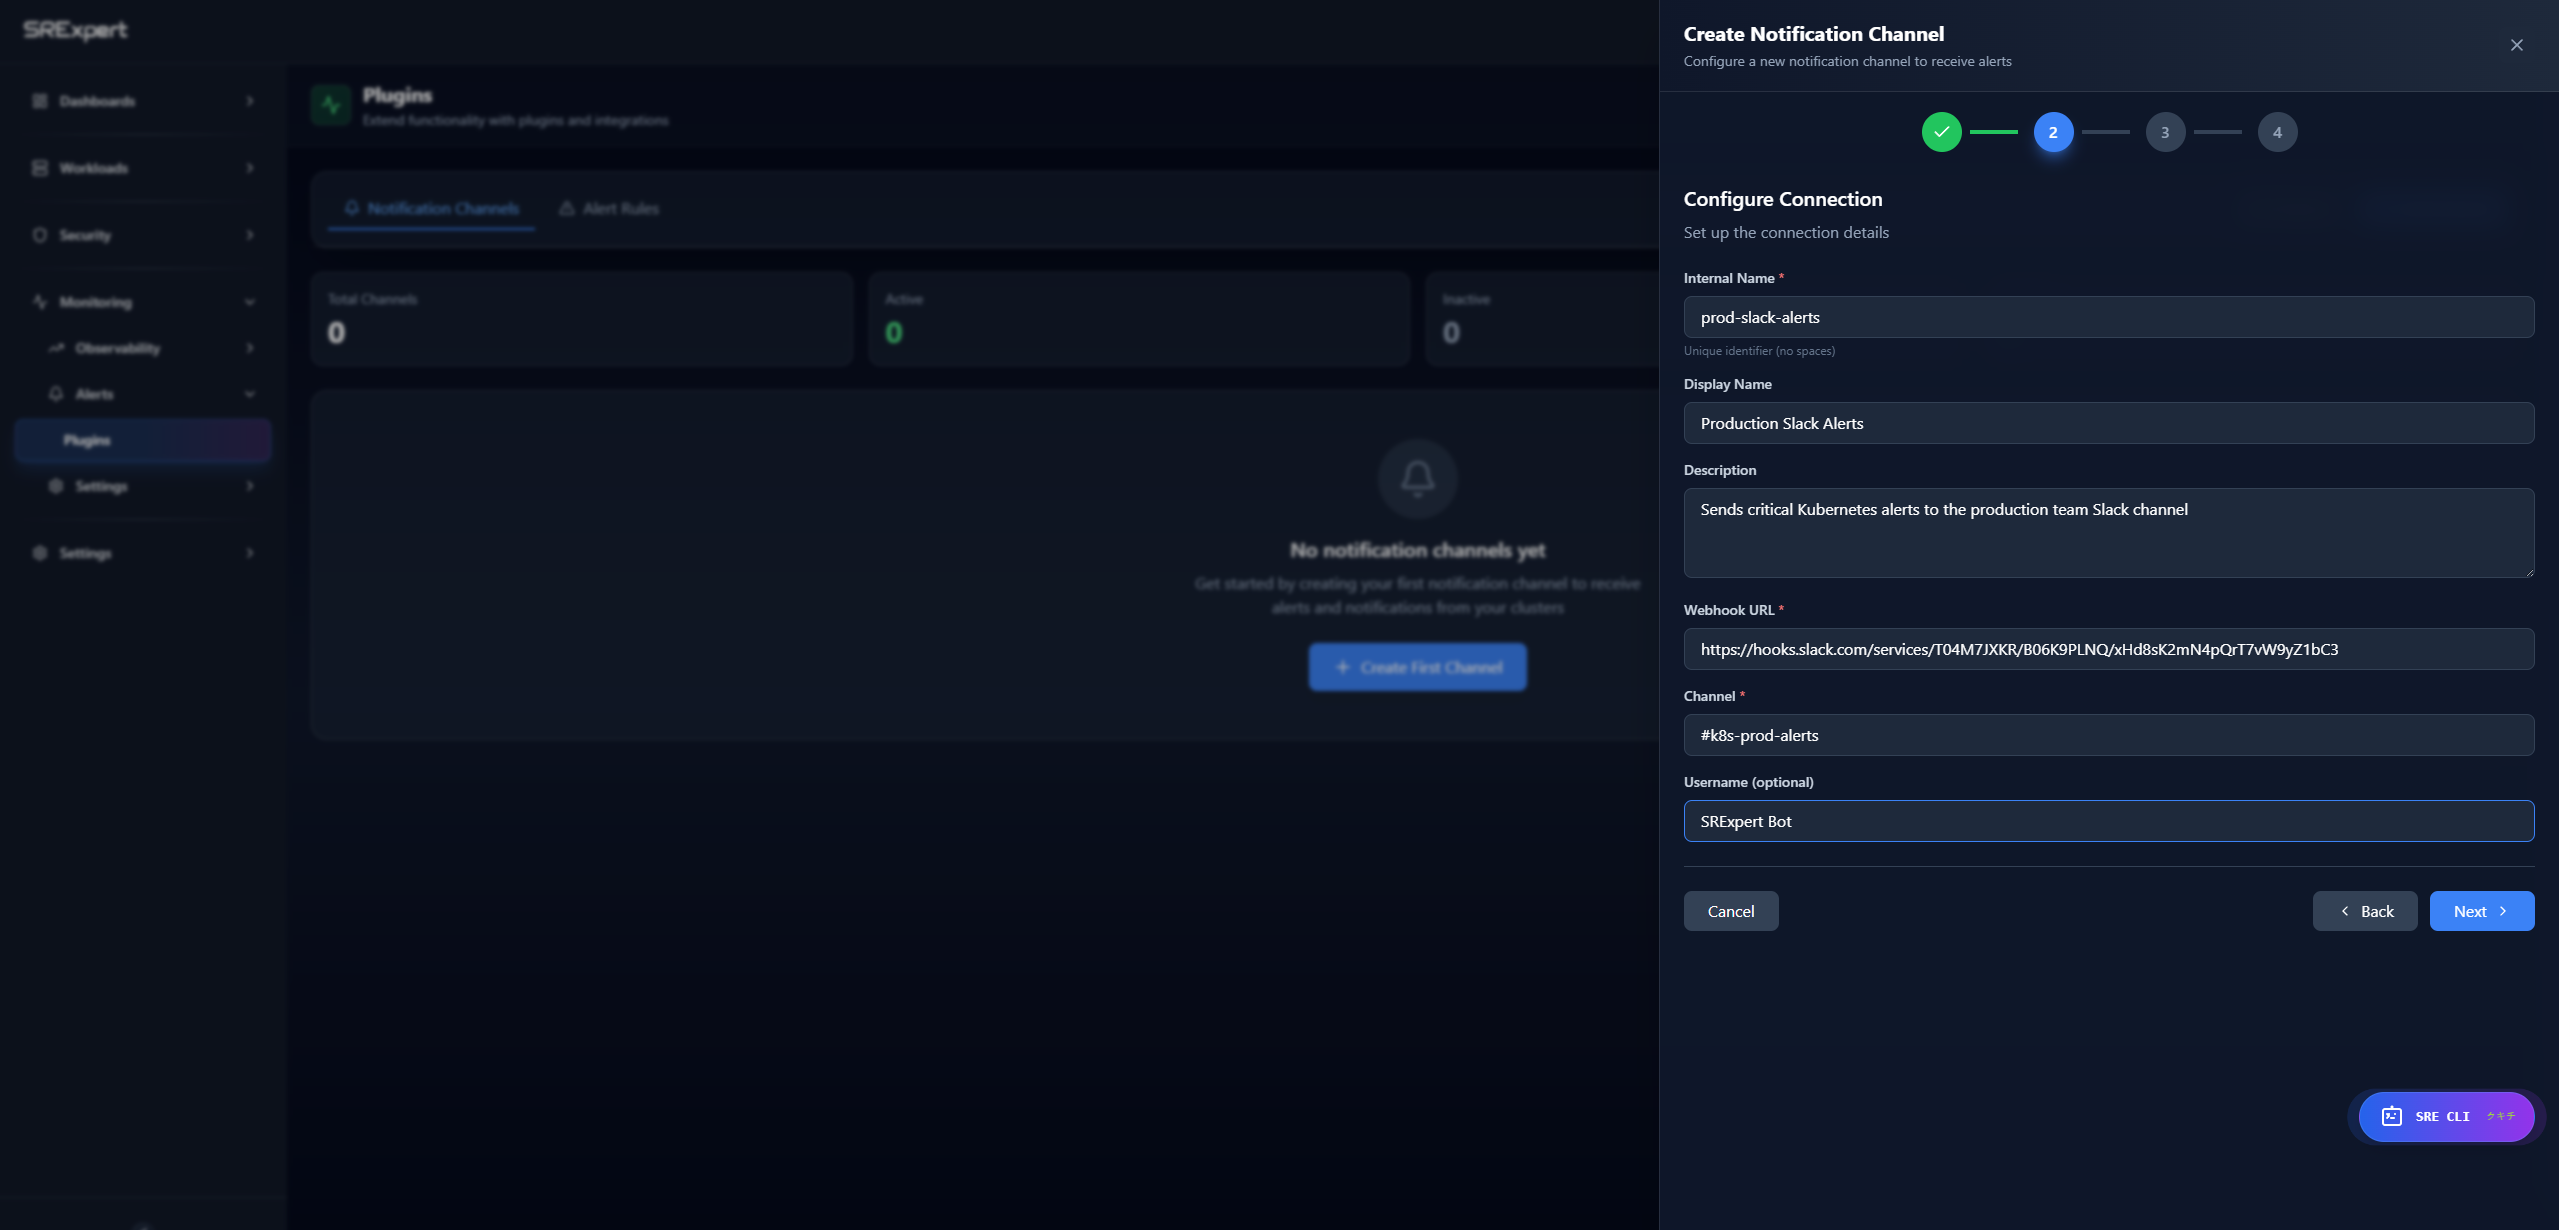
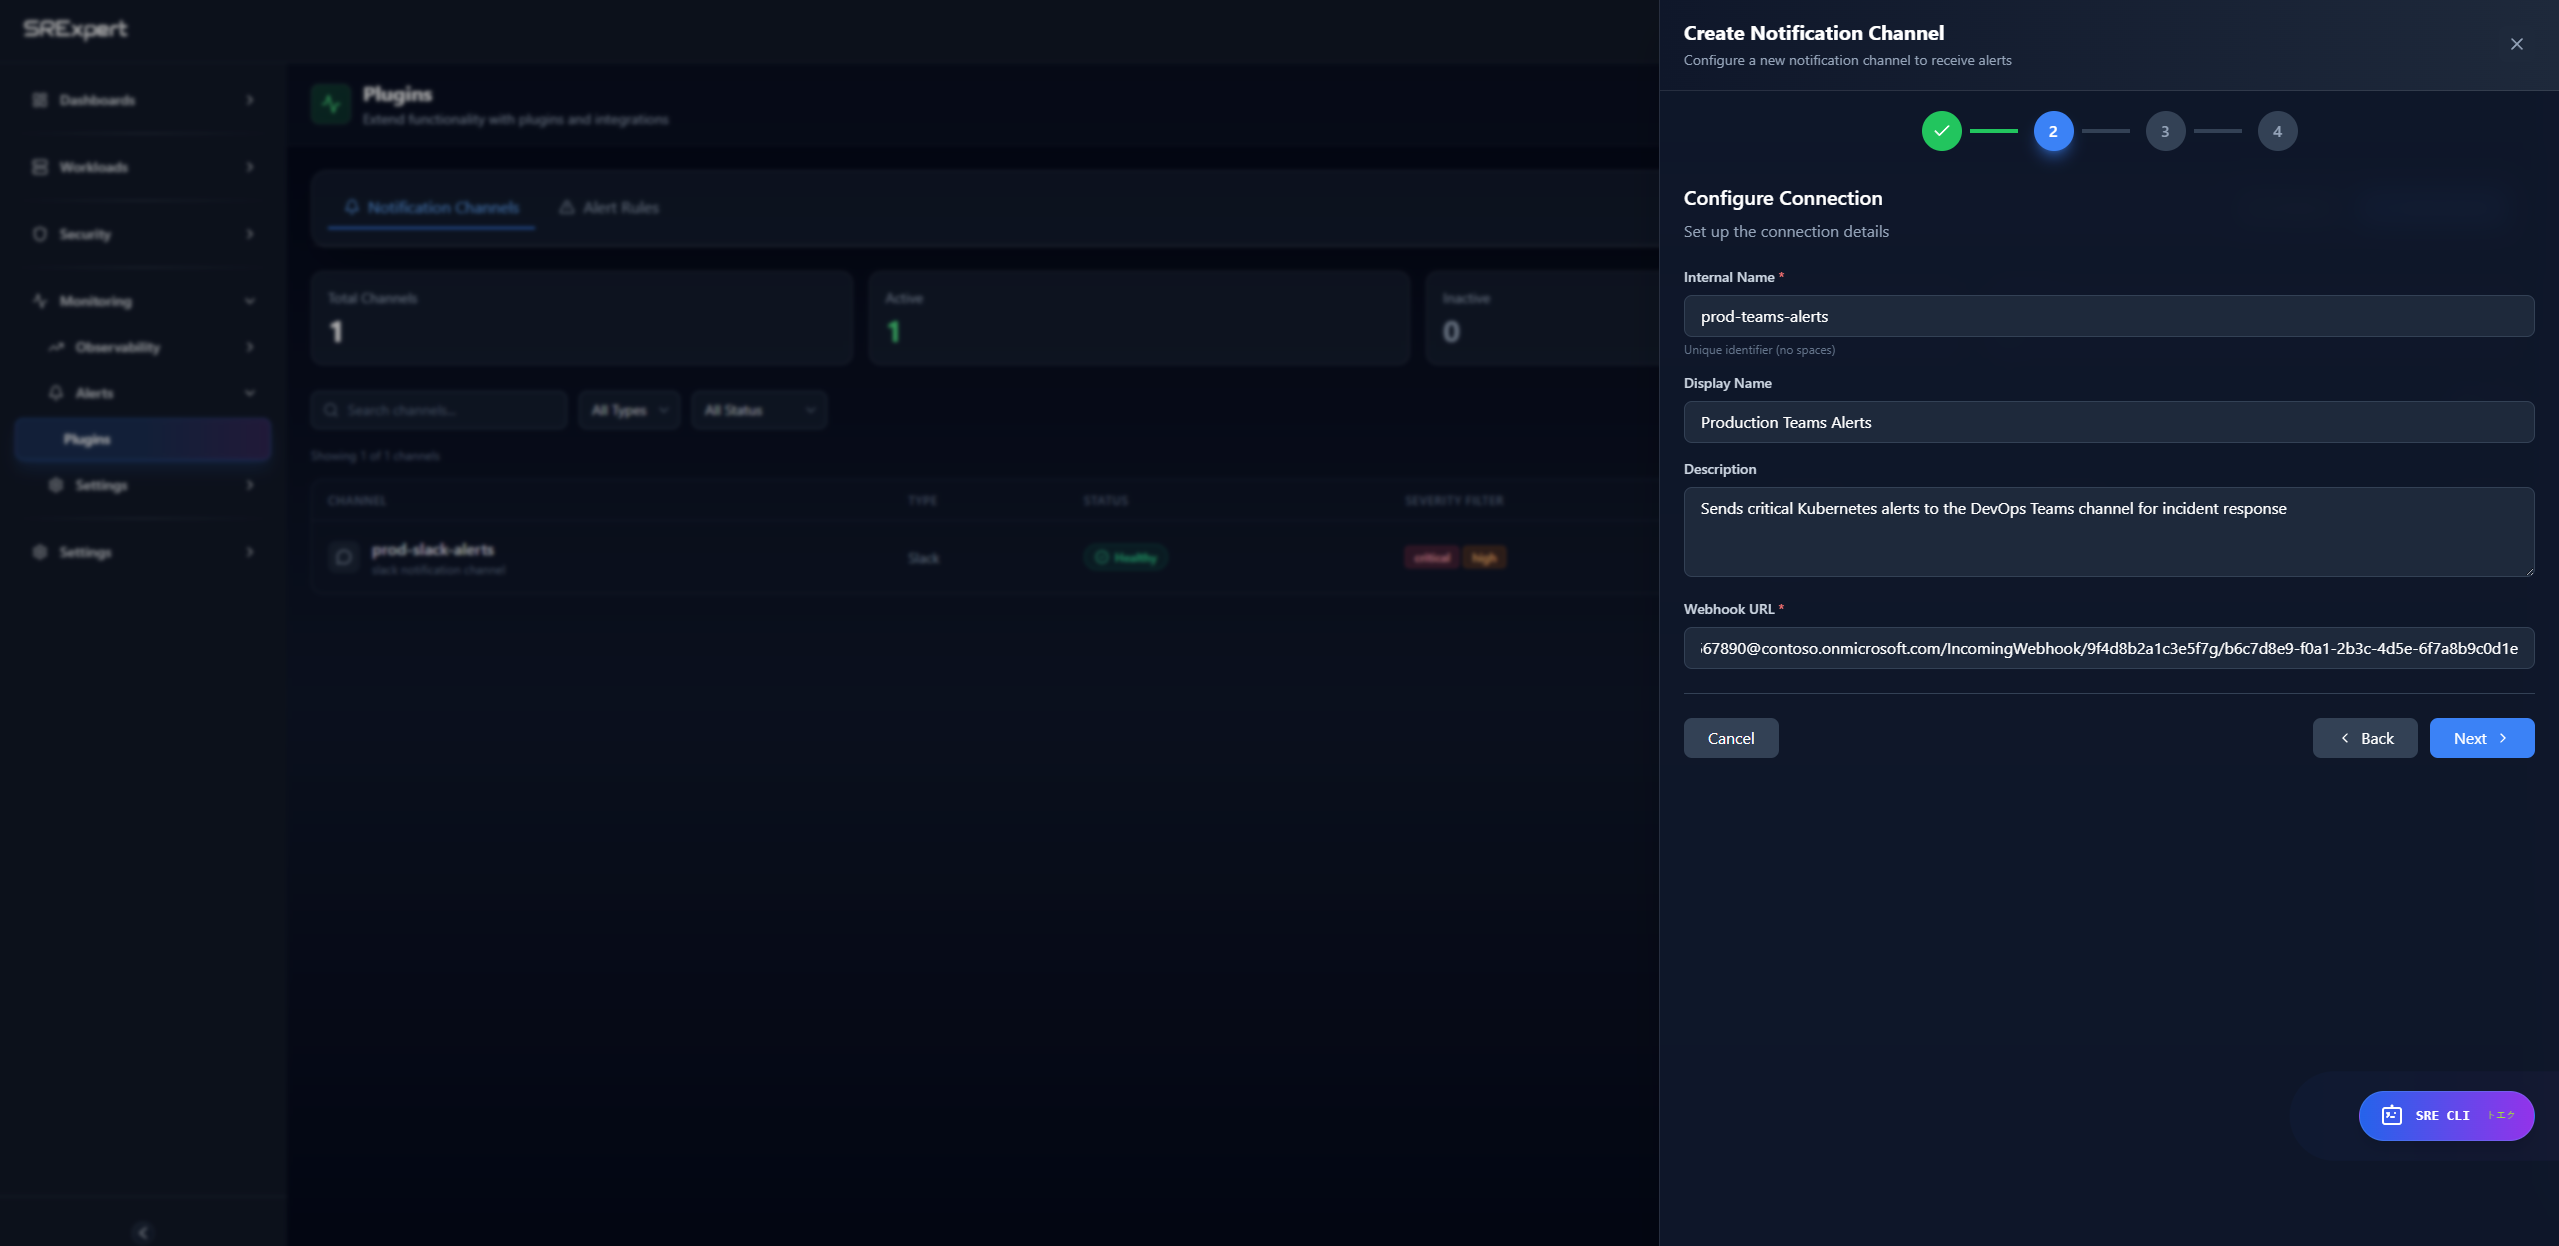
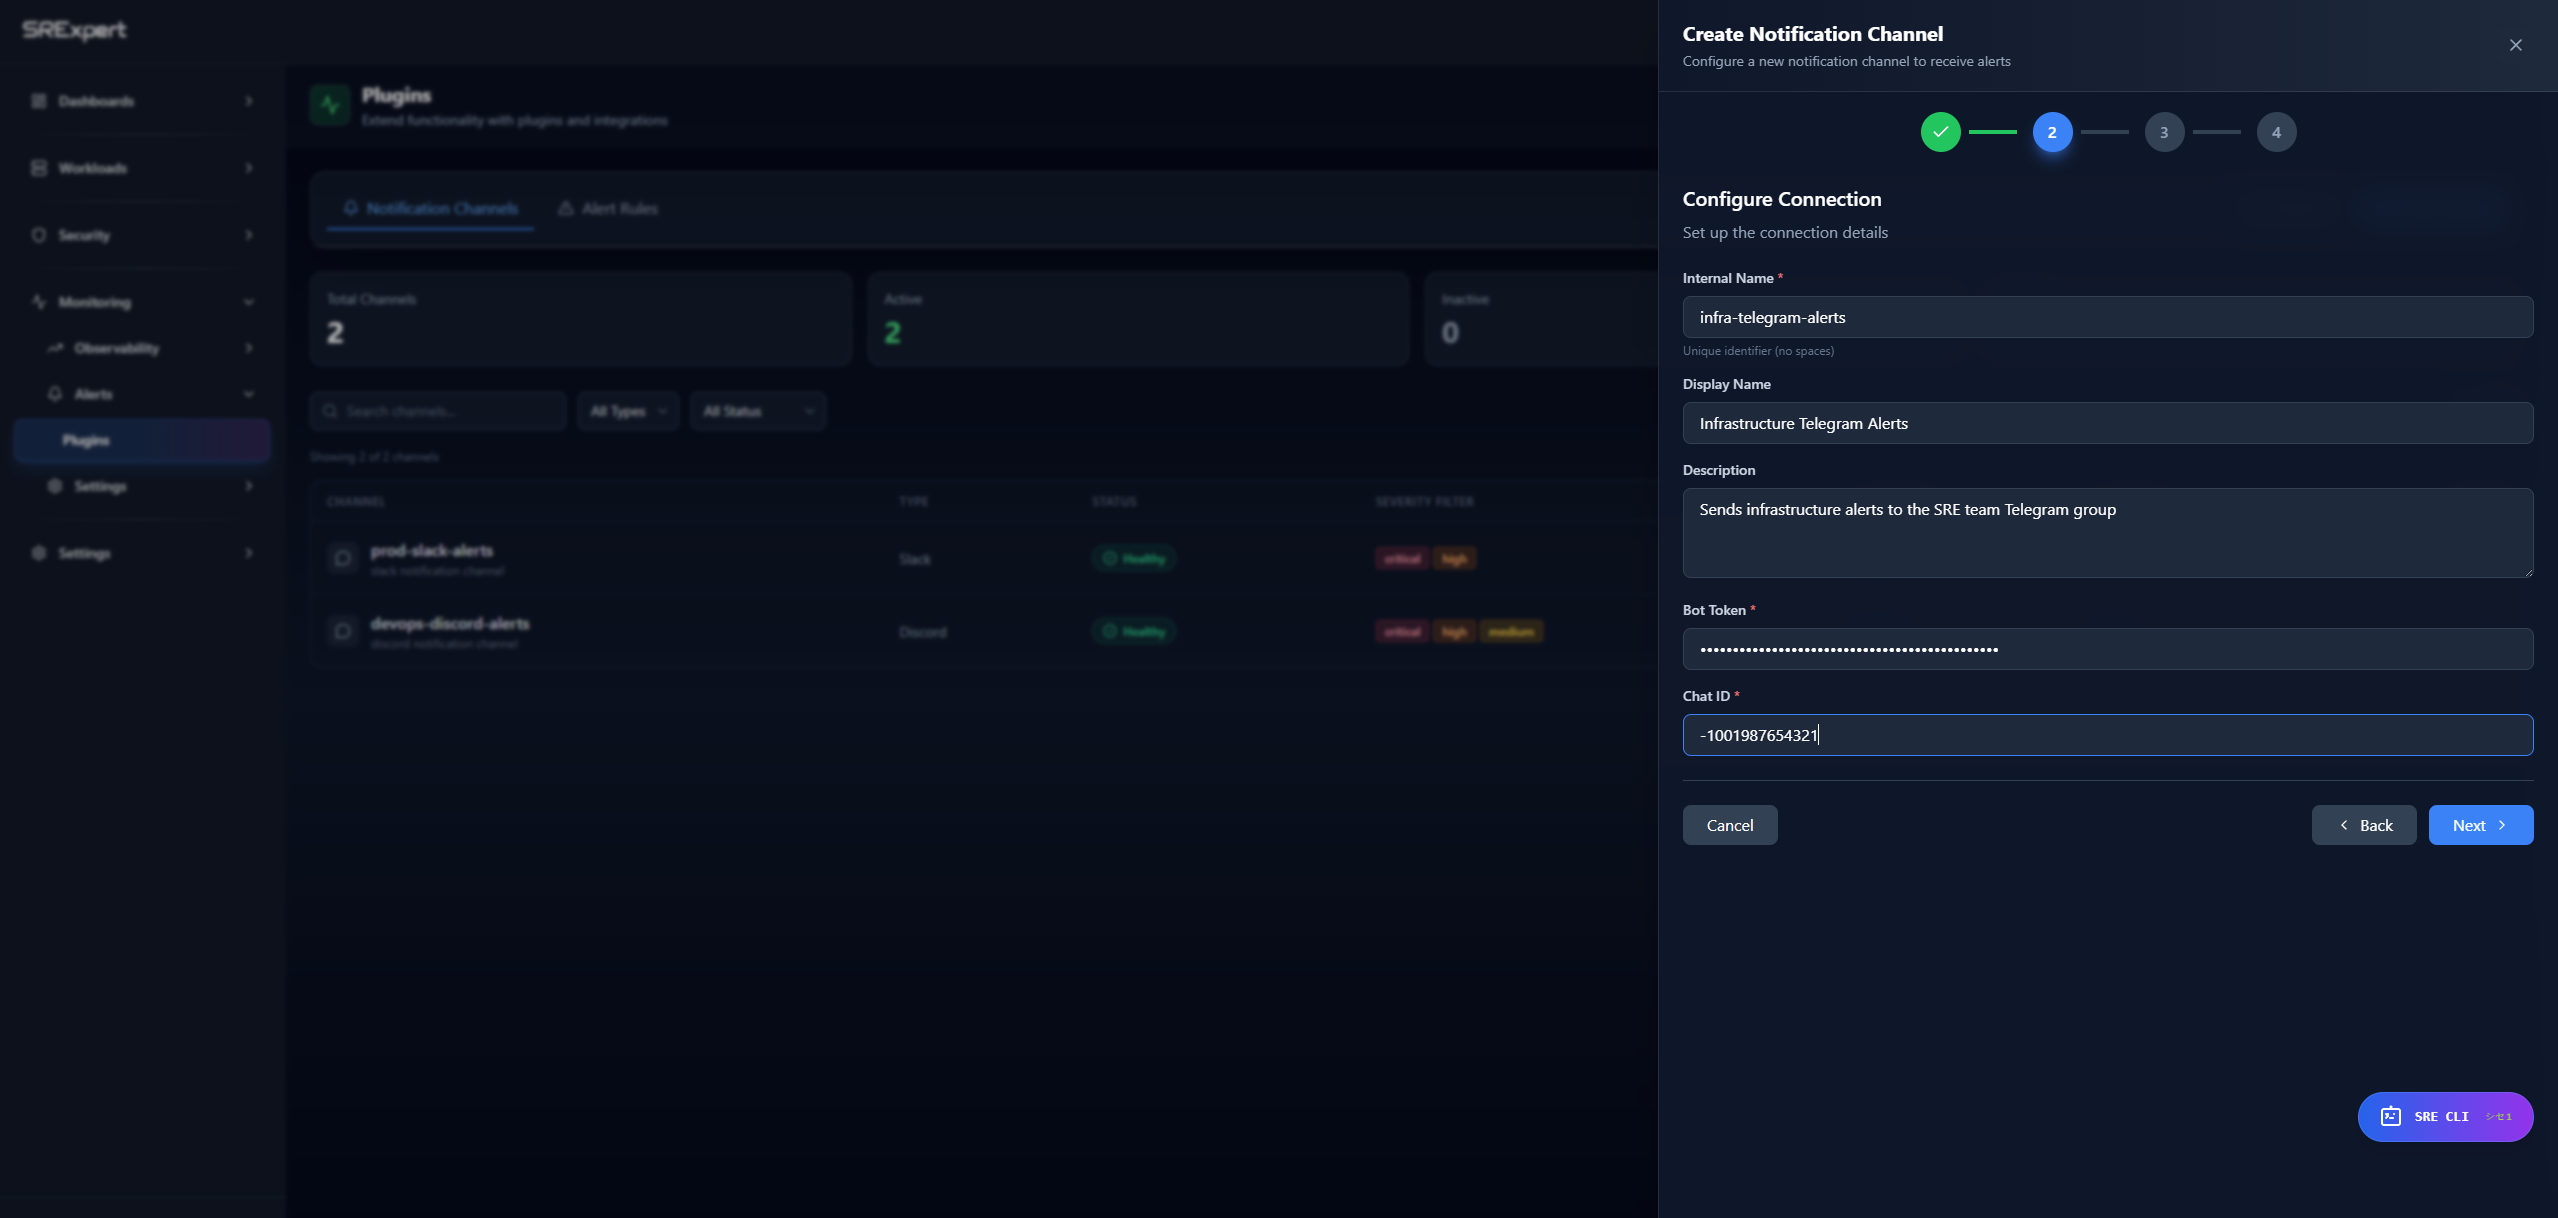
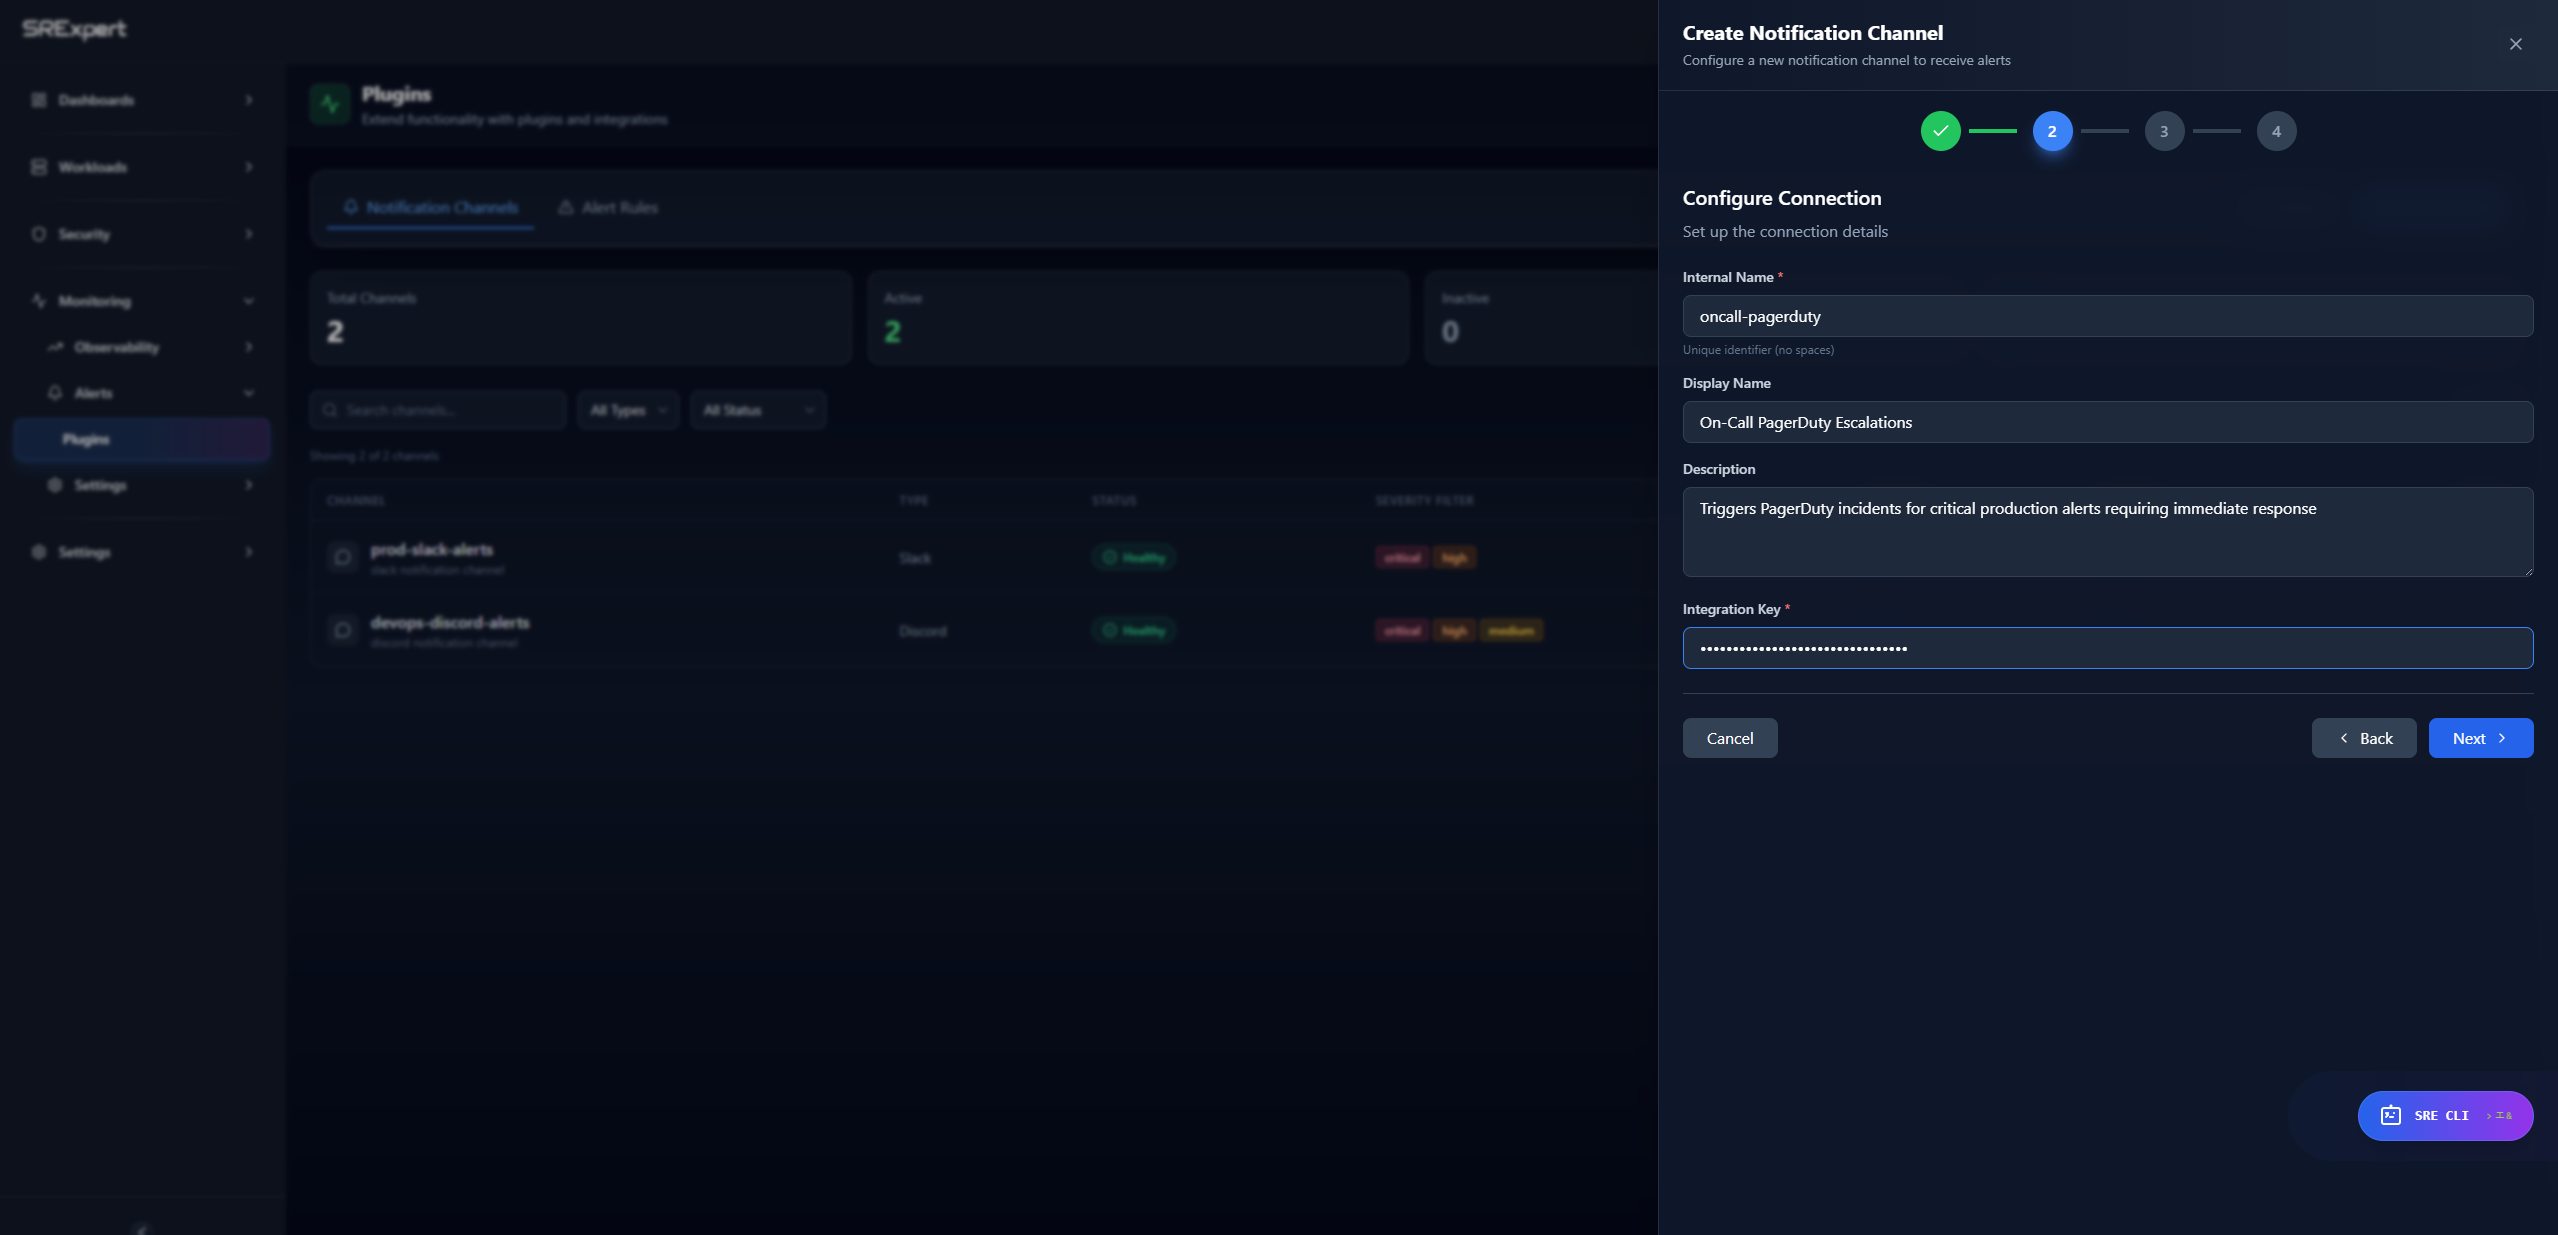
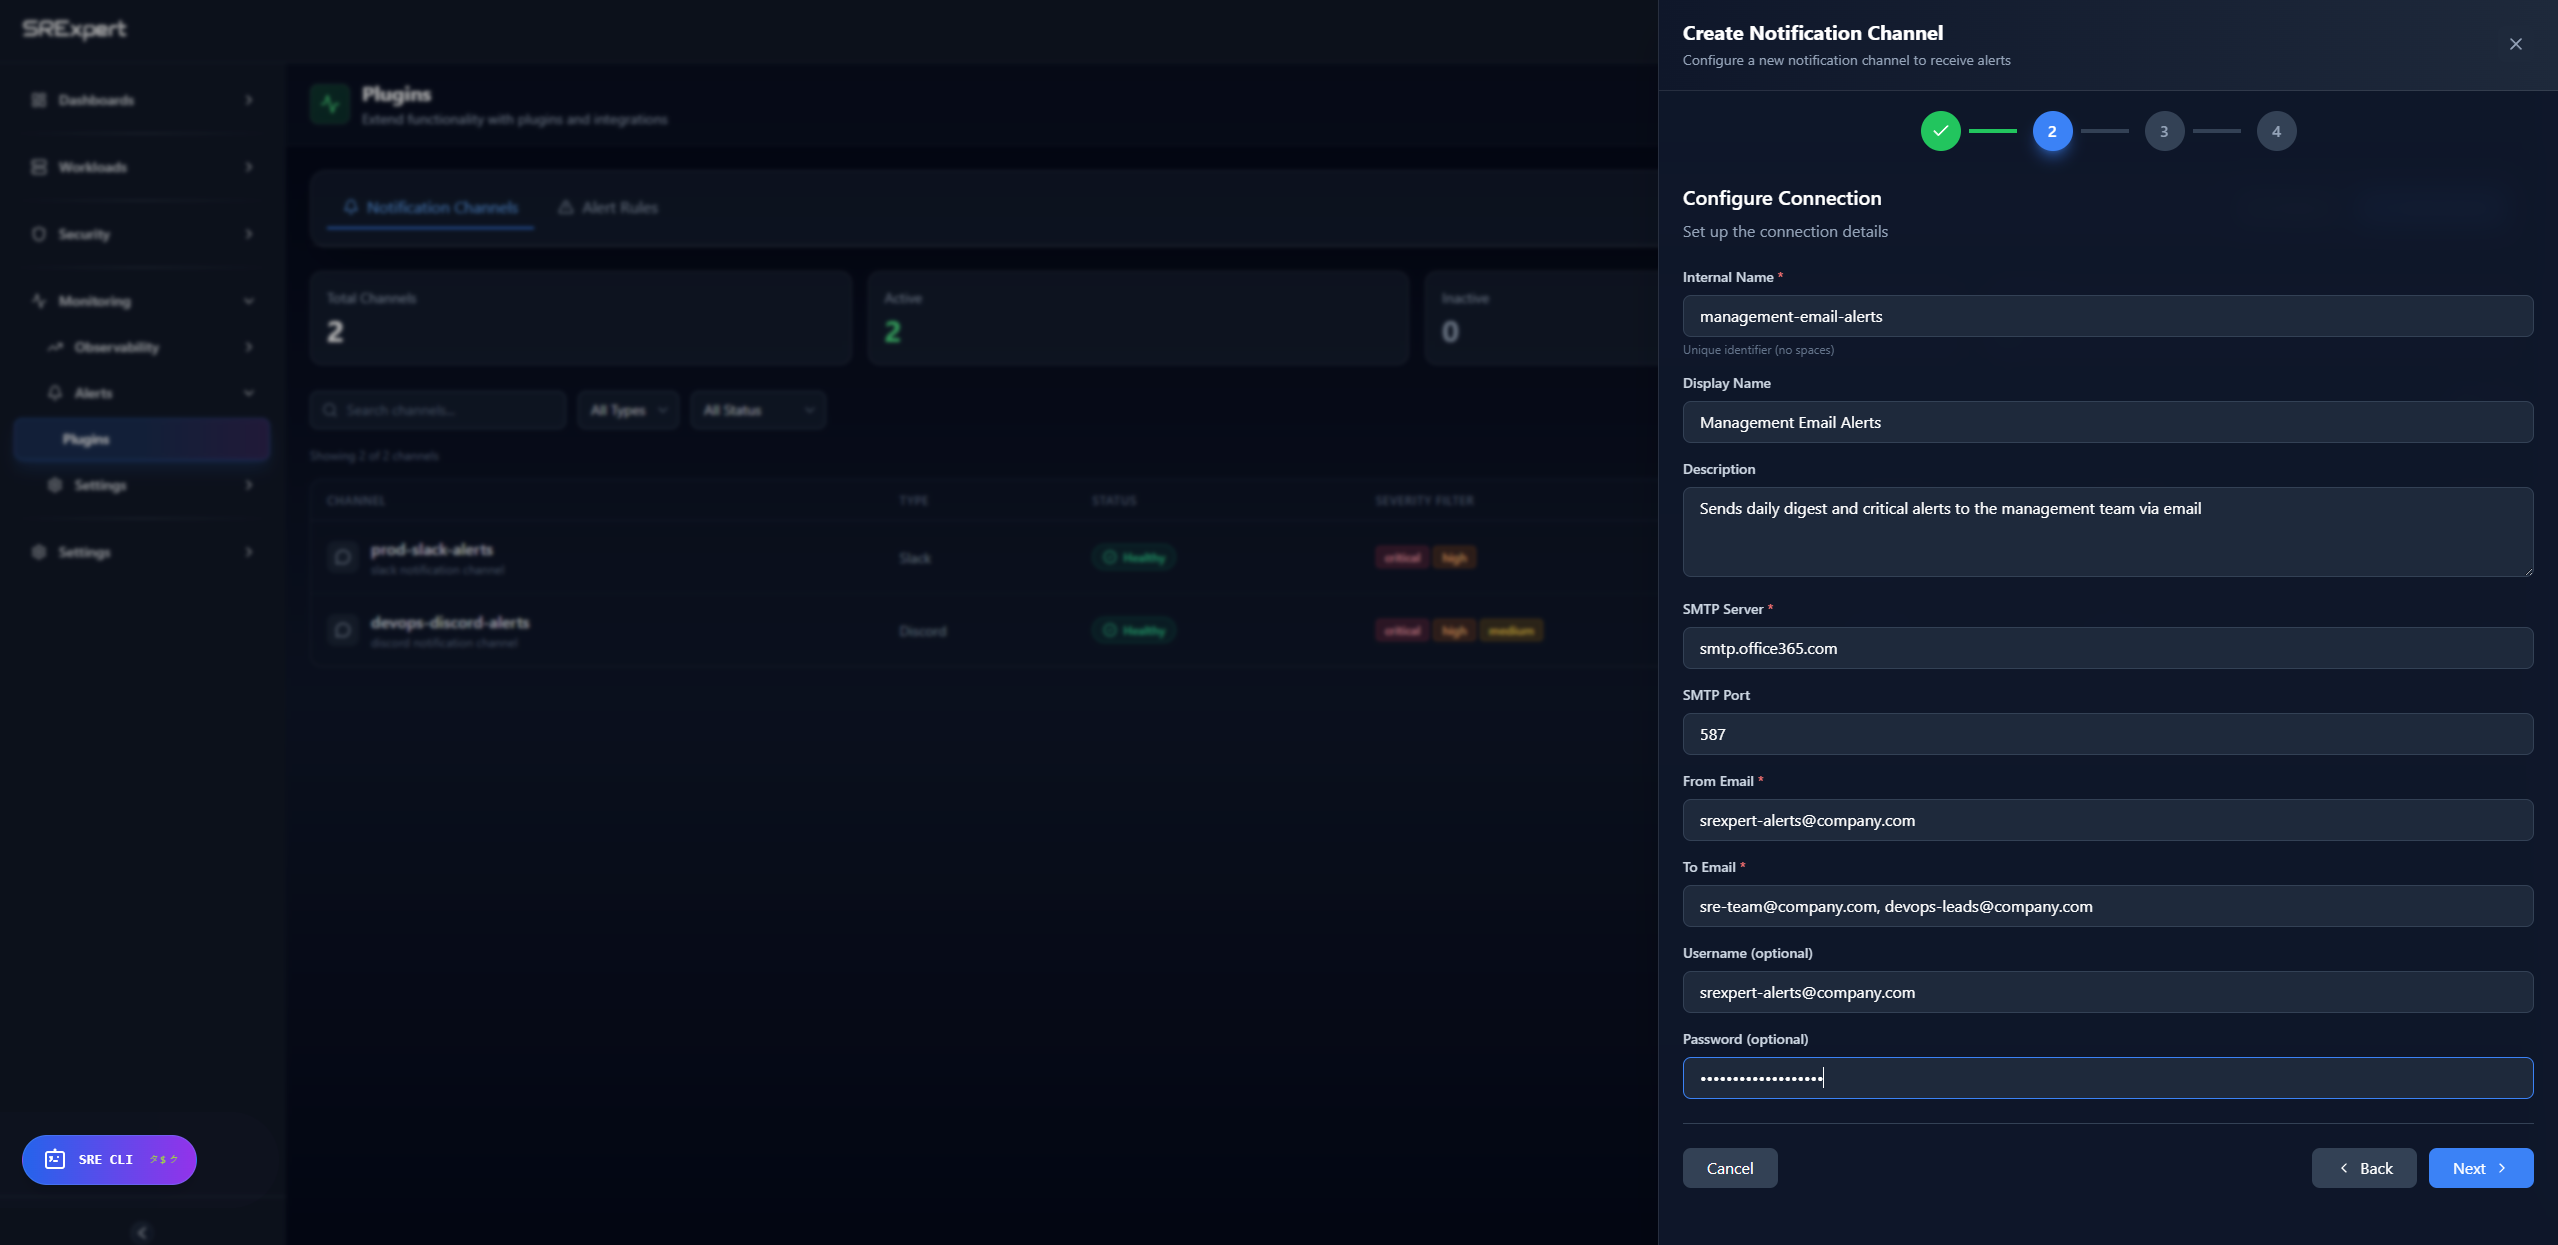
- Configure Connection - set the common fields (Internal Name, Display Name, Description) plus the type-specific connection fields
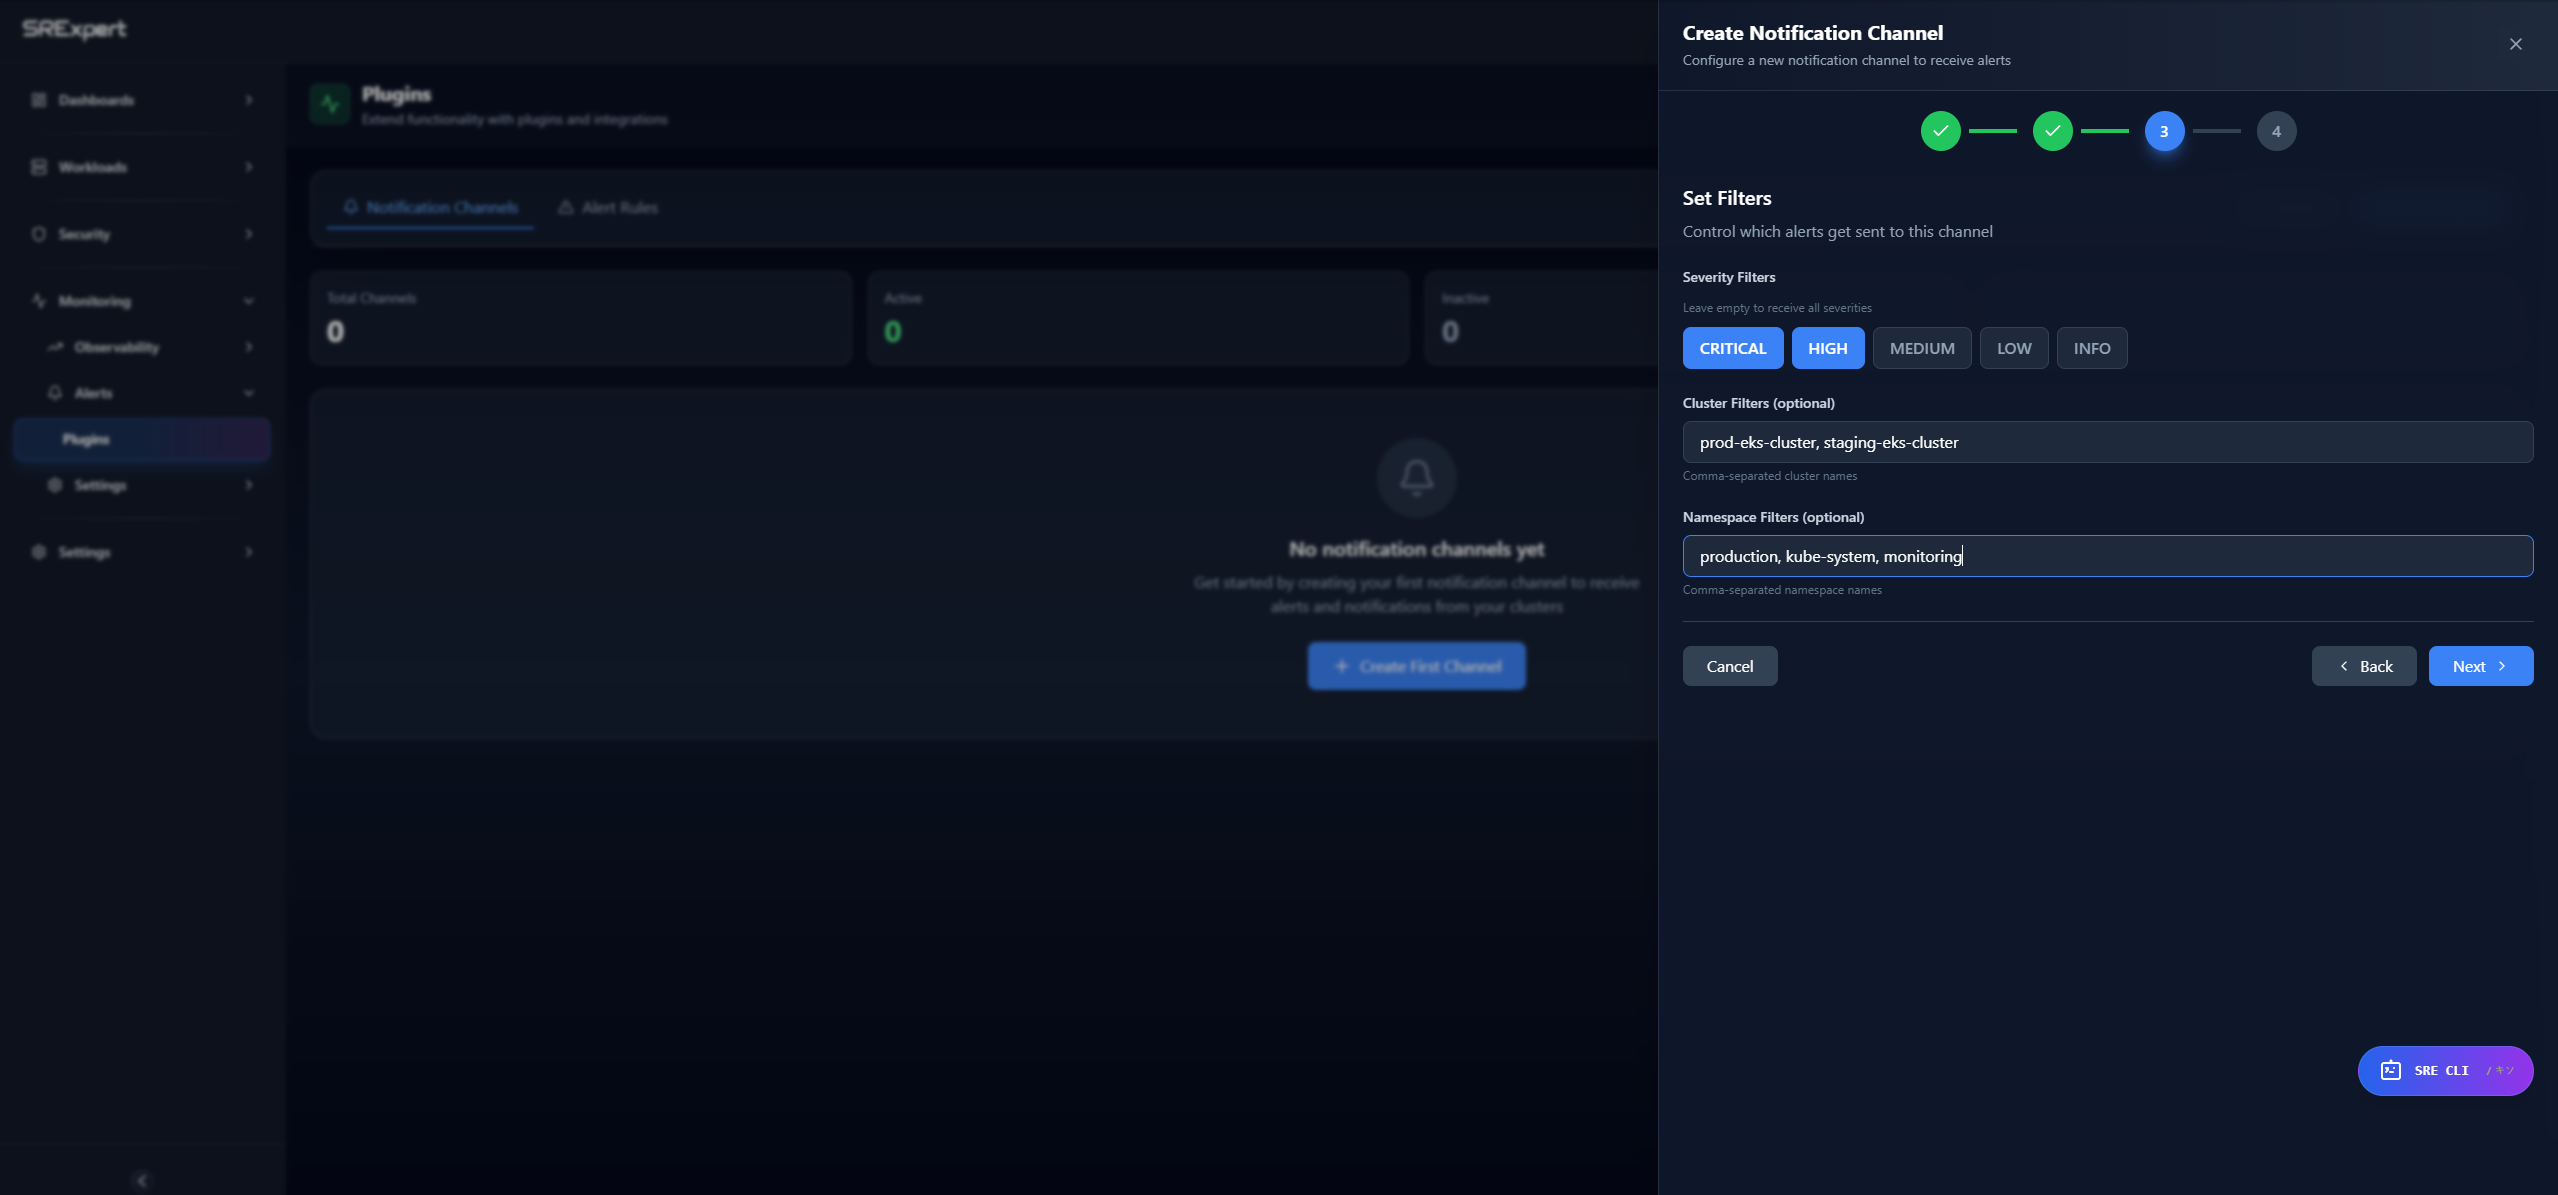
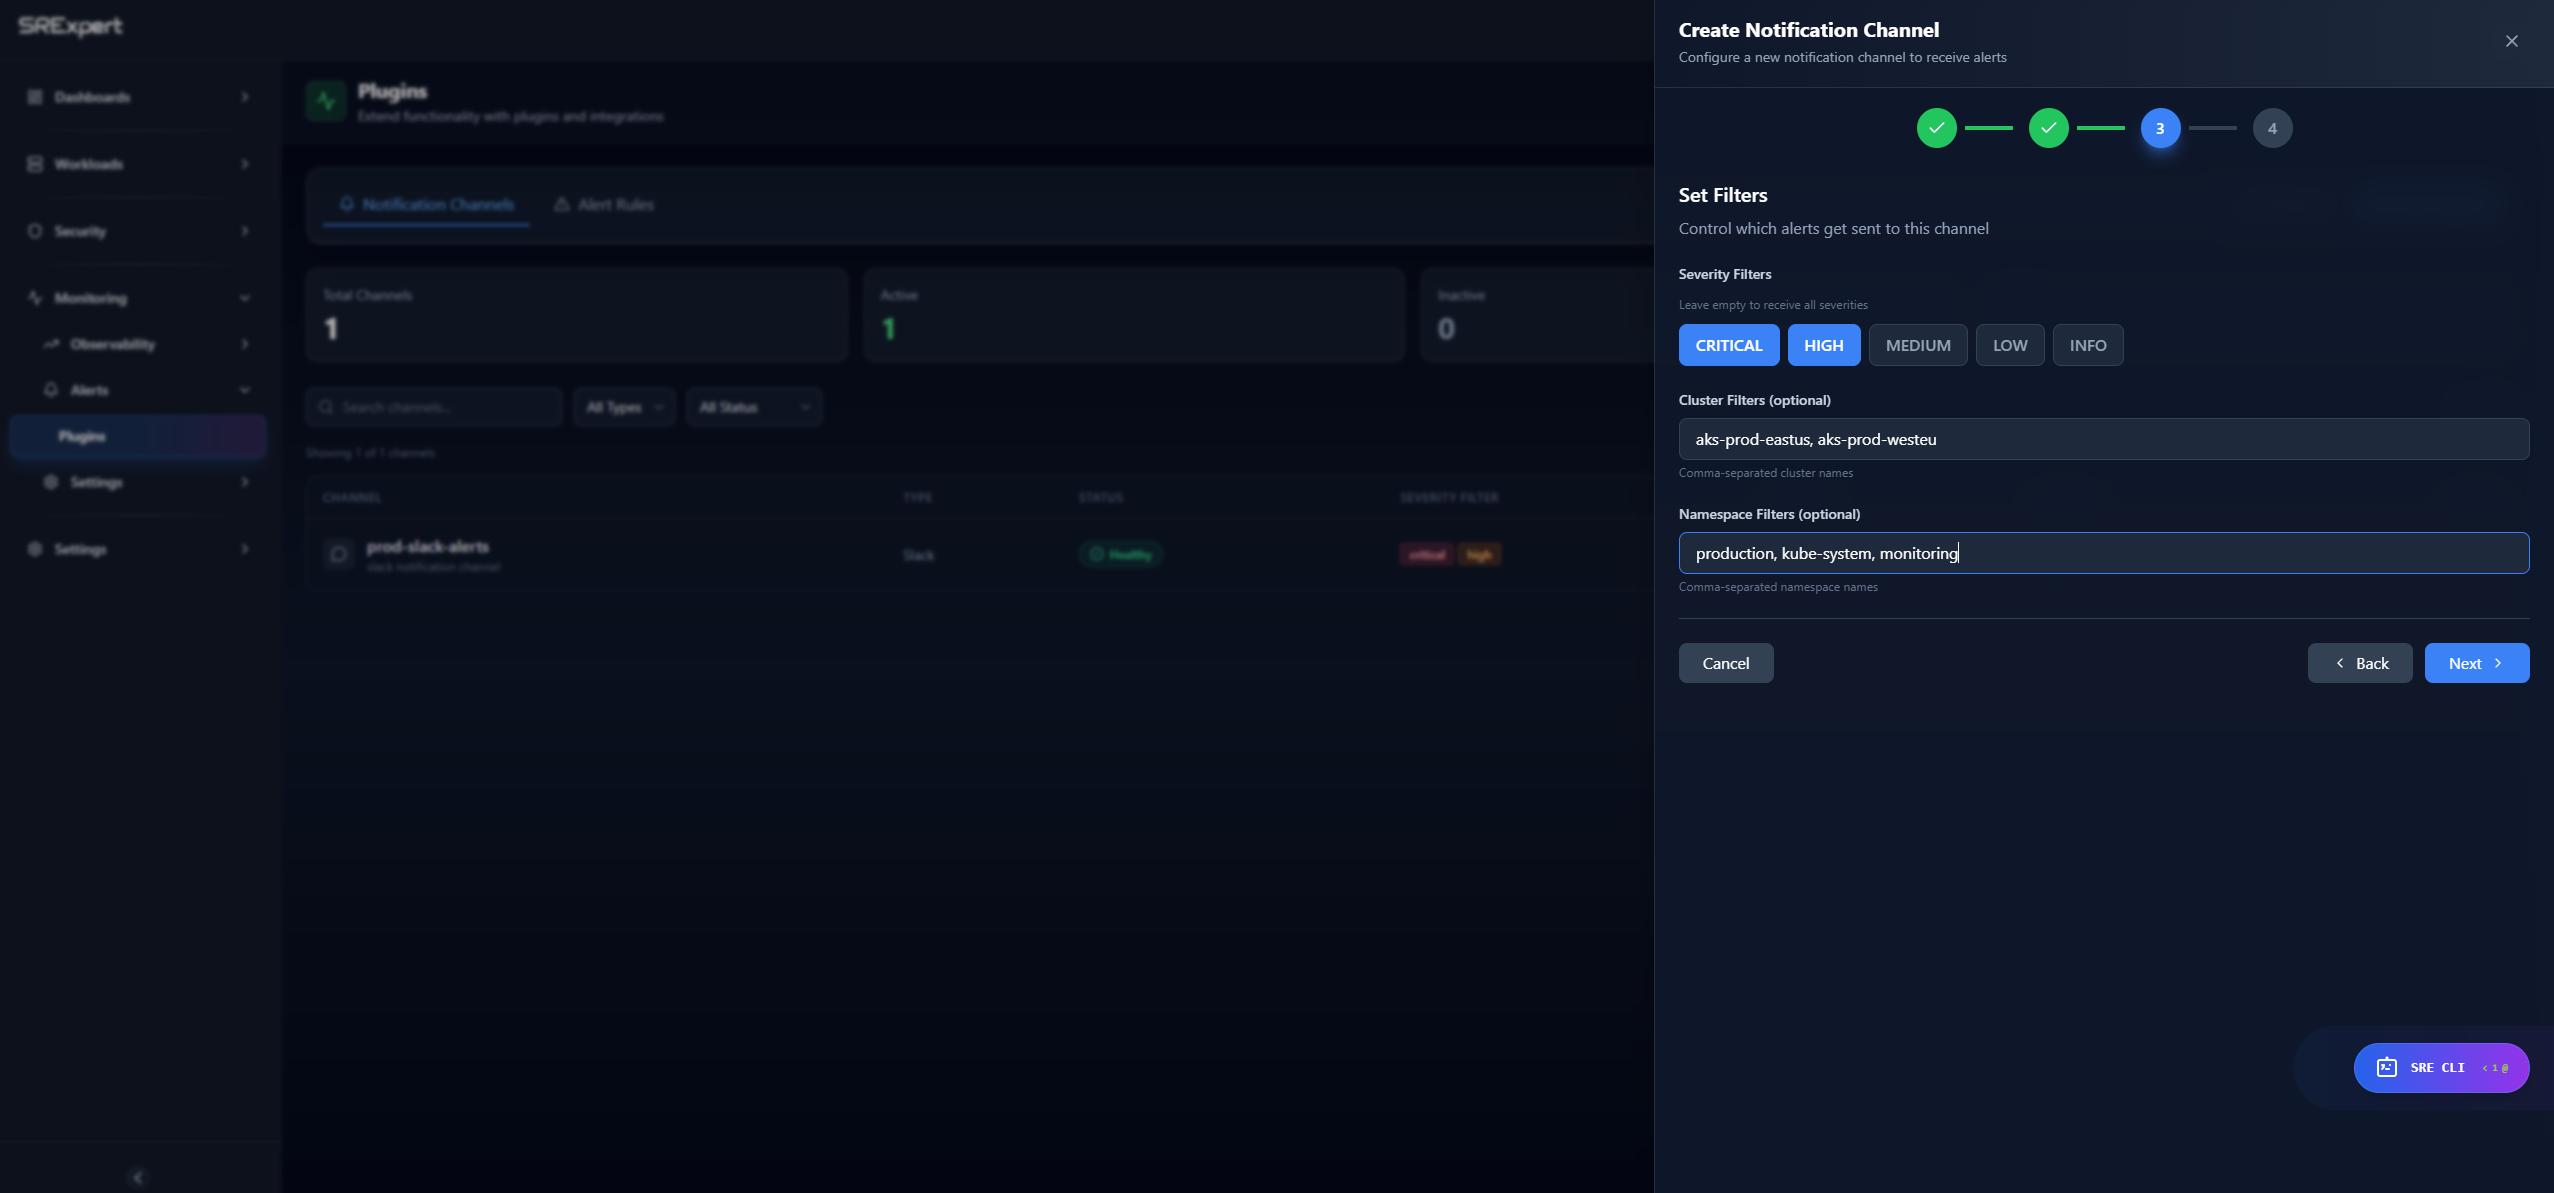
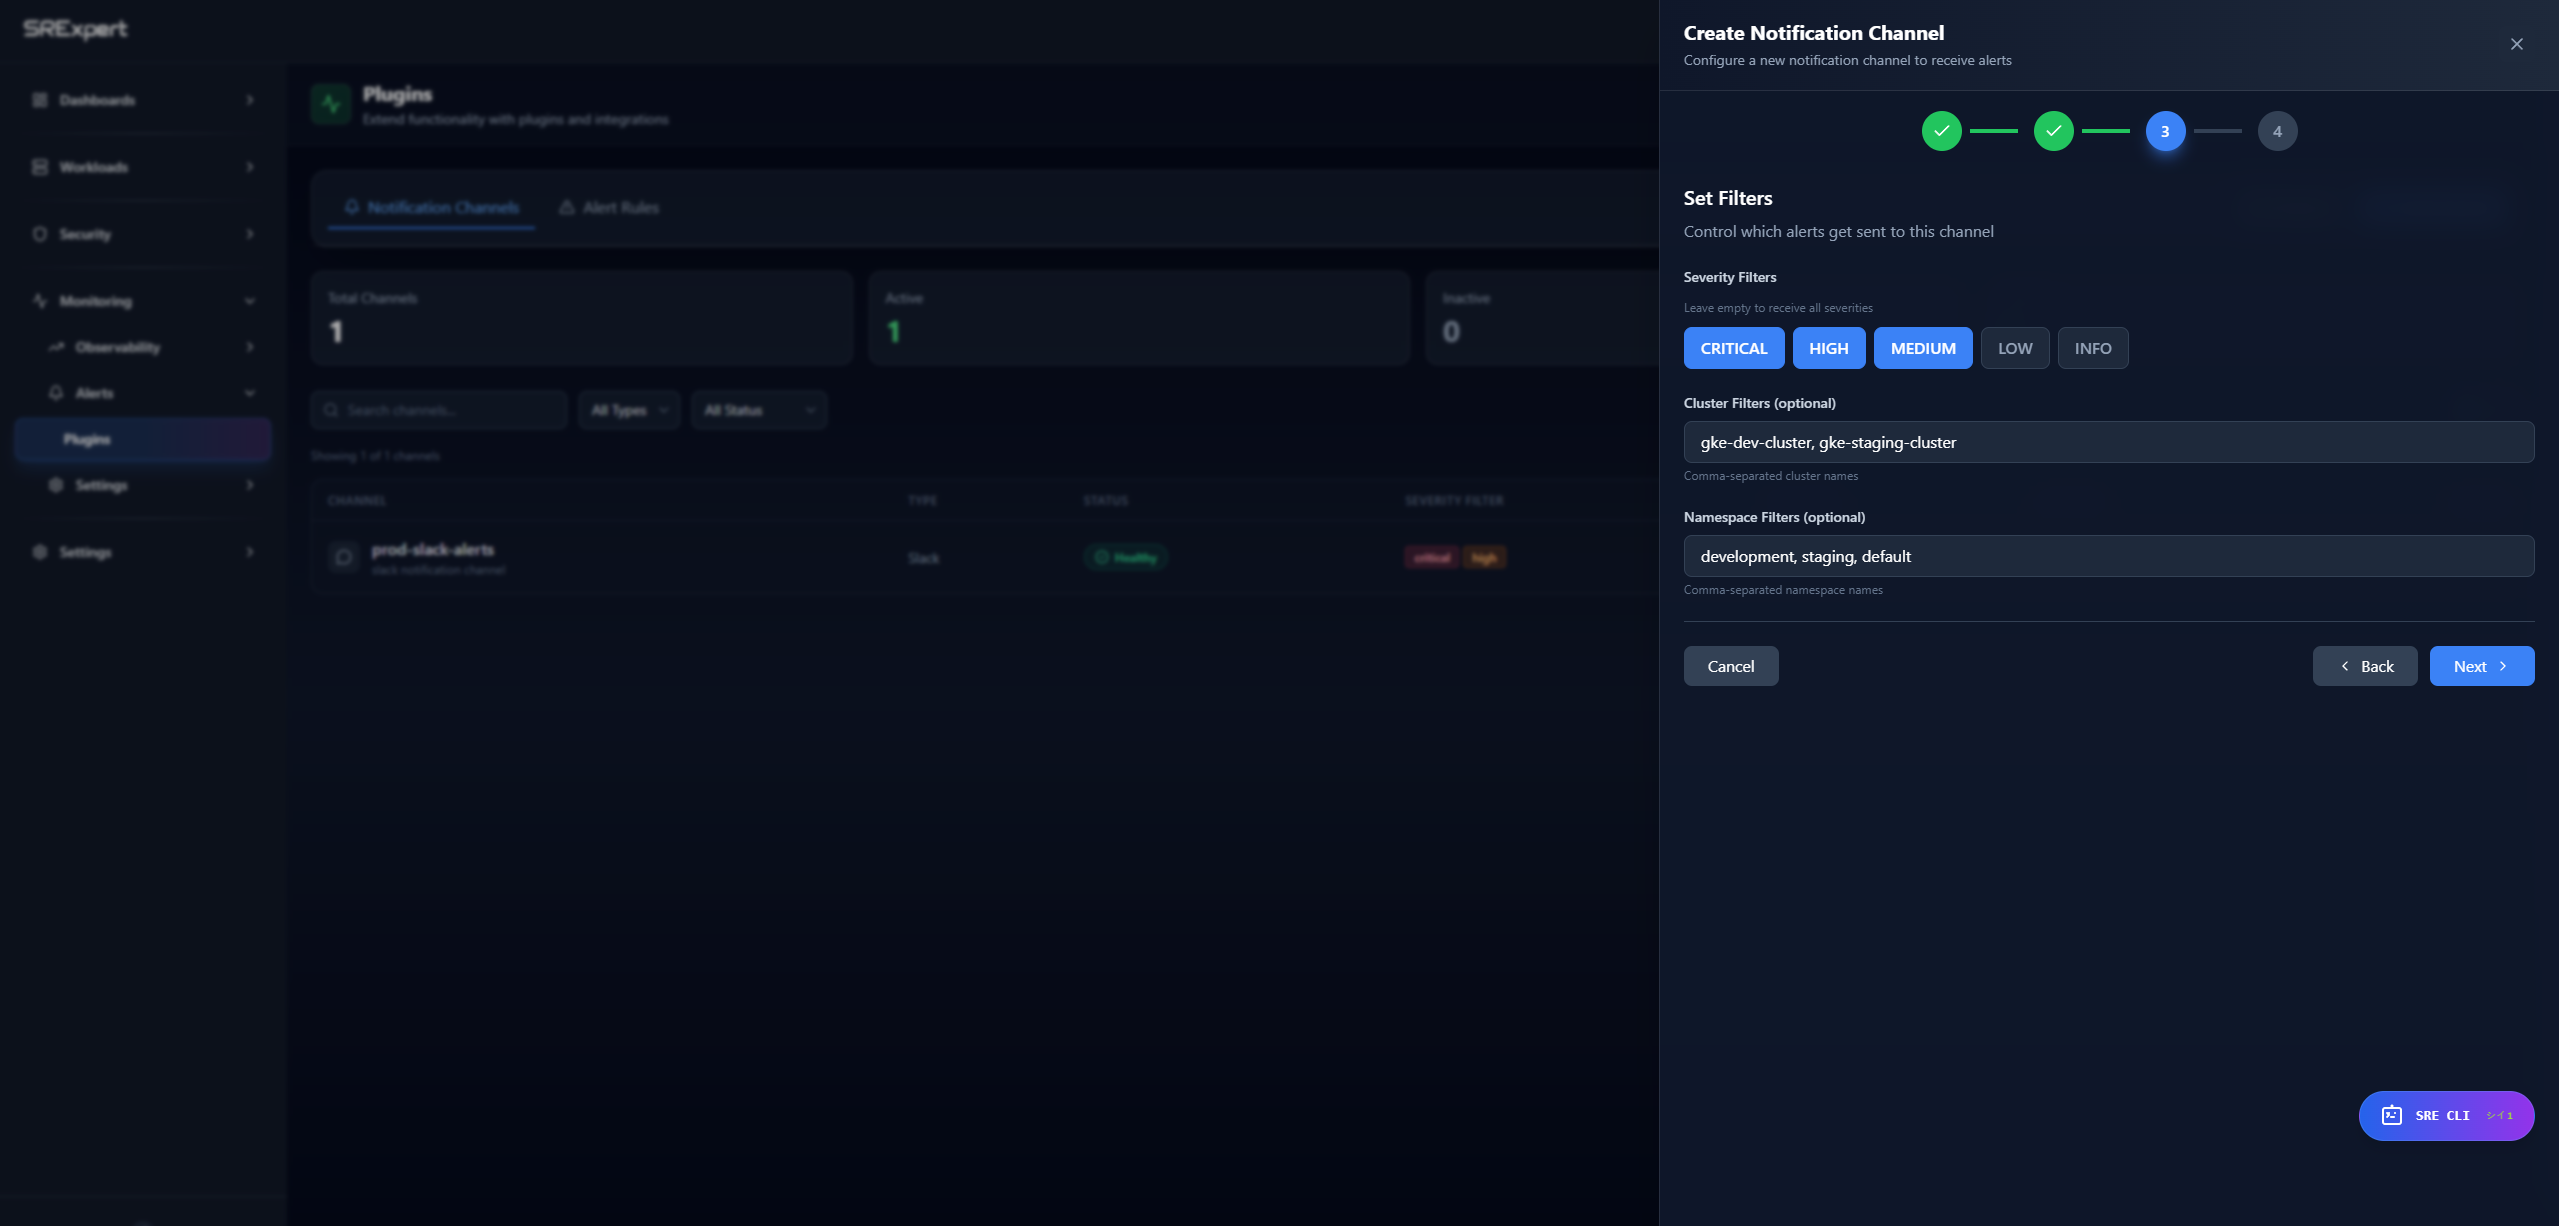
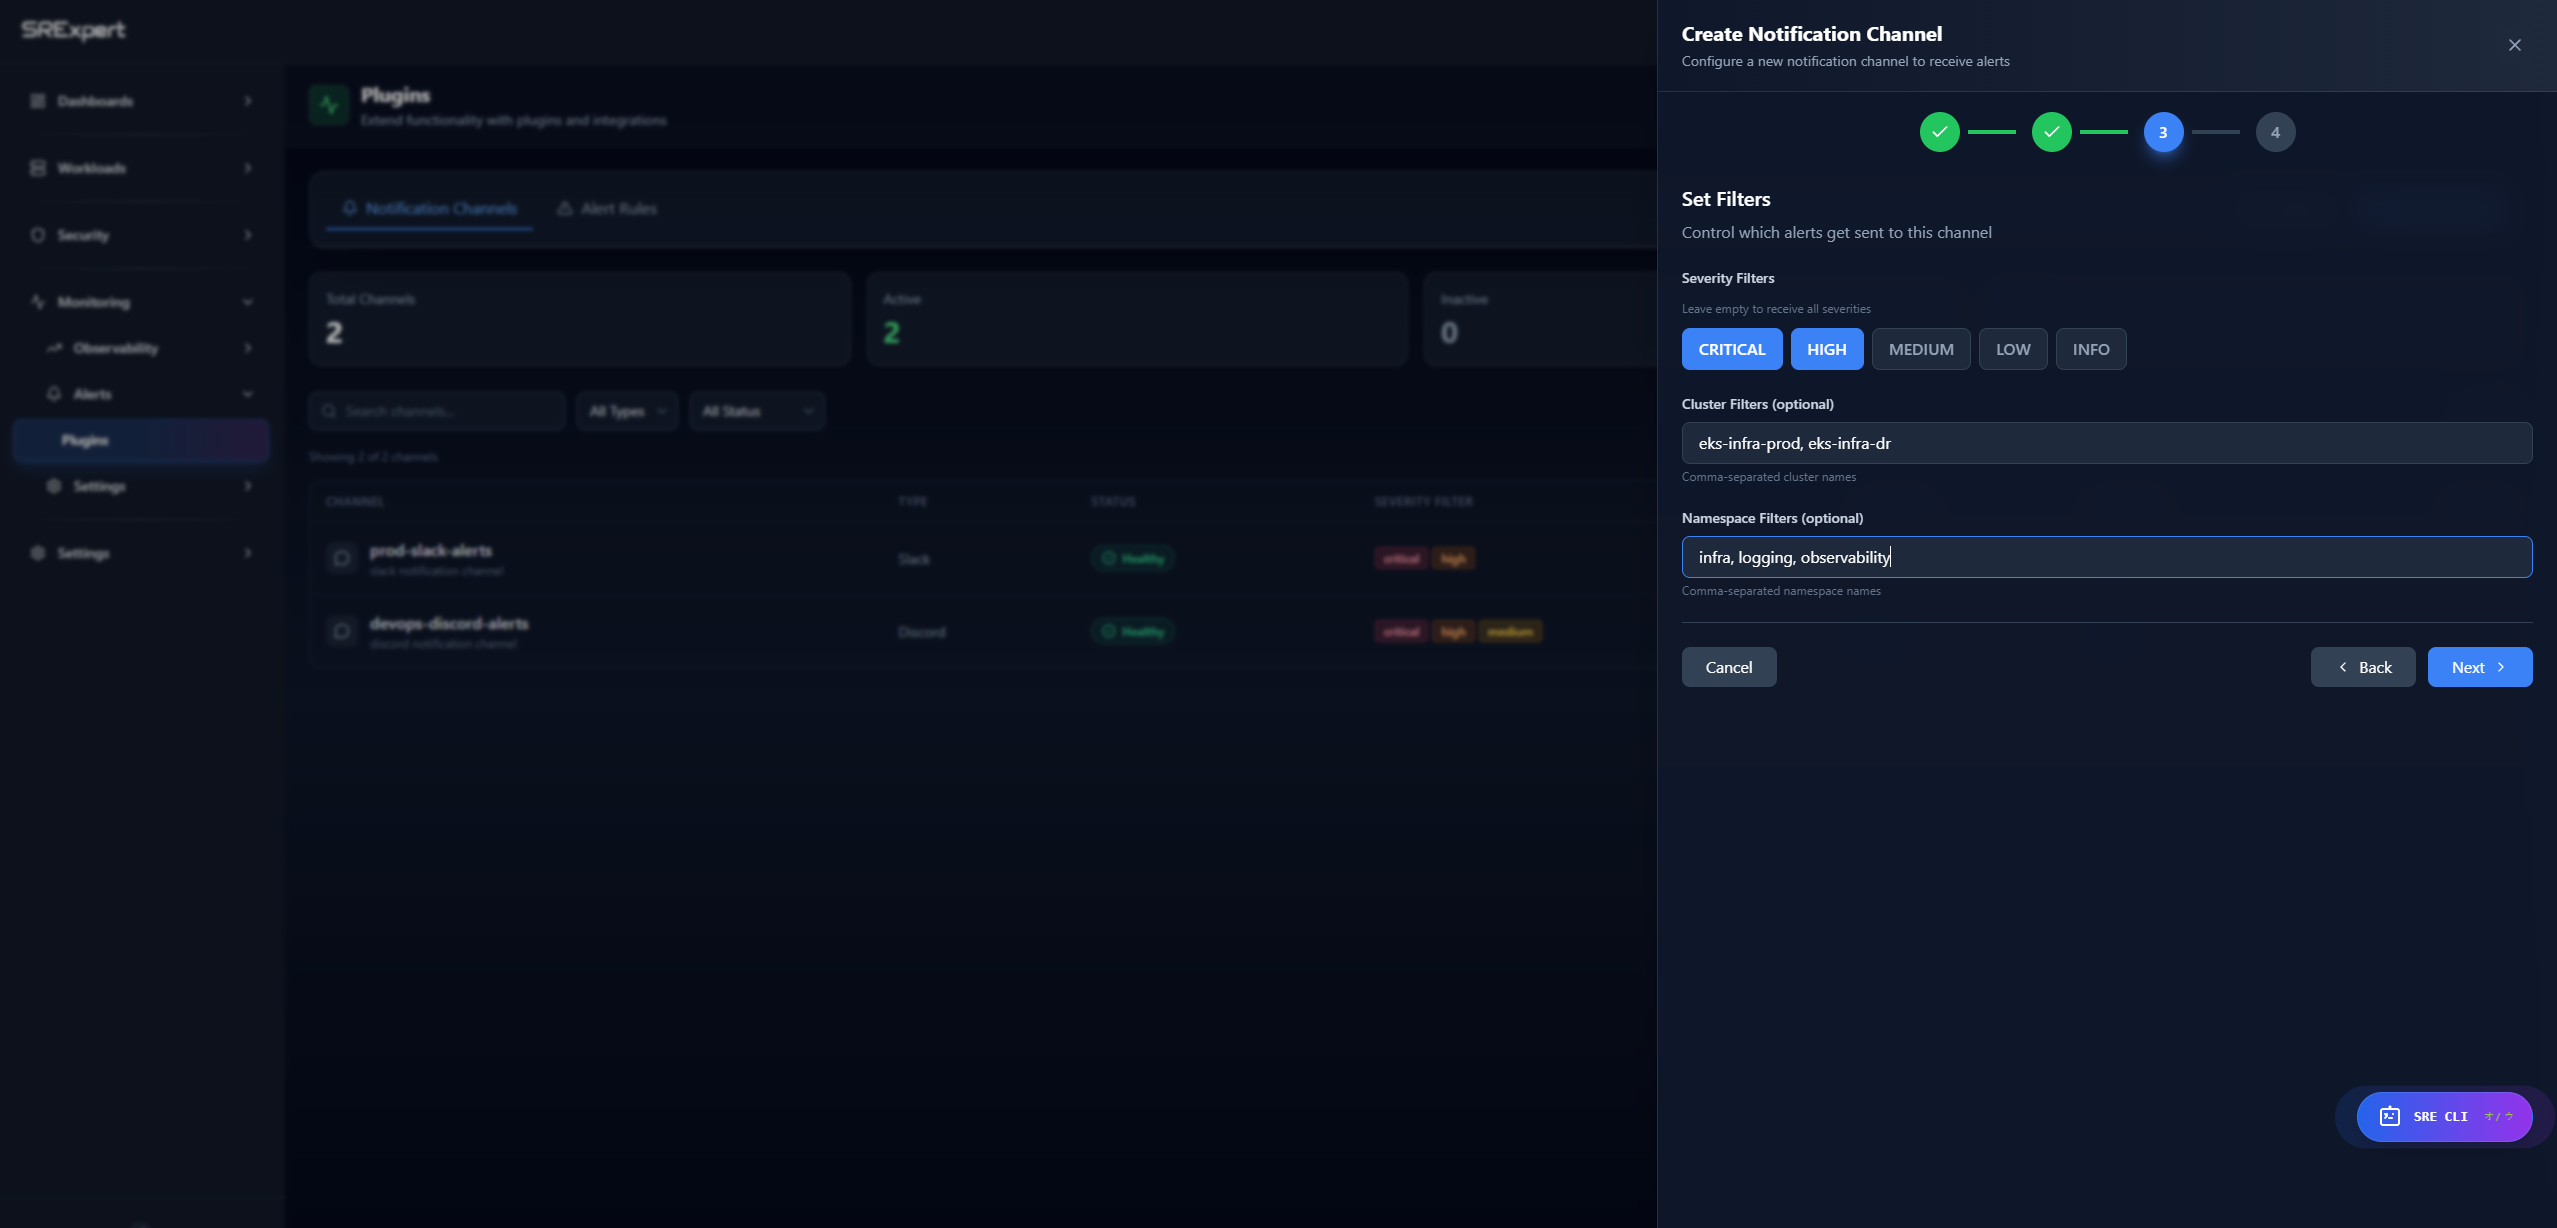
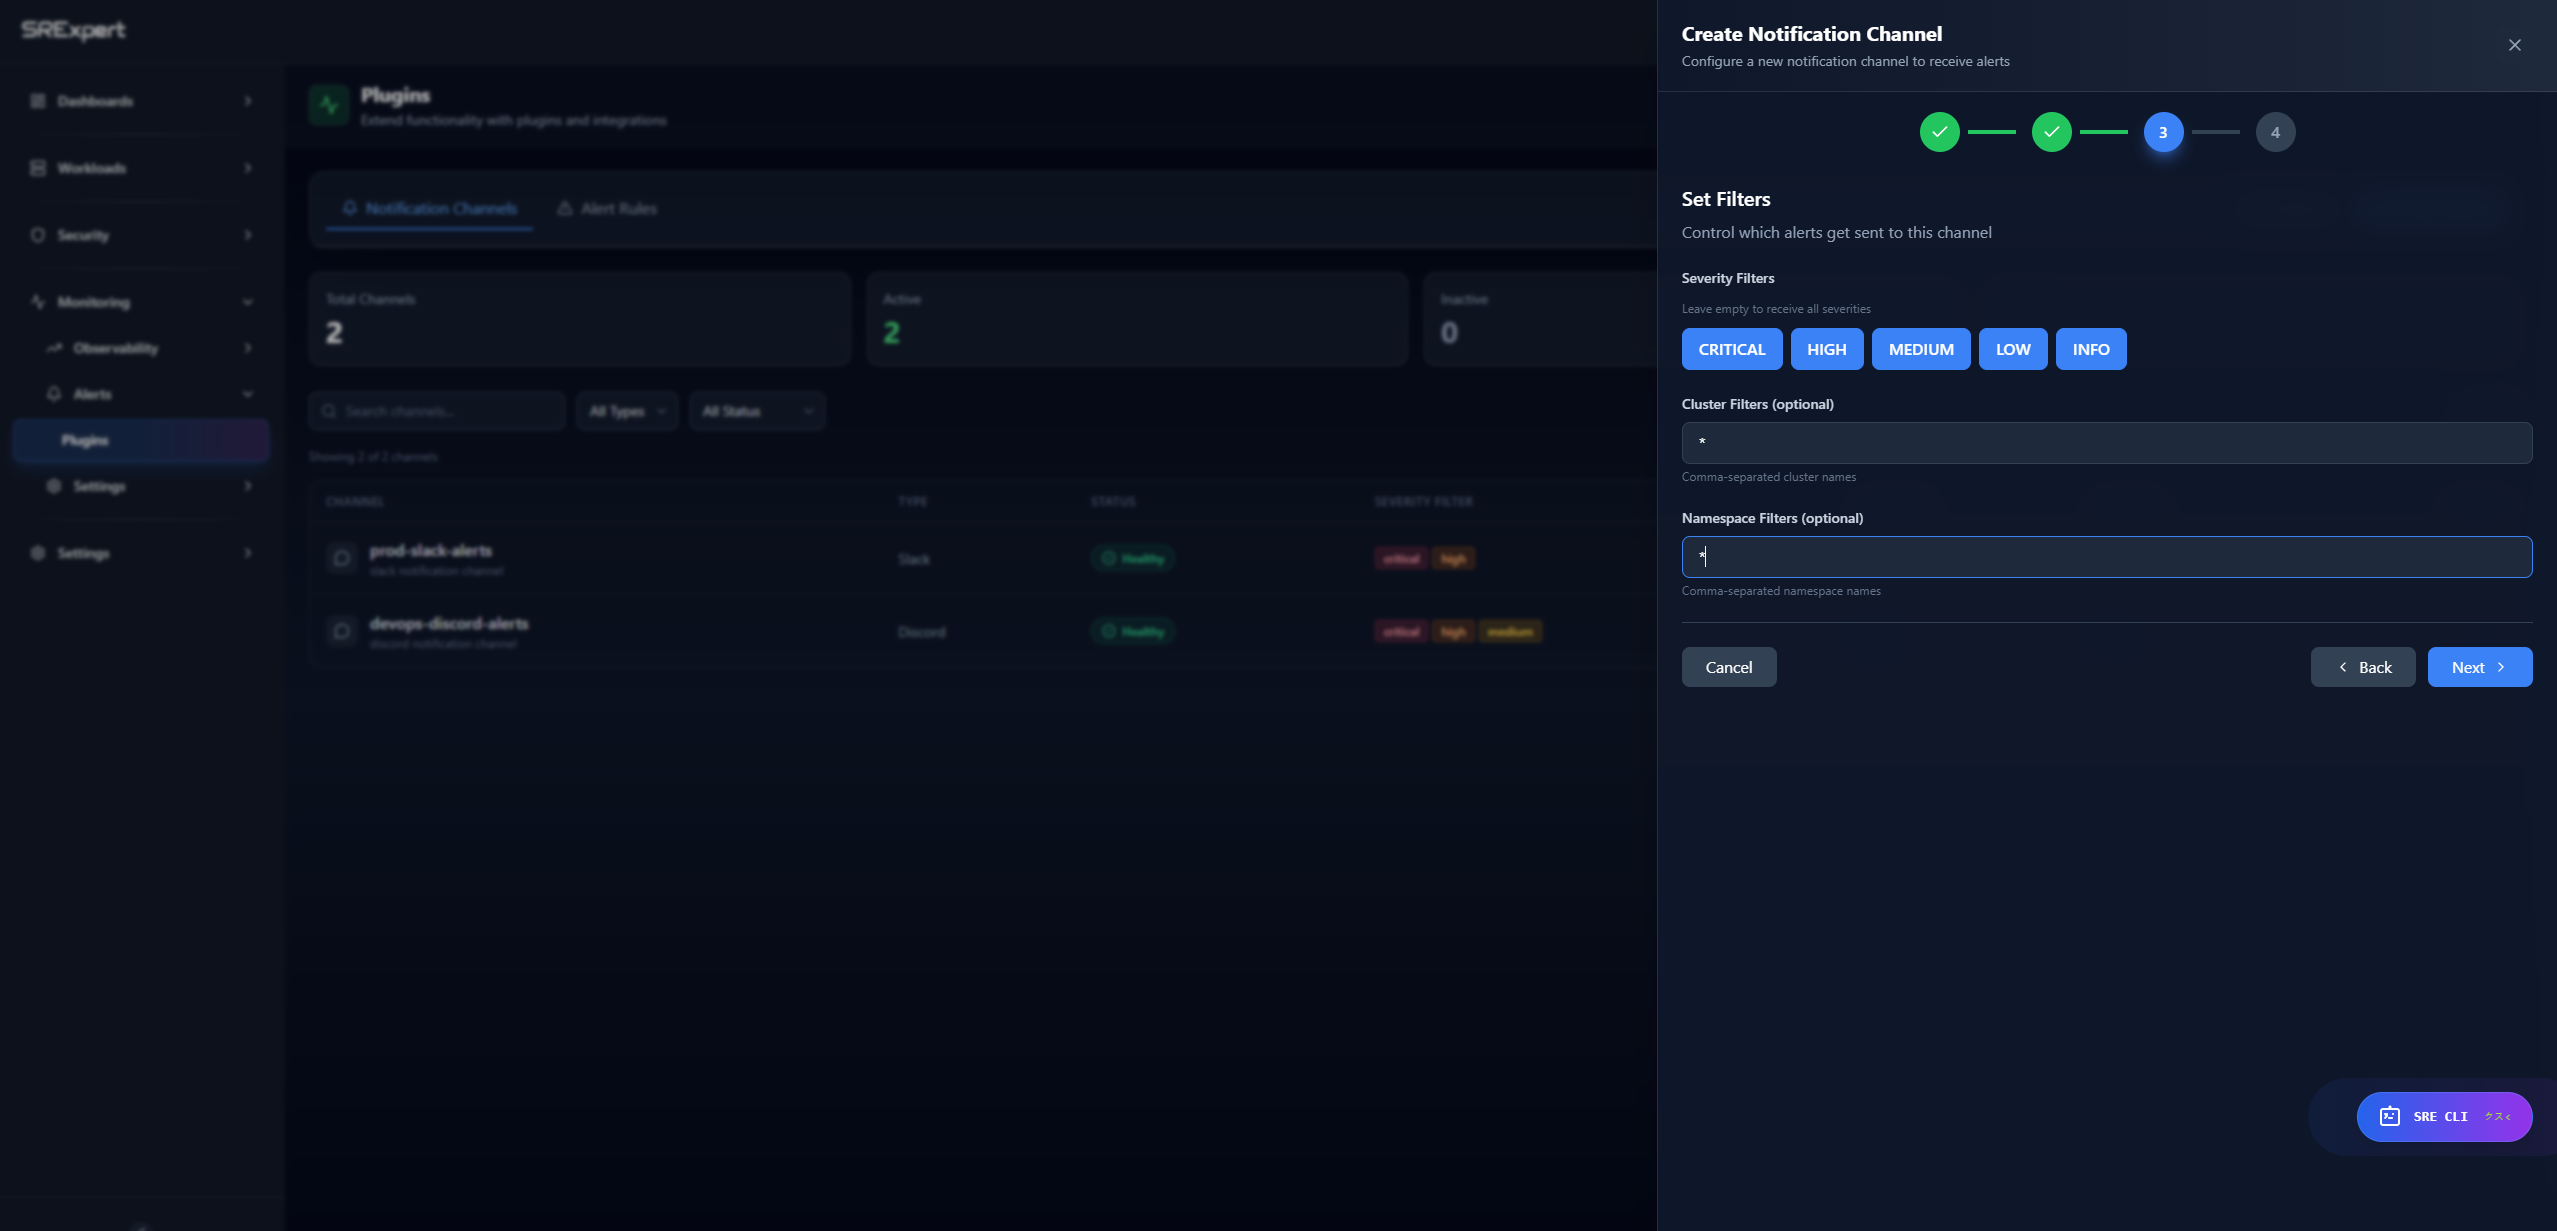
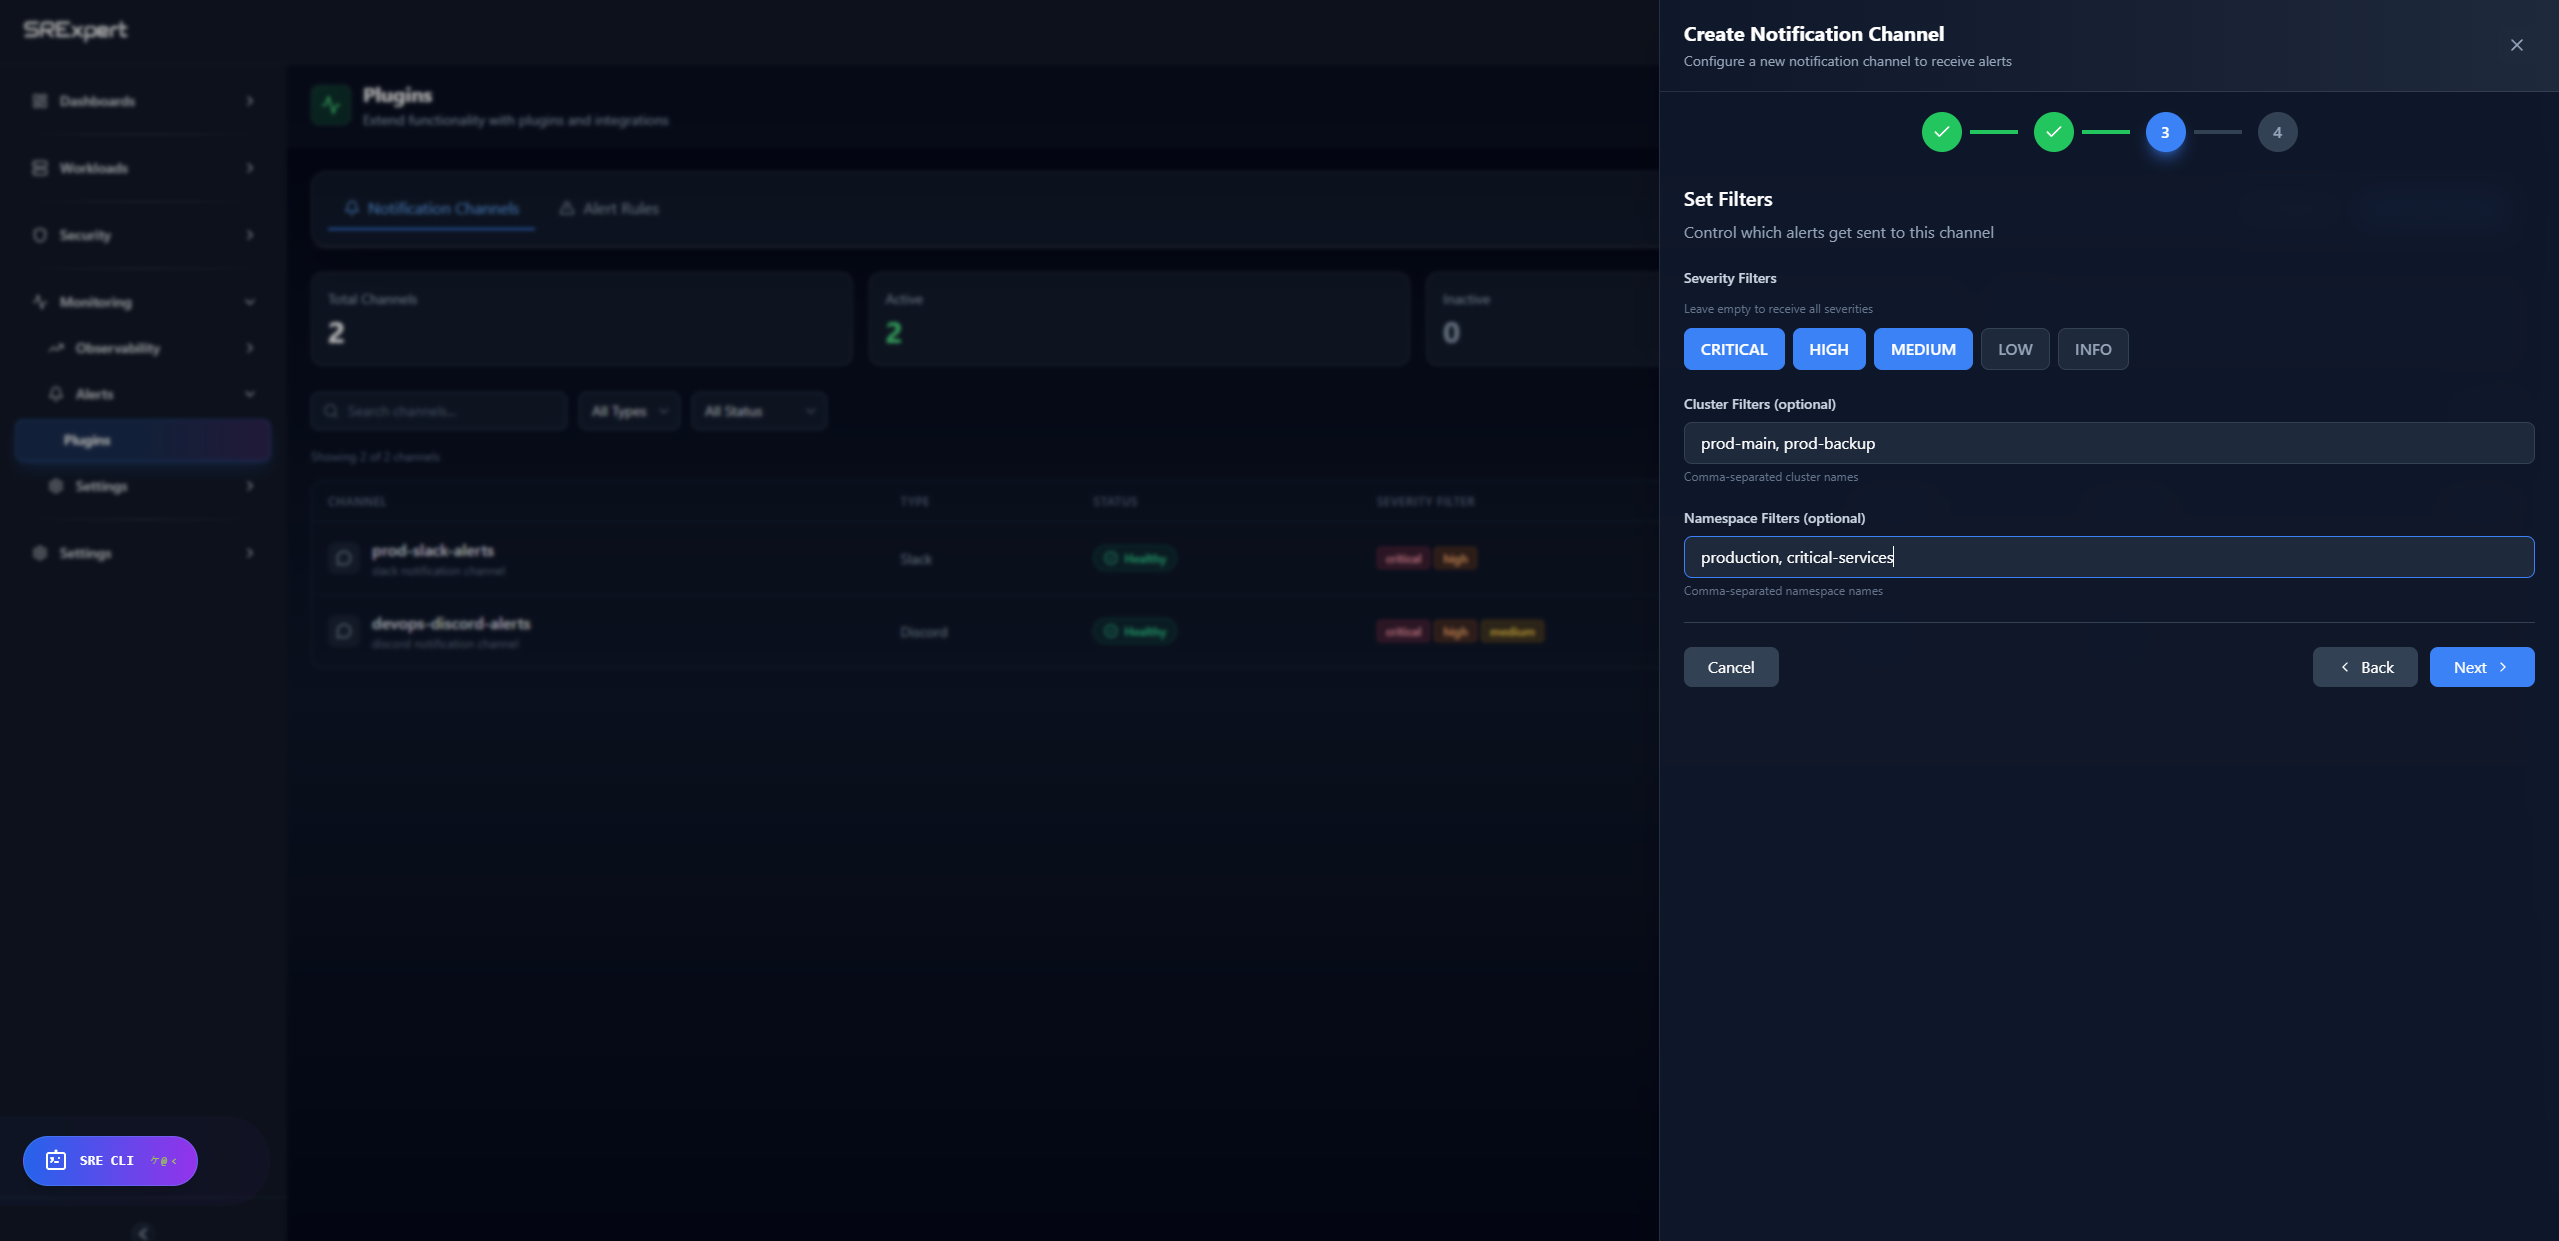
- Configure delivery options - such as alert filters (severity, cluster, namespace), where available
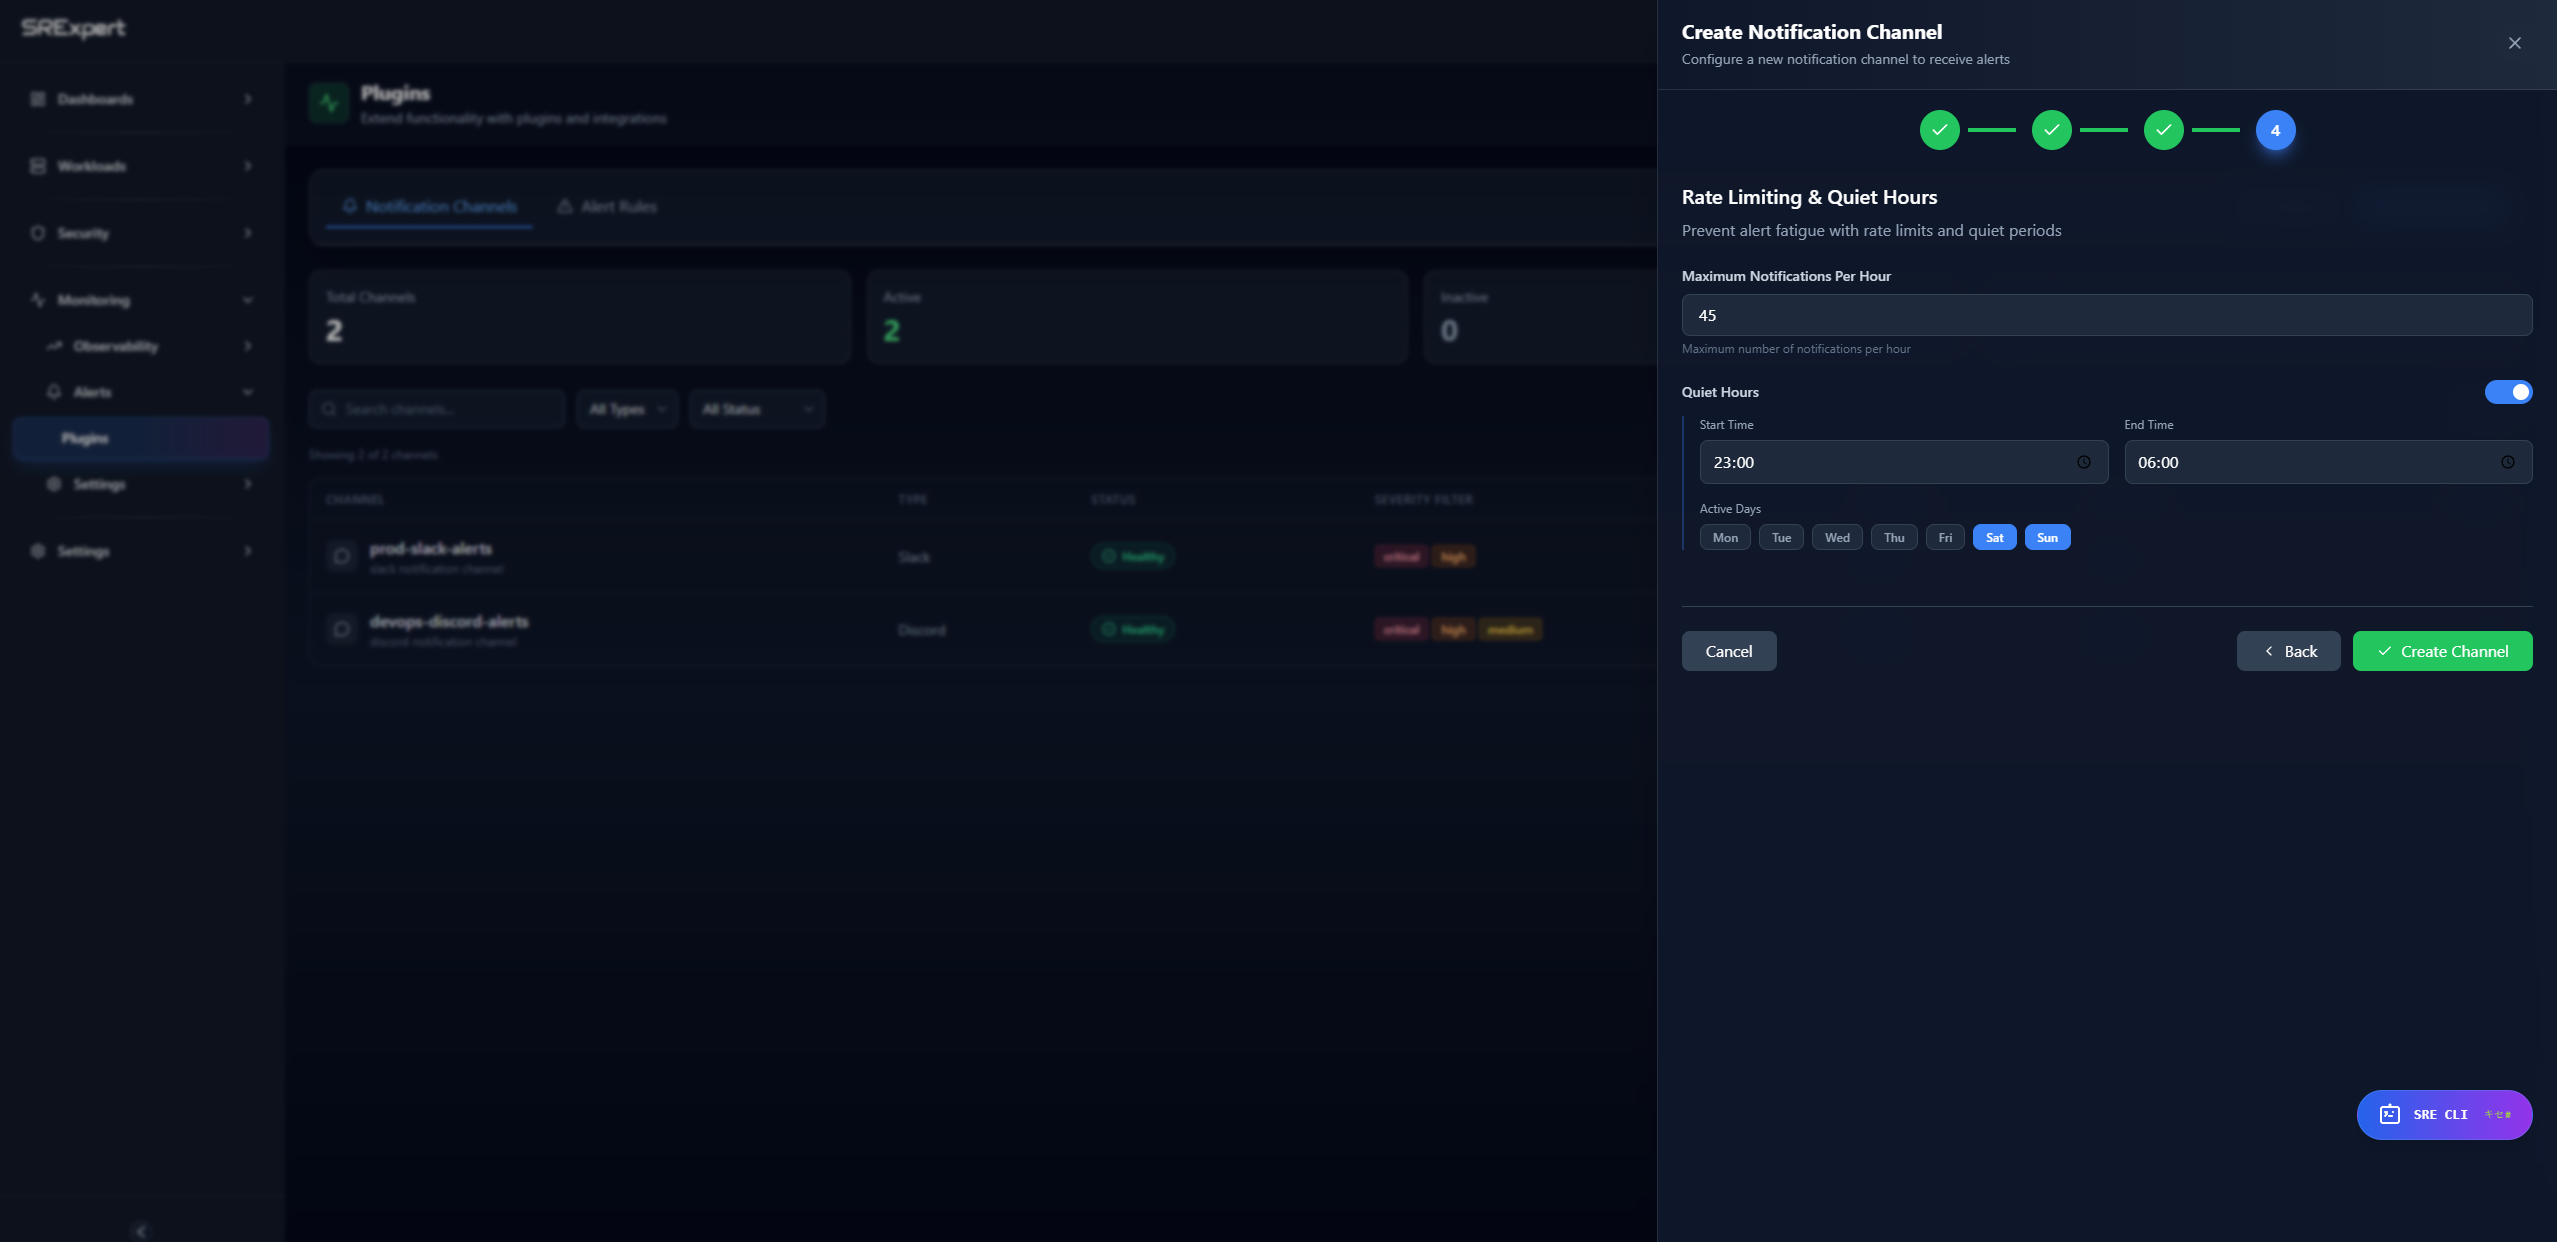
- Review - confirm your settings and create the channel
After creating a channel, use Send Test from its actions menu to verify it.
Supported Integrations
Slack Integration
Send alerts to Slack channels using incoming webhooks.
Step 1: Select Integration Type
Click Create First Channel (or Add Channel if you already have channels), then select Slack from the available integrations.
Step 2: Configure Connection
Fill in the connection details for your Slack webhook.
| Field | Description | Example |
|---|---|---|
| Internal Name | Unique identifier (no spaces) | prod-slack-alerts |
| Display Name | Friendly name | Production Slack Alerts |
| Description | Channel description | Sends critical alerts to... |
| Webhook URL | Slack incoming webhook URL | https://hooks.slack.com/services/... |
| Channel | Target channel | #alerts |
| Username | Bot display name (optional) | SRExpert Bot |
How to get Webhook URL: (Official Slack Documentation)
- Go to Slack API Apps
- Create new app or select existing
- Enable Incoming Webhooks
- Click Add New Webhook to Workspace
- Select channel and authorize
- Copy the webhook URL
Step 3: Set Filters
Configure which alerts should be sent to this channel.
| Filter | Description | Example |
|---|---|---|
| Severity Filters | Alert severities to include | CRITICAL, HIGH, MEDIUM, LOW, INFO |
| Cluster Filters | Specific clusters (comma-separated) | prod-cluster-1, prod-cluster-2 |
| Namespace Filters | Specific namespaces (comma-separated) | production, staging |
Leave filters empty to receive all alerts.
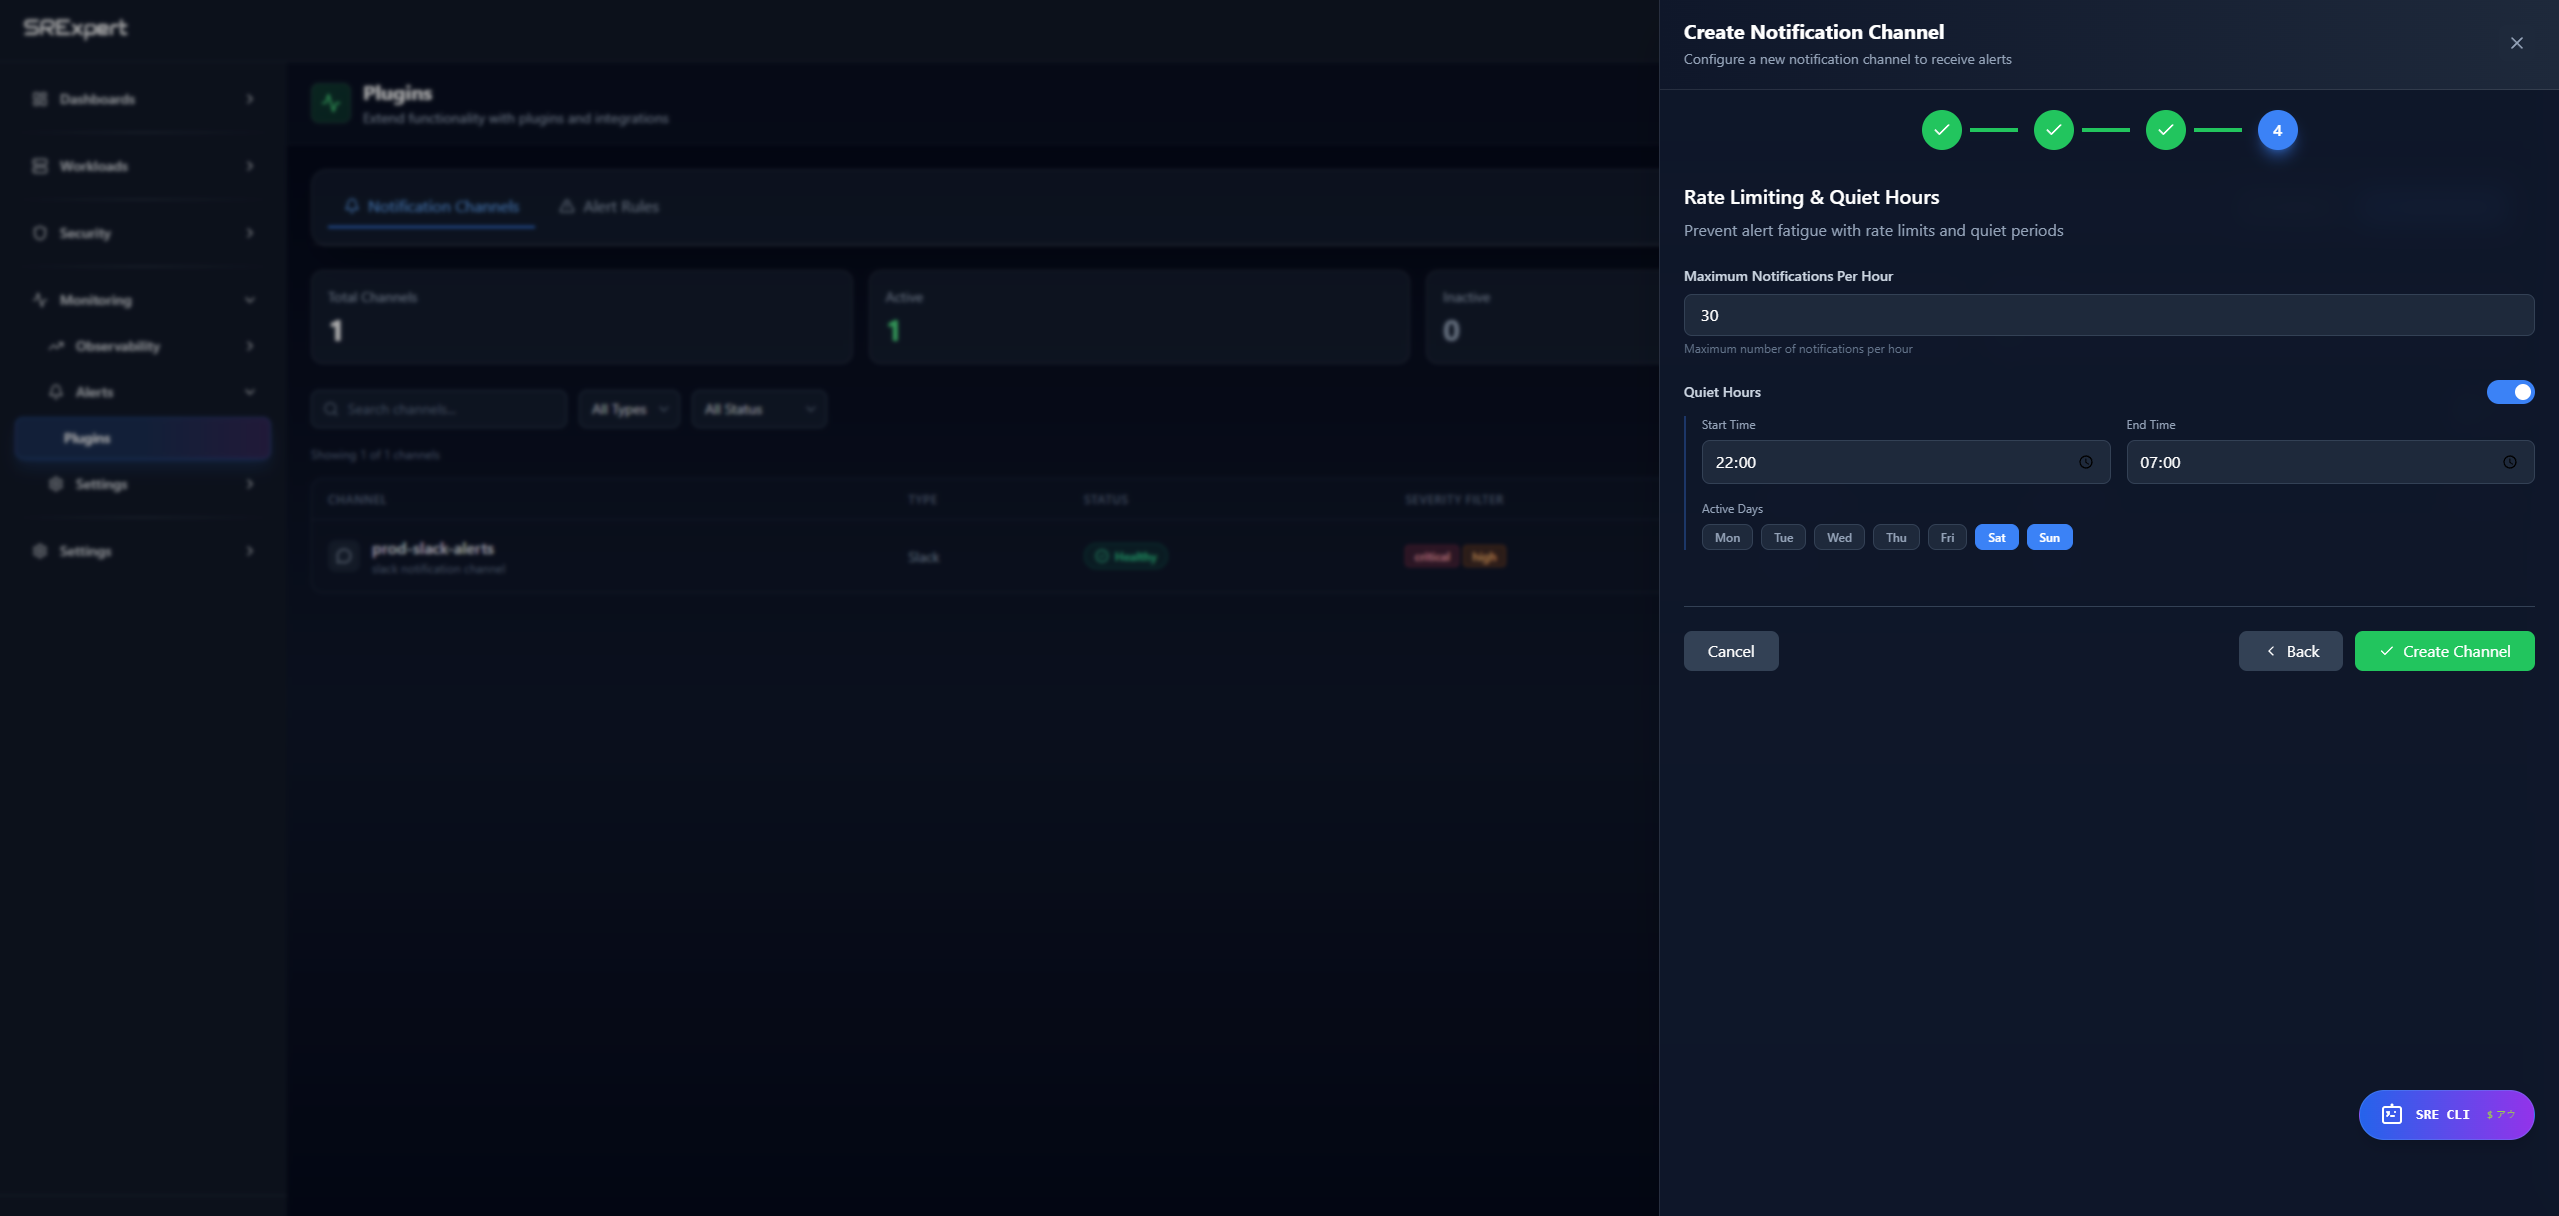
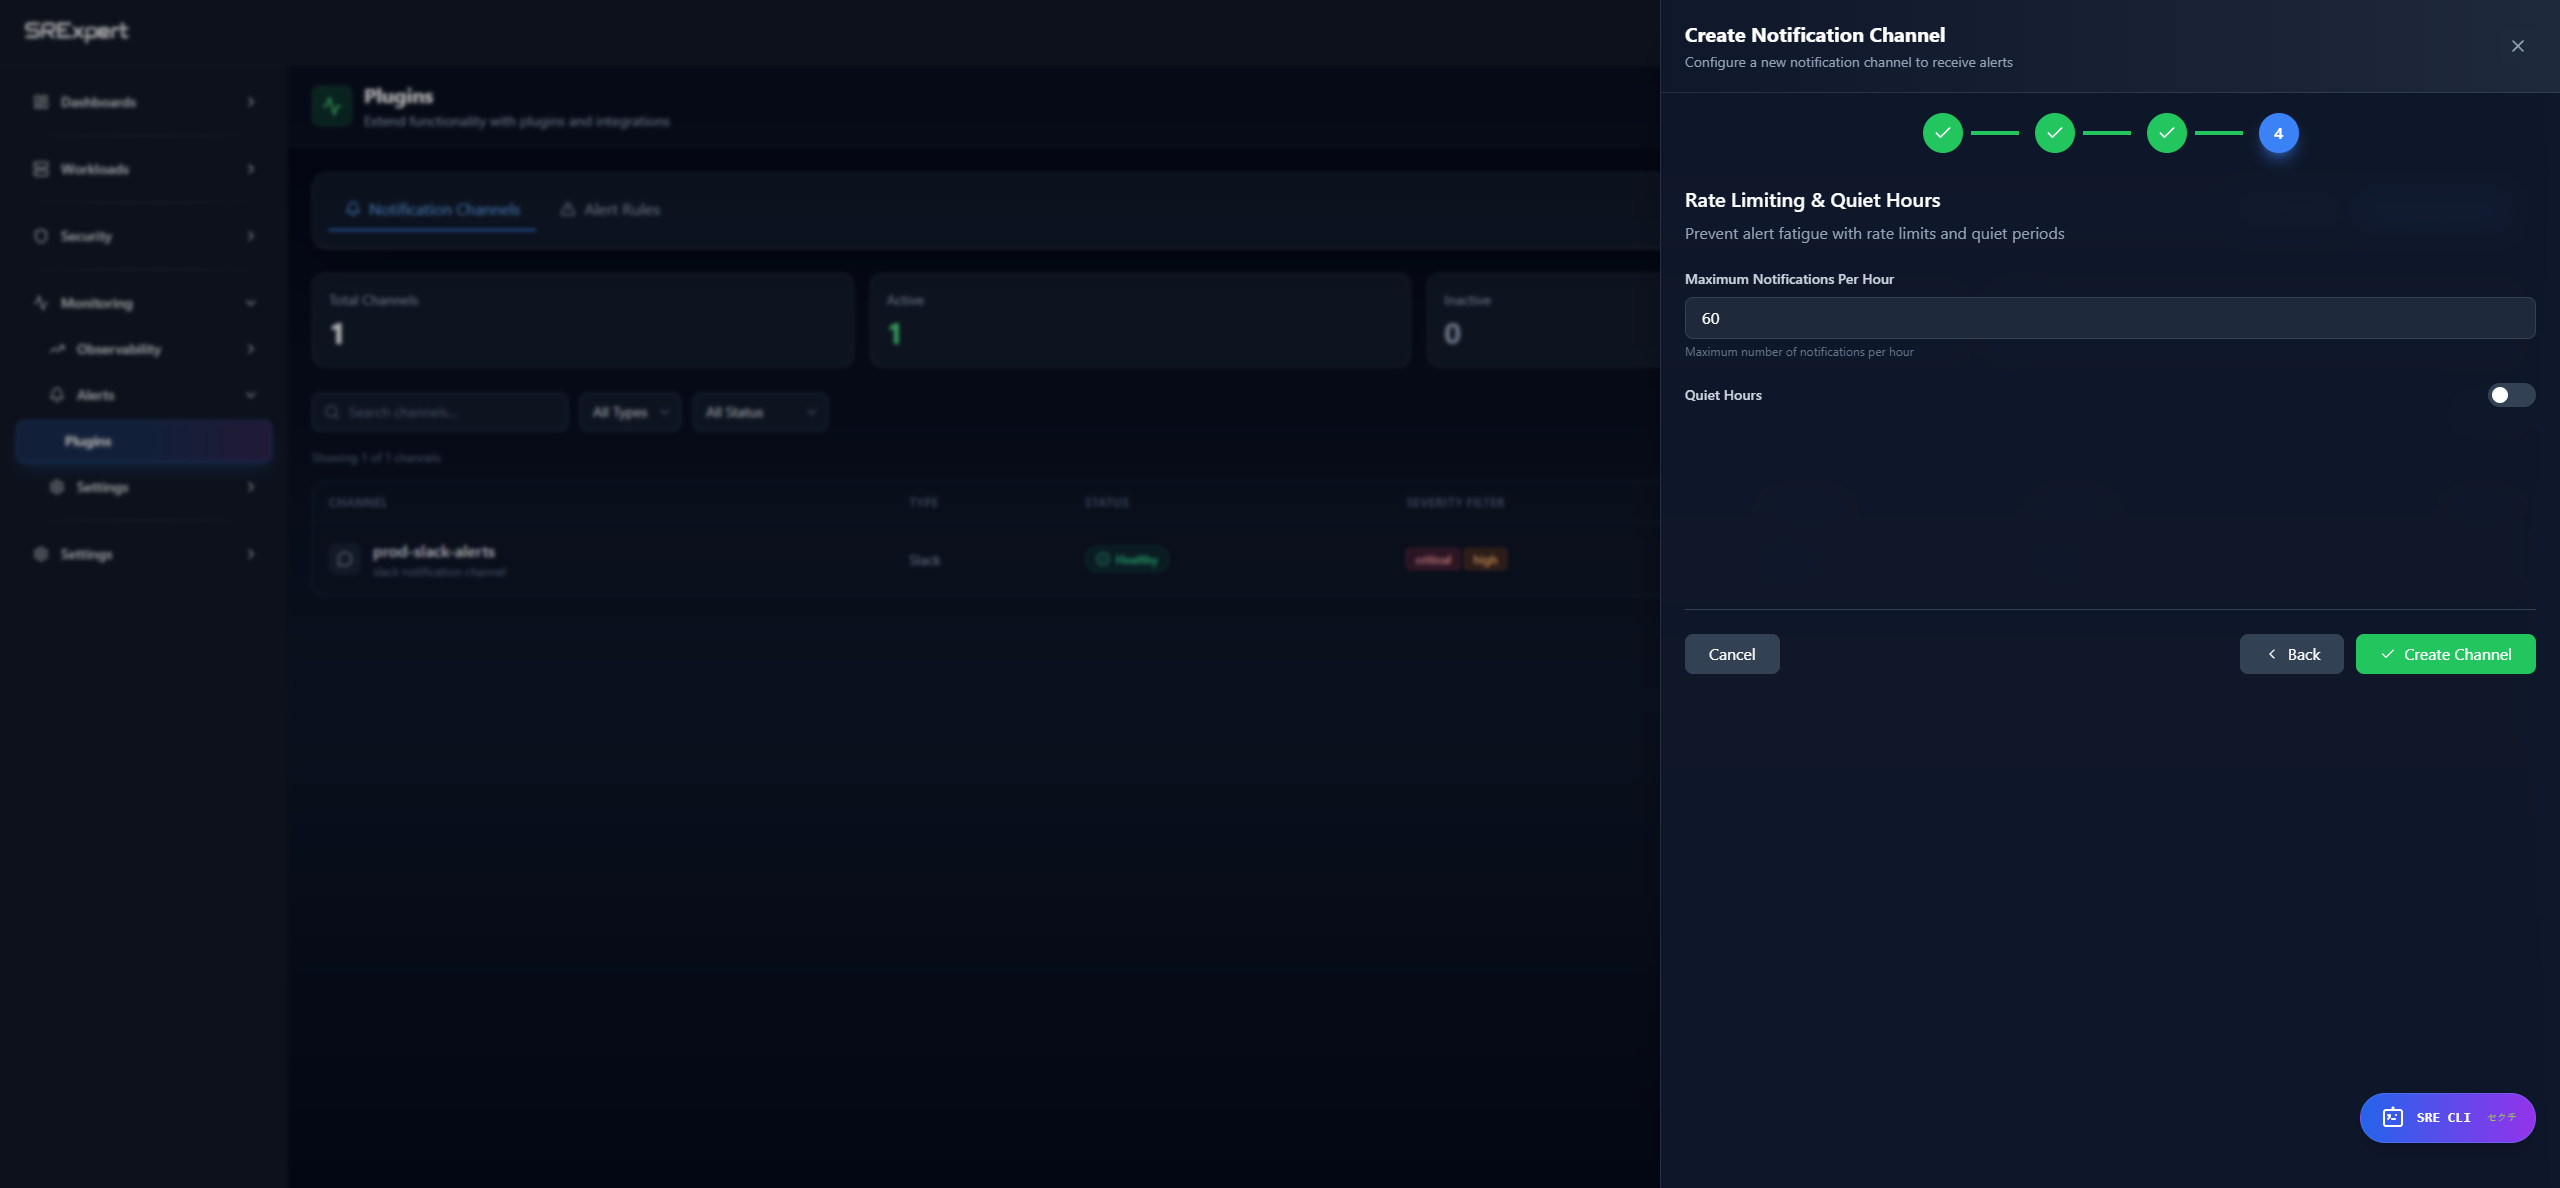
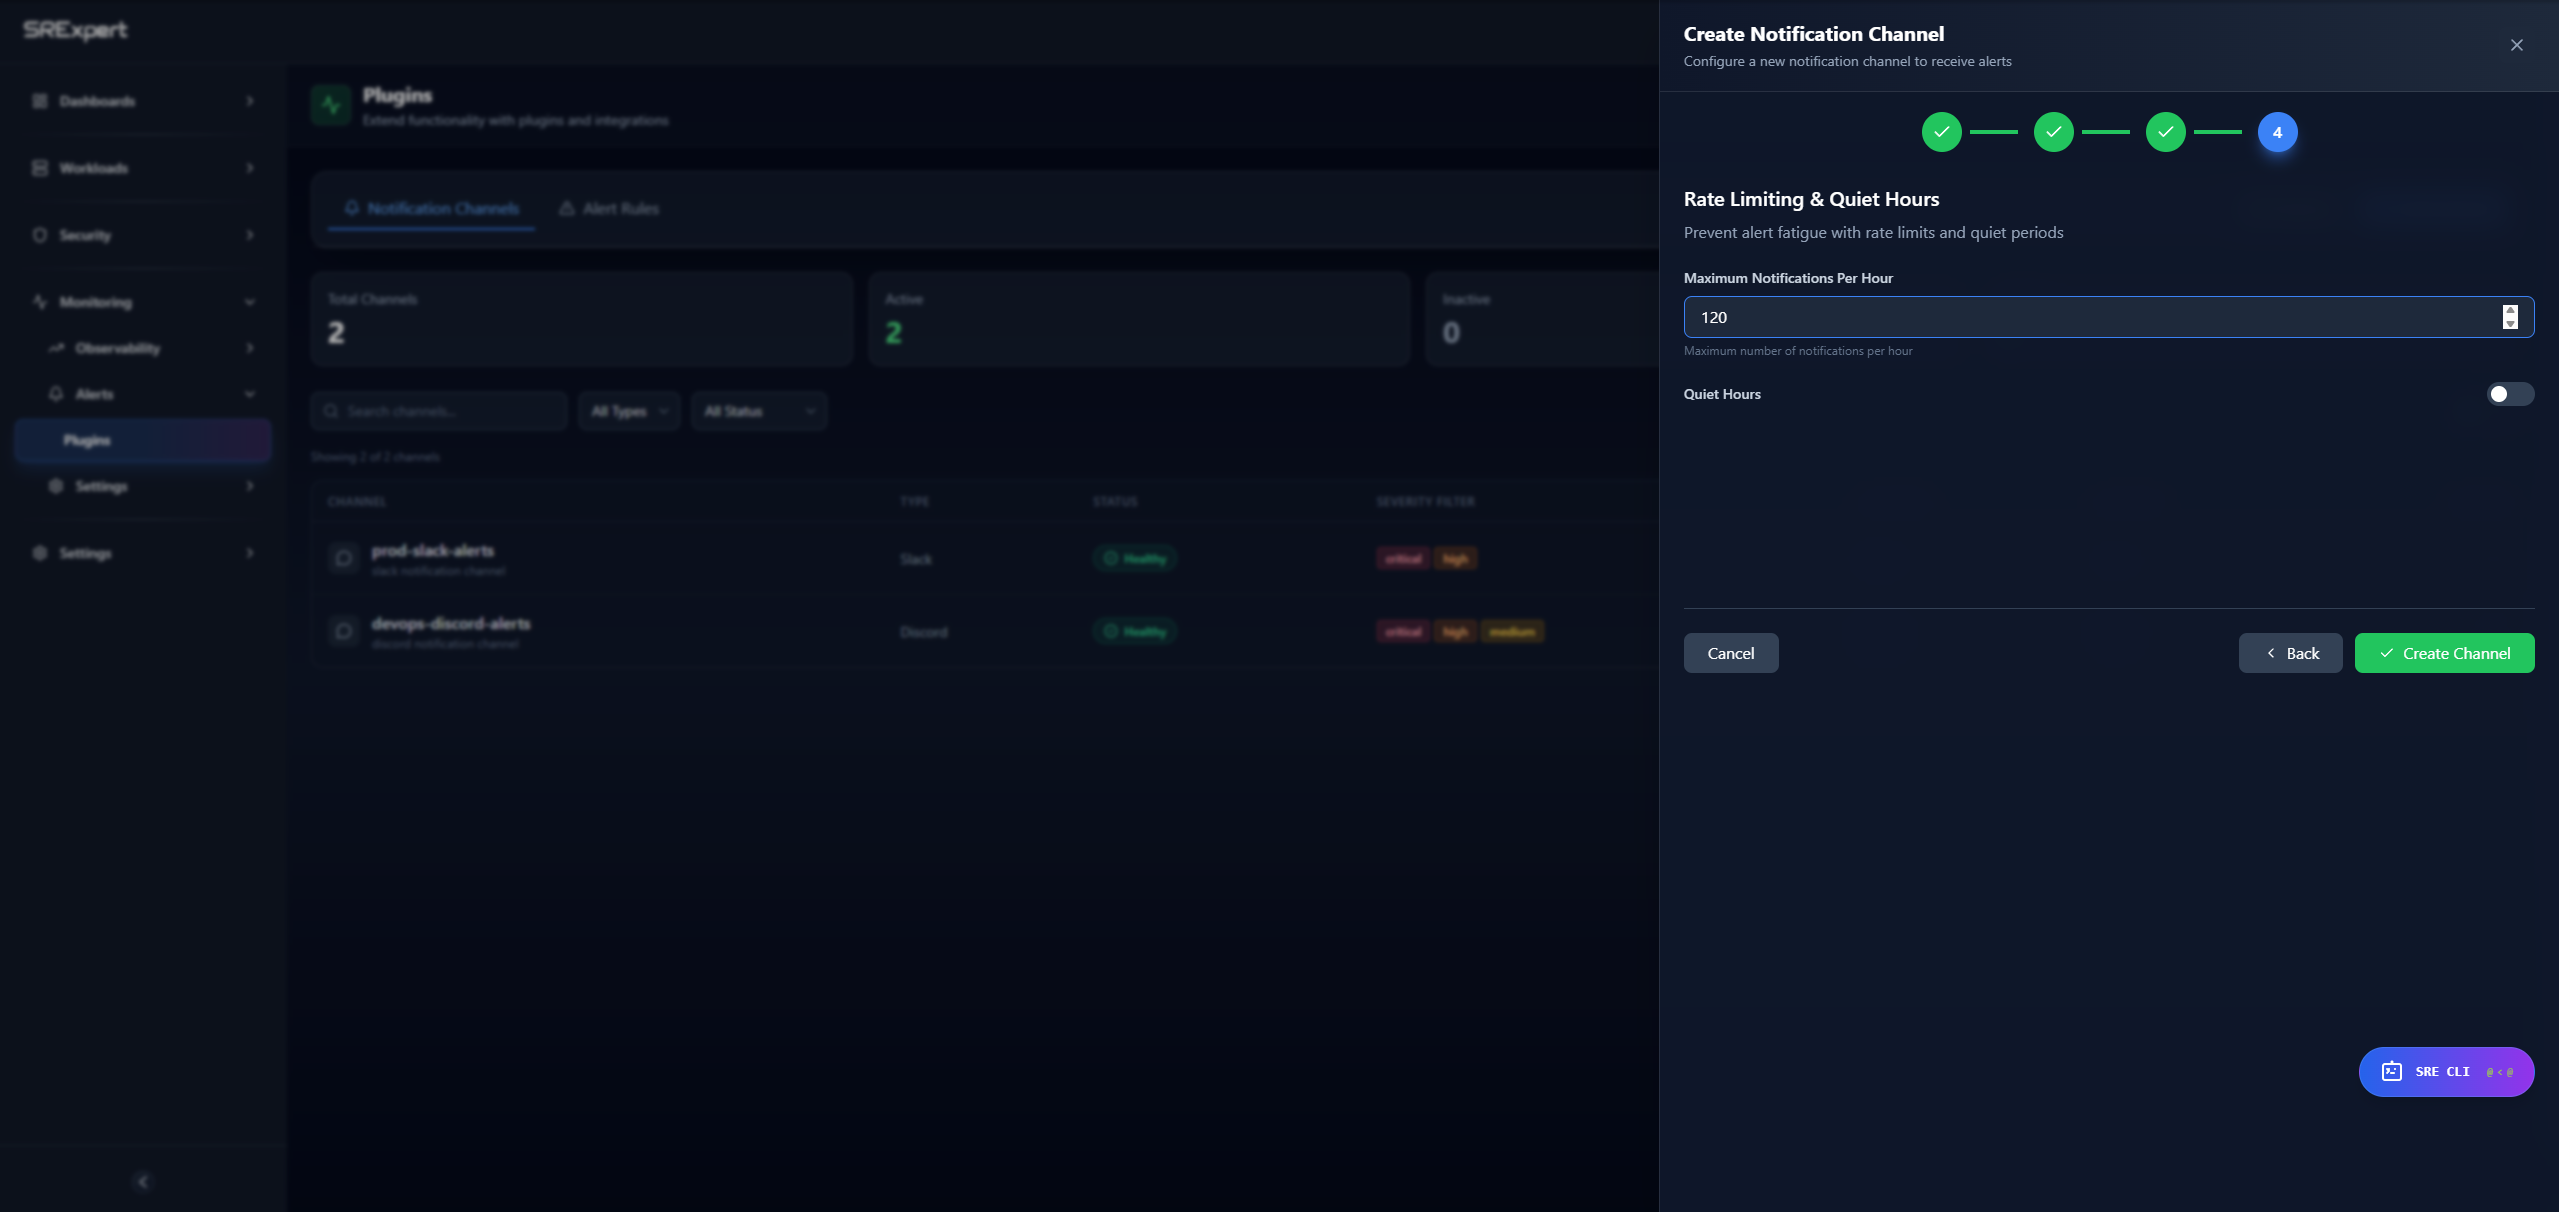
Step 4: Review & Delivery Options
Review your settings and, where available, configure delivery options such as rate limits and quiet periods to help prevent alert fatigue.
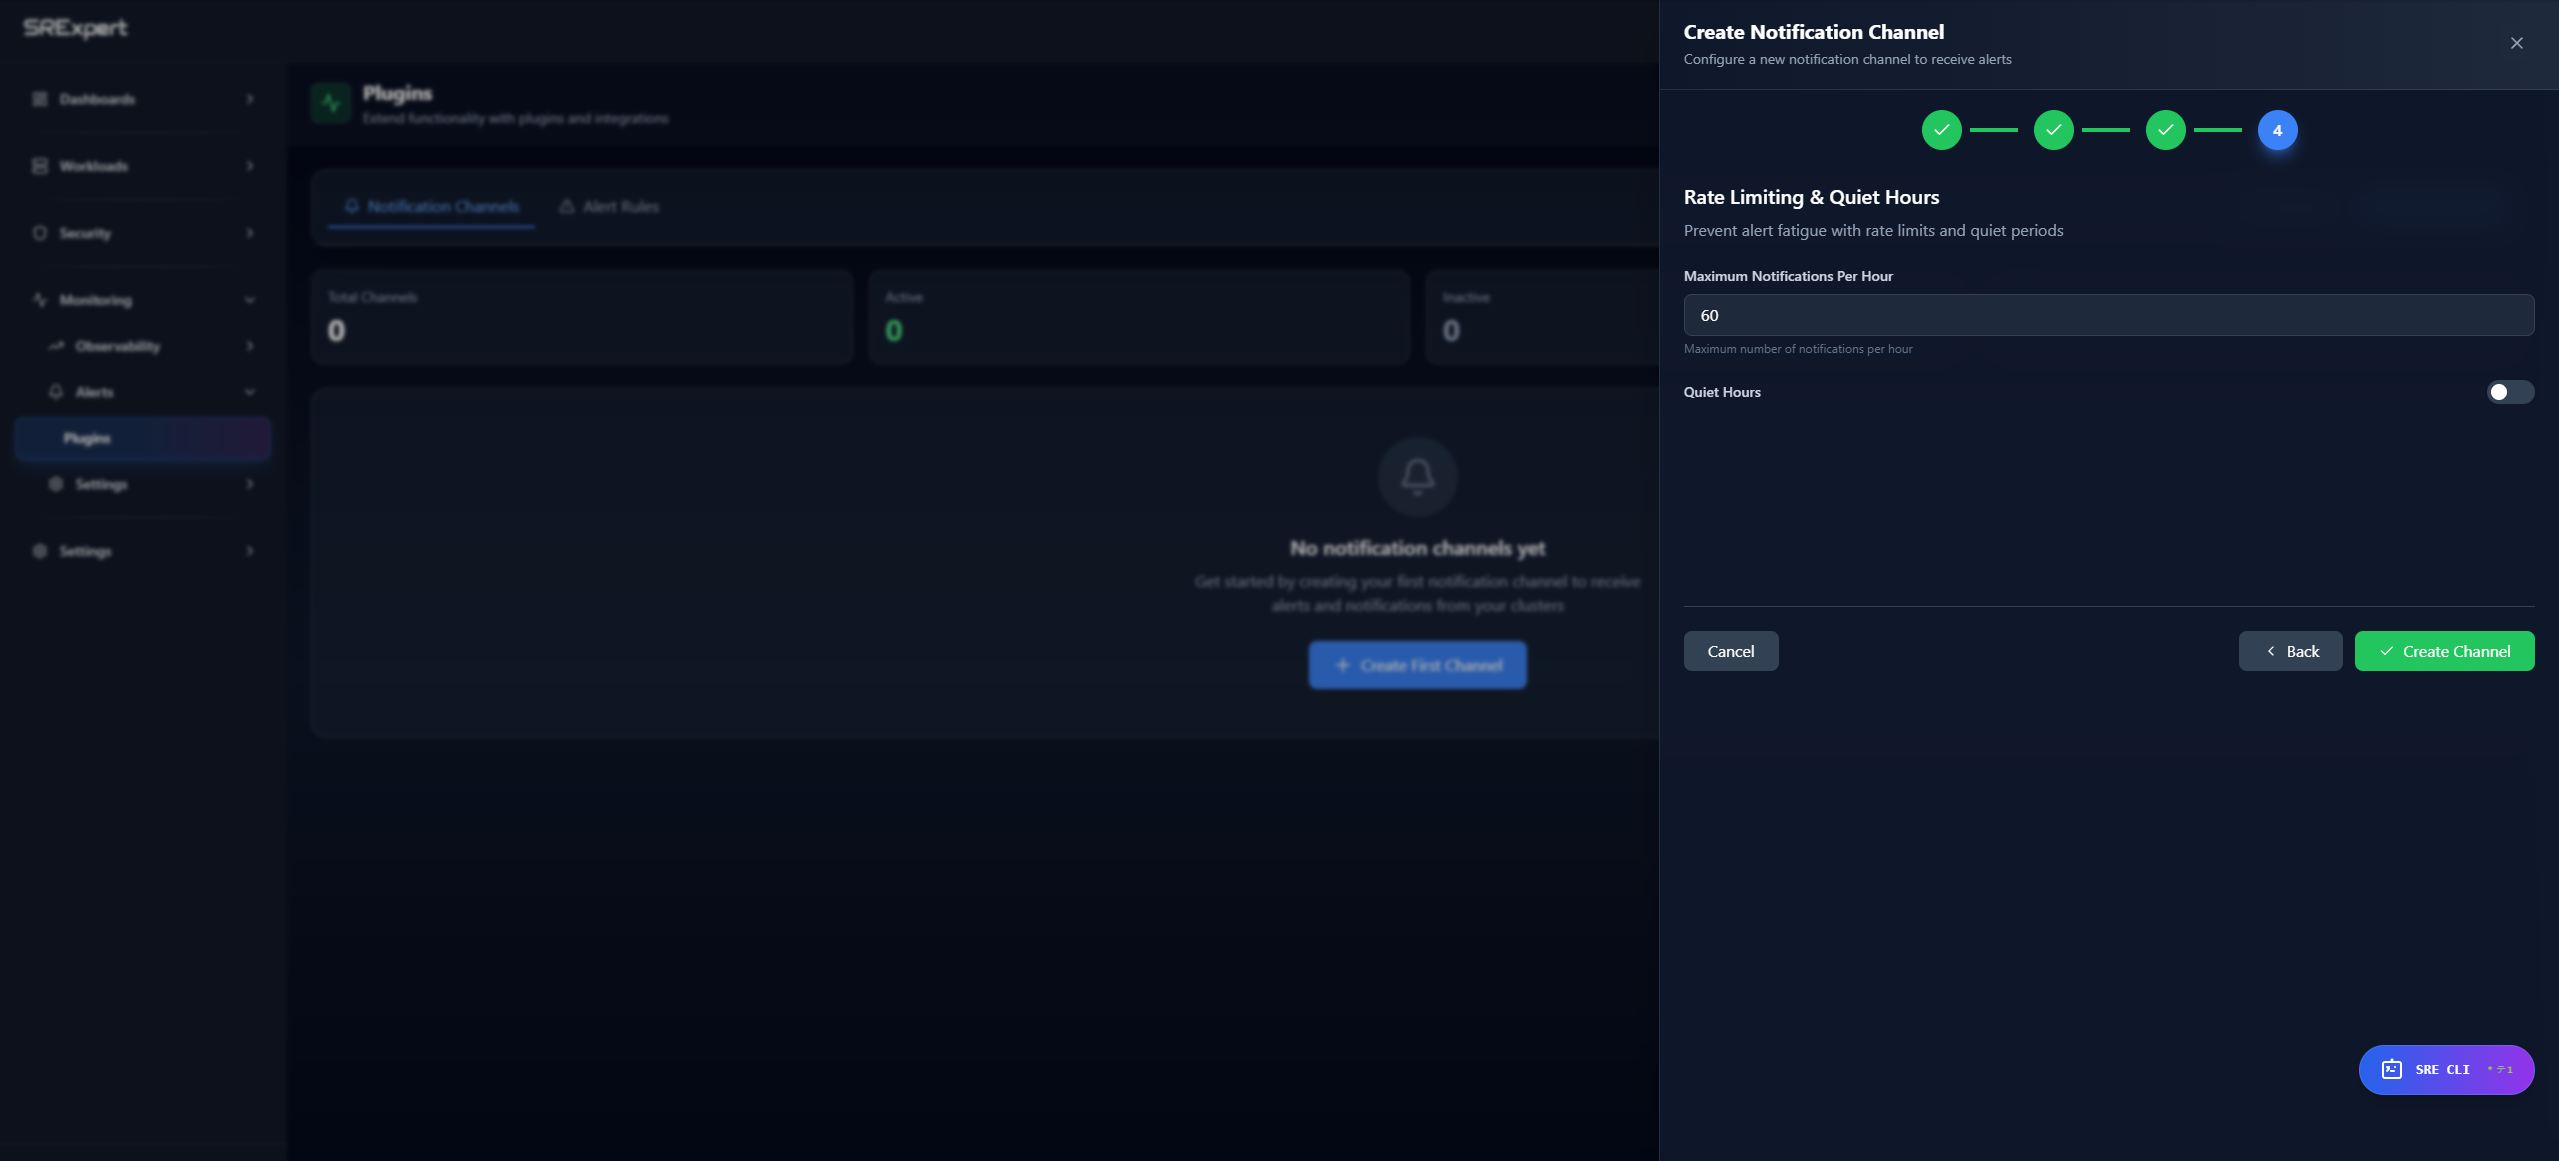
Depending on the integration, delivery options may include settings such as a maximum number of notifications per hour or quiet hours. Review the channel summary and confirm to create the channel.
Click Create Channel to finish the setup.


Testing Your Integration
After configuring a notification channel:
- Find your channel in the list and click the … menu (Actions)
- Click Send Test to verify the configuration
- A test alert will be sent to your channel
- Check for the test message in your notification platform
