Add Cluster
Connect your Kubernetes clusters to SRExpert. There are three ways to import a cluster:
| Method | Best For | Firewall Rules Needed |
|---|---|---|
| Generic Kubernetes (Agent) | Any cluster, private networks, behind NAT/firewalls | None (outbound HTTPS only) |
| Cloud Provider | AWS EKS, Azure AKS, GCP GKE with API credentials | None |
| Kubeconfig (Manual) | Direct access clusters, local/dev environments | Cluster API must be reachable |
Access the Import Wizard
Navigate to Settings > Cluster Management > Add Cluster.
Method 1: Generic Kubernetes (Agent)
Recommended for most deployments. The agent creates a secure reverse tunnel from your cluster to SRExpert. No inbound firewall rules, VPN, or port forwarding needed — only outbound HTTPS (port 443).
How It Works
- SRExpert generates a one-line install command with a unique registration token
- You run the command on your target cluster
- The agent installs as a DaemonSet in the
srexpert-systemnamespace - The agent opens an outbound WebSocket tunnel to SRExpert
- SRExpert detects the connection and starts collecting data
- Your cluster appears in the dashboard within seconds
Zero Firewall Architecture
The agent only needs outbound HTTPS access to your SRExpert instance. This means it works behind:
- Corporate firewalls and NAT
- Private networks with no public IPs
- Cloud VPCs with restricted ingress
- Air-gapped environments with HTTPS proxy
Your Kubernetes API is never exposed to the internet.
Step by Step
Enter Cluster Details
Select Generic Kubernetes as the import method. Fill in:
| Field | Description |
|---|---|
| Cluster Name | A unique name (use hyphens, no spaces) |
| Region | Optional — where the cluster is hosted |
Generate Install Command
Click Generate Import Command. You will get a command like:
curl -skL https://your-srexpert-instance/api/v1/agent/install/<token> | kubectl apply -f -Run on Your Cluster
Execute the command on the cluster you want to import. Make sure kubectl is configured and pointing to the correct cluster.
# Verify you're on the right cluster first
kubectl config current-context

# Then run the install command
curl -skL https://your-srexpert-instance/api/v1/agent/install/<token> | kubectl apply -f -
Wait for Connection
The agent will:
- Create the
srexpert-systemnamespace - Deploy a DaemonSet with leader election (one active agent per cluster)
- Register with SRExpert and establish the tunnel
This usually takes under 60 seconds. The wizard polls automatically and will show a success message when the agent connects.
What Gets Installed
| Resource | Namespace | Purpose |
|---|---|---|
| Namespace | srexpert-system | Isolated namespace for SRExpert components |
| DaemonSet | srexpert-system | Agent runs on all nodes, leader election picks one active |
| ServiceAccount | srexpert-system | API access for monitoring and management |
| ClusterRoleBinding | cluster-wide | Permissions for the agent to read cluster resources |
The agent requires broad read permissions to collect monitoring data, security scans, and workload information. Review the installed RBAC resources if your security policy requires it.
Method 2: Cloud Provider (AWS, Azure, GCP)
Import clusters directly from your cloud provider using API credentials. SRExpert discovers your clusters automatically.
Supported Providers
| Provider | Required Credentials |
|---|---|
| AWS EKS | Access Key ID + Secret Access Key |
| Azure AKS | Client ID + Client Secret + Tenant ID + Subscription ID |
| GCP GKE | Service Account JSON key |
Step by Step
Select Cloud Provider
Choose AWS EKS, Azure AKS, or GCP GKE from the import methods.
Configure Credentials
You can select an existing credential or create a new one.
| Field | Description |
|---|---|
| Credential Name | A friendly name for this credential |
| Access Key ID | Your AWS access key |
| Secret Access Key | Your AWS secret key |
| Region | AWS region to search for clusters |
The IAM user needs eks:ListClusters and eks:DescribeCluster permissions.
Use the Test button to verify your credentials before proceeding.
Select Clusters
SRExpert discovers all available clusters from the provider. Select one or more clusters to import.
Each discovered cluster shows:
- Cluster name
- Region/Zone
- Kubernetes version
- Node count
- Status
Import
Click Import to add the selected clusters. SRExpert will retrieve the kubeconfig from the cloud provider and start collecting data.
Managing Cloud Credentials
Cloud credentials are stored encrypted and can be managed at Settings > Cluster Management > Cloud Credentials. You can:
- Add new credentials
- Test existing credentials
- Delete credentials (does not remove imported clusters)
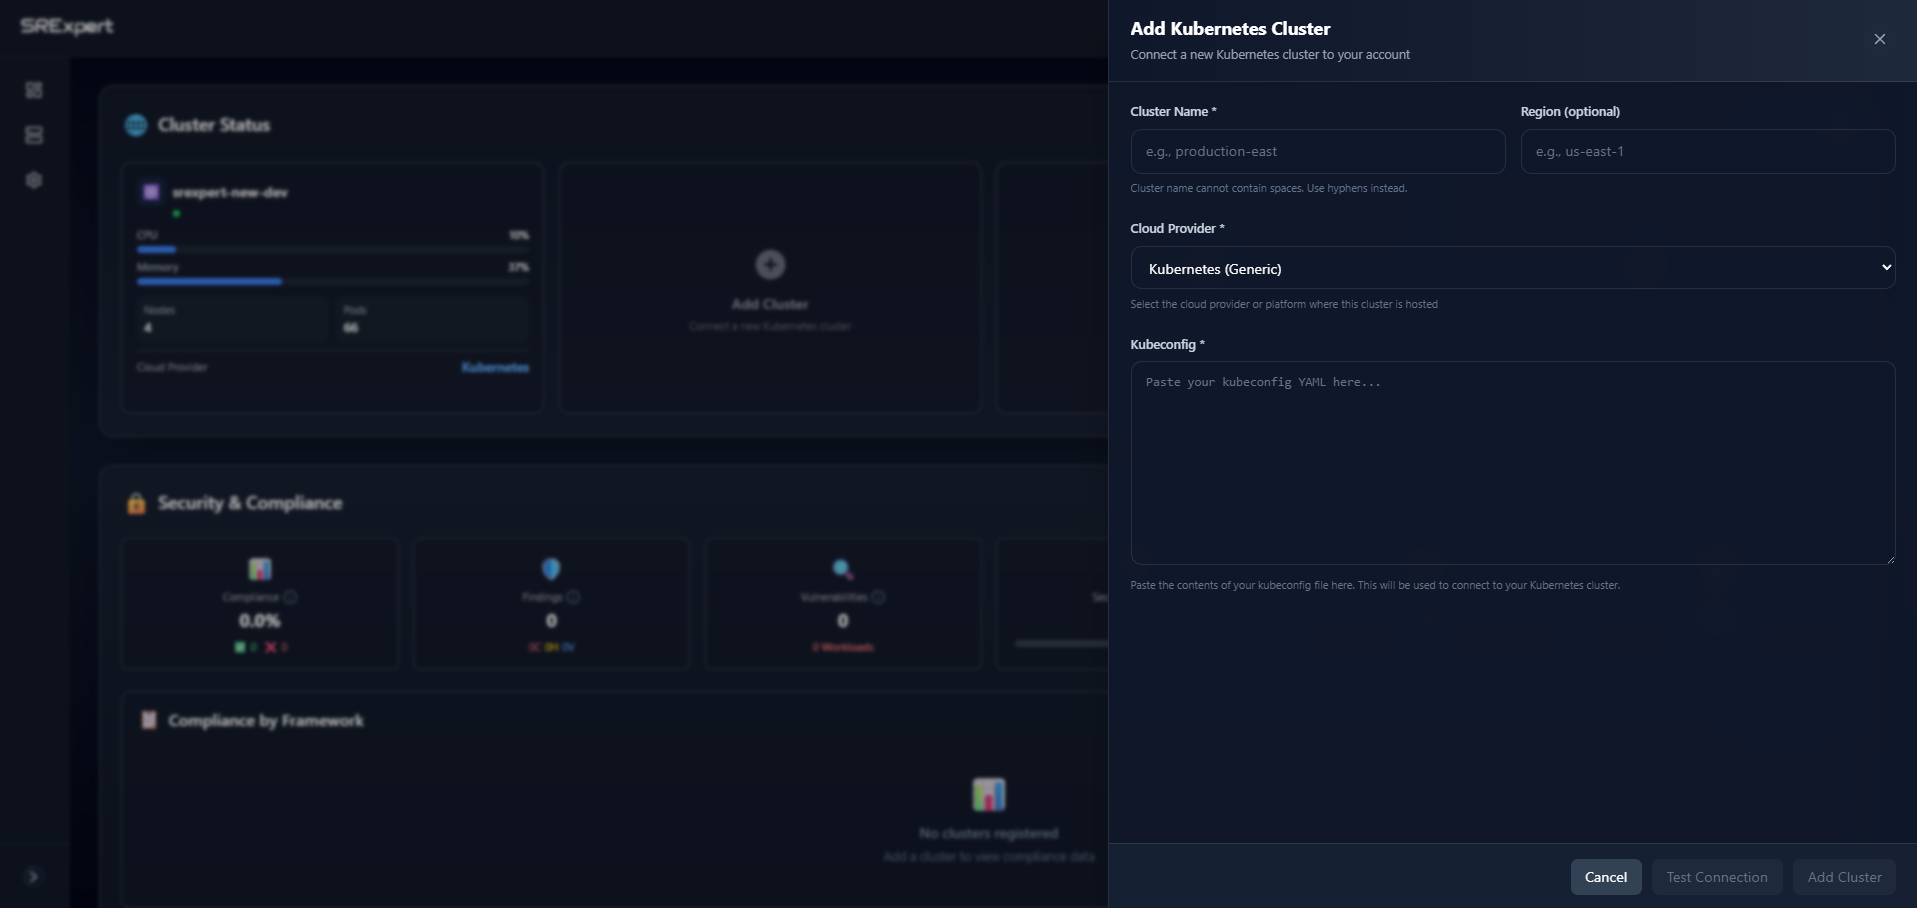
Method 3: Kubeconfig (Manual)
For direct-access clusters where you already have a kubeconfig file.
Prerequisites
- Working Kubernetes cluster with API reachable from SRExpert
kubeconfigfile with cluster access- Adequate RBAC permissions
Step by Step
Fill Cluster Information
| Field | Description |
|---|---|
| Cluster Name | A unique name (use hyphens, no spaces) |
| Region | Optional — where the cluster is hosted |
| Cloud Provider | Select your provider or “Kubernetes (Generic)“ |
Paste Kubeconfig
Paste the YAML content of your kubeconfig file:
apiVersion: v1
kind: Config
clusters:
- cluster:
    certificate-authority-data: LS0tLS1...
    server: https://your-cluster.k8s.local:6443
  name: my-cluster
contexts:
- context:
    cluster: my-cluster
    user: admin
  name: my-cluster-context
current-context: my-cluster-context
users:
- name: admin
  user:
    client-certificate-data: LS0tLS1...
    client-key-data: LS0tLS1...
Test and Save
Click Test Connection to verify SRExpert can reach the cluster. If successful, click Save.
The kubeconfig method requires the Kubernetes API to be reachable from the SRExpert backend. If your cluster is behind a firewall, use the Generic Kubernetes (Agent) method instead.
Verify Your Cluster
After importing with any method:
- The cluster appears in Settings > Cluster Management with status Connected
- Navigate to Dashboard to see cluster data
- Initial data collection takes 1-2 minutes
Recommended RBAC Permissions
For full functionality (monitoring, security scanning, workloads, Helm), the ServiceAccount or user should have broad read access:
apiVersion: rbac.authorization.k8s.io/v1
kind: ClusterRole
metadata:
  name: srexpert-reader
rules:
- apiGroups: [""]
  resources: ["*"]
  verbs: ["get", "list", "watch"]
- apiGroups: ["apps"]
  resources: ["*"]
  verbs: ["get", "list", "watch"]
- apiGroups: ["networking.k8s.io"]
  resources: ["*"]
  verbs: ["get", "list", "watch"]
- apiGroups: ["rbac.authorization.k8s.io"]
  resources: ["*"]
  verbs: ["get", "list", "watch"]
- apiGroups: ["storage.k8s.io"]
  resources: ["*"]
  verbs: ["get", "list", "watch"]
- apiGroups: ["batch"]
  resources: ["*"]
  verbs: ["get", "list", "watch"]
- apiGroups: ["autoscaling"]
  resources: ["*"]
  verbs: ["get", "list", "watch"]
When using the Agent method, RBAC is configured automatically during installation.
Troubleshooting
Agent Not Connecting
- Ensure outbound HTTPS (port 443) is allowed to your SRExpert instance
- Check agent pods:
kubectl get pods -n srexpert-system - View agent logs:
kubectl logs -n srexpert-system -l app=srexpert-agent - Verify the registration token has not expired
Kubeconfig Connection Error
- Check if the cluster API URL is reachable from SRExpert
- Confirm certificates are valid and not expired
- Test locally:
kubectl --kubeconfig=your-config.yaml get nodes
Cloud Provider Import Fails
- Verify credentials with the Test button
- Check that the IAM user/service principal has the required permissions
- Ensure the cloud API endpoints are reachable
No Data in Dashboard
- Wait 1-2 minutes for the initial data collection
- Check backend logs:
kubectl logs -n srexpert -l app.kubernetes.io/name=srexpert-backend --tail=100 - Verify the cluster shows as Connected in Settings
Next Steps
- Dashboard — View your cluster overview
- Security Overview — Run security scans
- Monitoring — Set up metrics and dashboards